Add Objects in a Diagram
In a diagram, you can add objects:
• that you create
• that already exist in the repository
You can add these objects:
• by drag & drop (for existing objects only)
• from the browse area
• from the compact search tool
• with the object insert toolbar
• inserting objects
• inserting multiple objects
• with the insert bar available on each object
The object multi-add box
Except when using drag & drop, you can add several objects at the same time in a diagram through the multi-add box. This box is displayed when you add on object:
• via the diagram insert toolbar
• via an object contained in the diagram
From the selection of an object type, you can select several objects of the same type to be added to the diagram, or create a new one. Suggested candidates and Other candidates are displayed depending on their relevance in the context of the diagram.

Adding existing objects to the diagram
To add existing objects to the diagram using the multi-add box:
1. Open the diagram of your choice in edit mode.
2. Add an object type to the diagram:
• via the diagram insert bar
• via an object contained in the diagram
The multi-add box opens.
3. If you cannot find what you want in the suggested candidate list, you can:
• enter the first 3 letters (minimum) of your choice and select the object(s) of interest in the list of results
• select directly the objects of interest in the other candidates list
• use the advanced search tool
4. (Optional) Click Show selection to display the selected objects, and, if needed, remove those that should not be added to the diagram.
5. Click Add.
The selected objects appear in the diagram.
Creating an object with the multi-add box
To create an object from the multi-add box:
1. Open the diagram of your choice in edit mode.
2. Add an object type to the diagram:
• via the diagram insert toolbar
• via an object contained in the diagram
The add box opens.
3. Click Create.
The new object appears in the diagram.
Adding an object by drag & drop
The drag & drop feature in a diagram is available from:
• the browse area (a tree or a list of cards)
• the compact full-text search
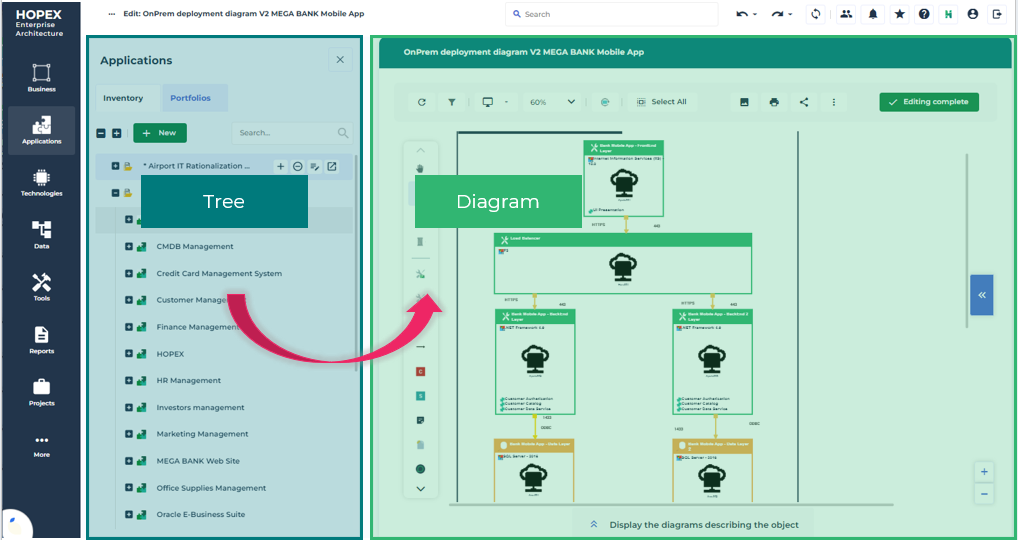
Adding an object from the browse area
To add an object from the browse area to a diagram by drag & drop:
1. Open the diagram of your choice in edit mode.
2. Hover the cursor over the menu of interest in the navigation bar (e.g.: Applications) and click Browse  .
.
.The browse area is displayed on the left of the diagram.
3. In the tree or the list, select the object of your choice and drag & drop it into the diagram.
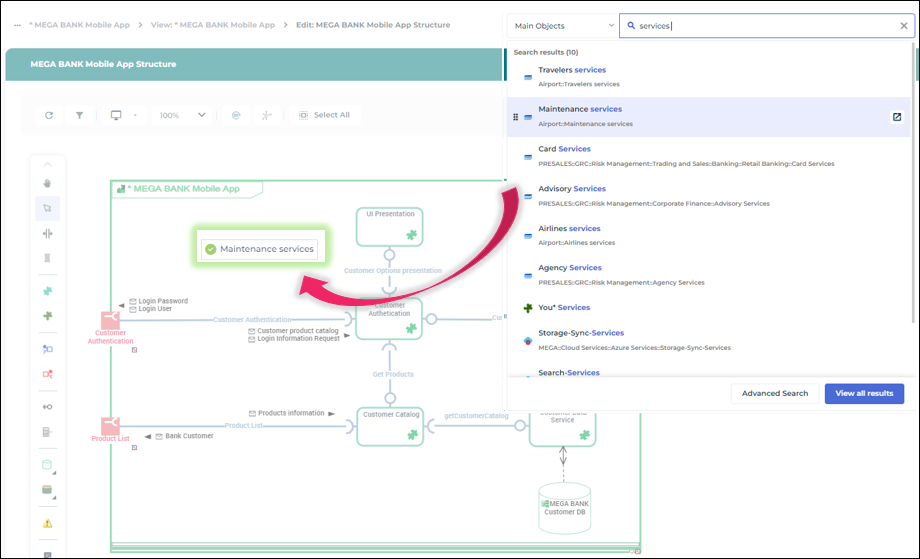
Adding an object from the compact search
To add an object from the compact search to a diagram by drag & drop:
1. Open the diagram of your choice in edit mode.
2. Perform a full-text search on the object that you want to add to the diagram.
3. In your search result list, select the object of interest and drag & drop it into the diagram.
Adding objects with the diagram insert bar
You can add one or several objects to the diagram from its insert bar (in one click).
The same object can appear several times in the same diagram.
To add one or more object(s) from the diagram insert bar:
1. Open the diagram of your choice in edit mode.
2. In the object insert bar, click the icon corresponding to the object type needed.
Example: Application Service  .
.
.The object ghost sticks to your cursor.
3. In the diagram, click where you want the object to be.
The Add window appears.
4. You can:
• insert one or more repository object(s)
• create an object: click Create
5. Click OK.
The object is added (and connected) to the diagram.
Adding several objects with the diagram insert bar
You can add several objects of the same type without using the object insert bar every time (through double-click).
To add multiple objects of the same type:
1. In the object insert bar, double-click the icon corresponding to the object type needed.
2. Add the first object.
The ghost of the second object of the same type sticks to your cursor.
3. Repeat the action to add as many objects as you want.
The object type remain selected as long as you do not press the <Esc> key or Select  or another object type.
or another object type.Adding an object from an object contained in the diagram
You can add an object to your diagram from an existing object. From this object, you have access to an insert toolbar. It only suggests objects that you can connect to the current object.
To add an object from an object in the diagram:
1. Open the diagram in edit mode.
2. Click the diagram object of your choice.
3. Select the direction you want to add the object in.
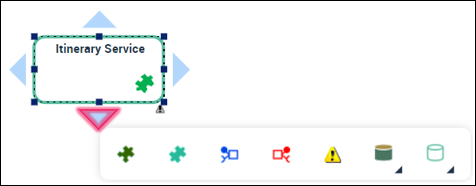
4. Click the icon corresponding to the object you want to add in the diagram.
5. Add the wanted object(s) using the multi-add box.
6. The objects are automatically added to the diagram, next to the current object you have selected. The links between the current object and the new ones appear automatically.

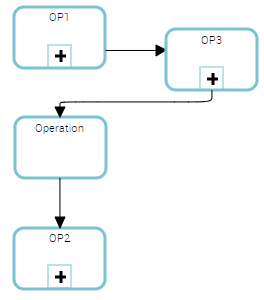
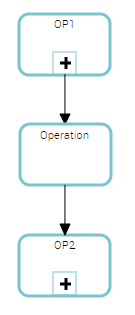
Inserting an object in a sequence flow
You can insert an object directly into a sequence flow. The source sequence flow is automatically split into two sequence flows, avoiding the creation, deletion or displacing of sequences.
Example: you can insert an operation into a process sequence flow.
To insert an object in a sequence flow:
1. In the object insert bar, click the icon representing the object type you want to insert.
Example: an operation.
2. Hover the cursor over the sequence flow on which you want to insert the object.
The sequence flow is highlighted in gray.
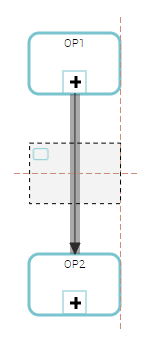
3. Let off your click.
The object is inserted in the sequence flow.
The source sequence flow is automatically split into two sequence flows. Both of the sequence flows keep the customization applied to the source sequence flow (if any).
Note:
If you do not have enough space between both objects, the object is placed above the others. You must then move it.