Aligning Elements
To position or align elements in a diagram, you can use:
• smart guides
The smart guides indicate the spacings and alignments between elements in the diagram.
Smart guides are active by default.
• the feature of alignment of selected elements:
• left, right, or center
• top, bottom, middle
• perspective
• on grid
• the grid
The grid is displayed by default. The grid is also active by default, but smart guides take precedence over it.
You can configure the grid, before drawing your diagram, so as to align each new element with the grid.
Using smart guides
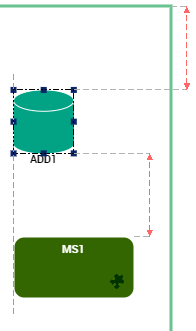
As soon as you move an element, smart guides appear and indicate:
• vertical and horizontal alignments between the selected element and the other elements.
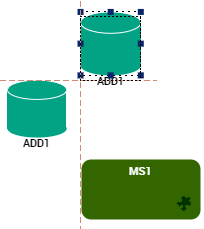
• equidistances between the selected element and the other elements.
Smart guides take precedence over the grid (if activated). If you want the grid to take precedence over the smart guides, you must hide the smart guides.
To hide the smart guides:
1. Right-click in the diagram and select Grid.
The Grid and Guides window opens.
2. In the Guides parameters section, clear Display smart guides when shapes are aligned
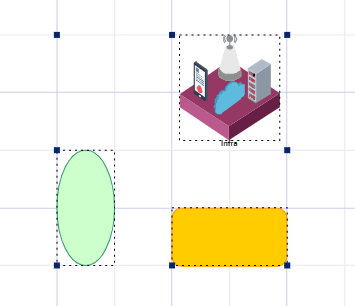
Aligning elements included in an area
You can align elements included in an area:
• left, right, or center
• top, bottom, middle
• perspective
Objects are aligned:
• with the most top, bottom, right, left element, or with a vertical or horizontal median (for centering), or
• with a reference element that you define.
To align drawing objects:
1. Select the objects to be aligned.
2. (If needed) Define the reference element:
• Press the <Shift> key.
• Hold down the key and click the element.
3. In the element arrangement bar, select the alignment mode of your choice.
If you did not define a reference element, the top (bottom, left, right) edge of the most top (bottom, left, right respectively) element is used as reference in the Top (Bottom, Left, Right) alignment you chose
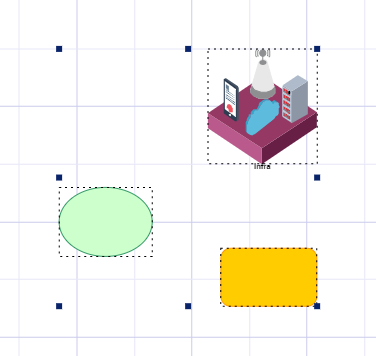
Aligning elements selected one by one
You can align elements selected one by one:
• left, right, or center
• top, bottom, middle
• perspective
The last item selected is used as the reference. The selection is aligned on the top (bottom, right, left respectively) edge of the element.
Centering is made with respect to the last element selected.
To align drawing objects:
1. Select the objects to be aligned.
2. In the element arrangement bar, select the alignment mode of your choice.
3. Centering is made with respect to the border of the last element selected.
Aligning elements on grid
The size of objects created without a grid or using a finer grid is modified to become a multiple of grid spacing (the object is either slightly enlarged or reduced to minimize modifications).
To align elements on grid:
1. Activate and configure the grid
2. (If needed) Deactivate the smart guides.
3. Select the element(s) to align on grid.
4. In the Aspect page, in the Alignment section, click Snap to grid  .
.
.Each selected element is modified.