Configuring General Settings
To set up the display of your static website, you have to edit the website configuration file.
To edit the configuration file:
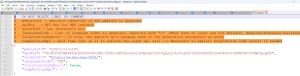
1. Open the Config.json file in edition mode.
2. Enter/edit the following information if needed:
• "websiteID": enter the Absolute Identifier of the website to generate.
• "apiKey": enter the API key.
• "serverUrl": enter the HAS instance's URL.
• (Optional) "languagesCode": the website is generated in English by default. Edit or add code language(s), separated by ";" to generate the website in the language(s) of your choice.
• (Optional) "forceContinuOnError": the "false" value is set by default. Enter "true" to package the website even if the generation encountered an error.
• (Optional) "temRefreshApi": "300s" is set by default. Reduce the wait time to refresh the API call if needed.
3. Save and close the file.
API Key
An API key must be created. It will authorize the user to execute the website generation process.
Website Absolute Identifier
The Website Absolute Identifier is essential for specifying which static website is displayed through the Enterprise Portal.
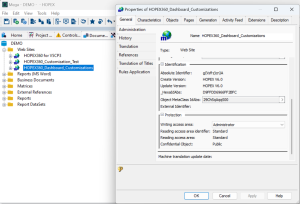
To retrieve the Website Absolute Identifier:
1. Open the HOPEX Windows Front-End
2. In the Documentation tab, expand Web Sites.
3. Right click the adequate website to open its Properties.
4. In the General tab > Administration tab, copy the Absolute Identifier.