Managing Profiles
To:
• modify profile options
• manage metamodel filters at profile level
• implement data access rules for the profile
• compare profile permissions
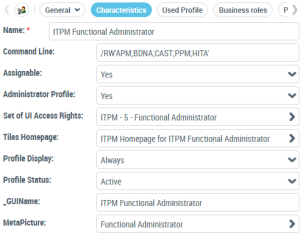
Viewing Profile Characteristics
To view profile characteristics:
1. Access the user management pages.
2. Select the Profiles sub-folder.
3. In the edit page, select the profile.
4. In the toolbar, click Properties  .
.
.The profile Properties are displayed.
Customizing the UI Access (Permissions) of an Existing Profile
MEGA provides profiles adapted to each Solution or product. However, you might need to customize the UI access (permissions) of these profiles. For this purpose MEGA recommends you to create a Set of UI Access Rights from the Set of UI Access Rights of the profile concerned, then to customize it.
To customize the UI Access (Permissions) of a profile:
1. Access the properties of the profile.
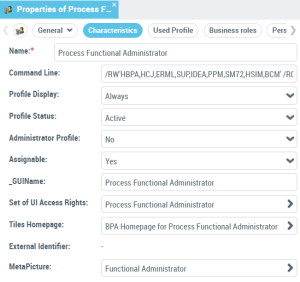
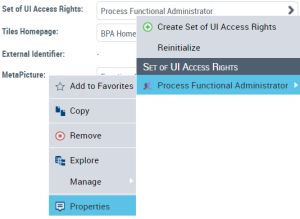
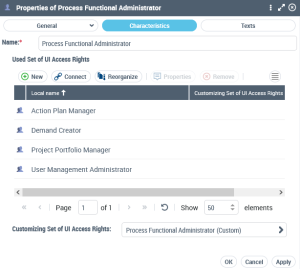
2. In the Set of UI Access Rights field, click the arrow and access its Properties.
3. In the Characteristics page, click the arrow of the Customizing Set of UI Access Rights and select Create Set of UI Access Rights.
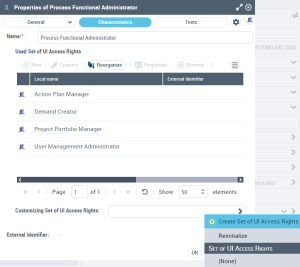
The name format of the Set of UI Access Rights is predefined as:
<Name of the Set of UI Access Rights of the profile concerned> (Custom)
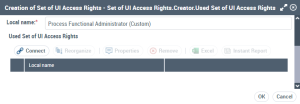
4. (If needed) Modify its Name.
5. Click OK.
The set of UI access rights you created is predefined with the same UI access rights as those defined for the profile concerned.
6. Click OK.
7. Customize the UI Access of the set of UI Access rights you just created.
Customizing the Characteristics of an Existing Profile / Creating a Profile from an Existing Profile
MEGA provides profiles adapted to each Solution or product. However, you may need to customize the characteristics of a profile provided by MEGA (for example connect a terminology).
To customize the characteristics of a profile provided by MEGA:
1. Create a profile and configure its Set of UI Access Rights by aggregating the set of UI access rights of the profile on which is based your profile.
2. Configure the profile.
Creating a Profile
Users with the same profile share common characteristics (e.g.: options, authorized products, UI access rights).
To create a profile you must define:
• its name
• its set of UI access rights
The set of UI access rights created inherits from all of the permissions defined on the Sets of UI access rights you have connected to it.
• its characteristics
• (WET-based desktop) its assigned WET
• (Non WET-based desktop) its accessible desktops and applications
To create a profile:
1. Access the Profiles management pages.
2. In the Assignable Profiles page, click New  .
.
.3. In the profile creation window, enter the Name of the profile.
4. In the Set of UI Access Rights field, click the arrow and select Create Set of UI Access Rights.
5. In the Name field, enter a name for the Set of UI access rights of the profile.
6. (Optional, to use one or several Sets of UI access rights already defined) Click Connect  :
:
:• (Optional) In the search field, enter the character string to be searched for.
• Click Find  .
.
.• In the list, select the Set of UI access rights on which you want to base the Set of UI access rights of your profile.
The set of UI access rights you are creating inherits from the permissions defined on all the sets of UI access rights you connected to it.
• Click Connect.
7. Click OK.
The new profile is listed in the All Profiles page.
8. Configure the profile characteristics.
E.g.: in the Characteristics page, set the Assignable parameter to “Yes”, connect a Tiles Homepage.
9. (WET-based desktop) Assign a WET to the profile.
10. (Non WET-based desktop) Define:
• the accessible desktop(s)
• the available applications
E.g.: “The Web Front-End for a Web application.
11. (If needed) Define the Set of UI access rights of the profile.