Exporting Objects
You can export HOPEX objects from:
• HOPEX Administration
• HOPEX
You can export objects in the following formats:
• plain text
The exported file is in the form of an .MGR file.
• XML MEGA
The exported file is in the form of an .XMG file containing commands or data (objects and links).
• Excel
You can password-protect the export file generated. The exported file has the .mgz format and can only be imported by entering the password you defined.
Exporting HOPEX objects
You can export objects from HOPEX Administration or from your HOPEX desktop.
To export HOPEX objects:
1. Access the repository from which you want to export objects.
2. Right-click the repository concerned and select Object Management > Export Objects.
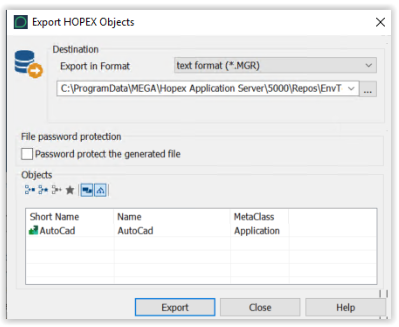
The Export HOPEX Objects dialog box opens.
3. In the Export in Format field, select the export file format.
Several options enable object export configuration.
4. (Optional) Enter a different name and folder if the default values are not suitable.
 enables you to browse the folder tree and select where the export file will be located.
5. (If needed) In the File password protection pane, select "Password protect the generated file".
6. In the Objects frame, click Add Objects to List  .
.
. .
.The query dialog box appears.
7. Start the query and select the appropriate objects in the result window.
8. Click OK.
The selected objects are added to the Export HOPEX Objects dialog box list, preceded by their type.
You can carry out this procedure several times, allowing you for example to export objects of different types.
 to delete an object from the list.
9. In the Objects group box, by default two export configuration options are proposed:
• Include Objects of Merging  , which allows you to export technical objects resulting from merging objects (_TransferredObject).
, which allows you to export technical objects resulting from merging objects (_TransferredObject).• Propagate  , which allows you to export listed objects together with their dependent objects.
, which allows you to export listed objects together with their dependent objects.10. (Optional) By default, the export perimeter is as defined in the properties of the Export tool. To modify the export default perimeter, you must have previously activated export perimeter selection, see Activating the export perimeter selection option.
In the Objects frame, select the Perimeter of export using the drop-down menu.

11. When selection is complete, click Export.
12. (If step 5 you selected the password protect file option) In the File protection dialog box, enter a password, confirm it and click OK.
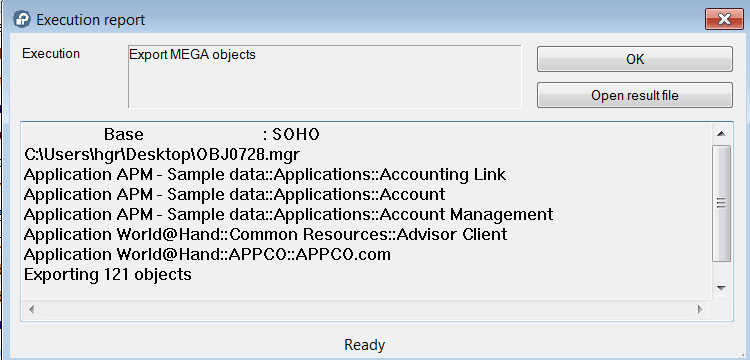
The export process begins.
During export, the name and type of the objects being exported appear at the bottom of the dialog box, together with duration of export. On completion of export, the Execution Report displays the number of exported objects.
Exporting a HOPEX object from the object
You can export an object from your HOPEX desktop.
To export a HOPEX object from the HOPEX desktop:
1. Connect to HOPEX
2. In the Main Objects navigation window, right-click the object you want to export and select Manage > Export.
The Export HOPEX Objects dialog box opens.
In the Objects frame, the object to be exported is already selected.
3. Refer to the procedure Exporting HOPEX objects.
Viewing an export file
To view the exported file:
1. Export objects.
2. In the export Execution Report dialog box, click Open result file
In the case of:
• an export in MEGA XML format, the view MEGA XML exchange file dialog box appears.
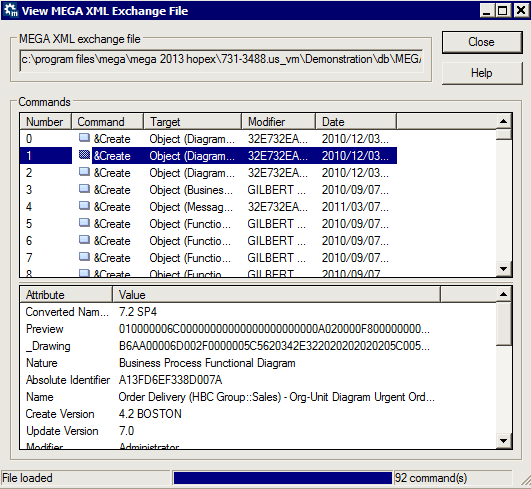
This file is presented in the form of a table showing a list of commands. Corresponding to each command ("Create", "Connect", etc.) there is a an object, object modification date and name of the last modifier.
• export in text format, the Notepad dialog box appears:
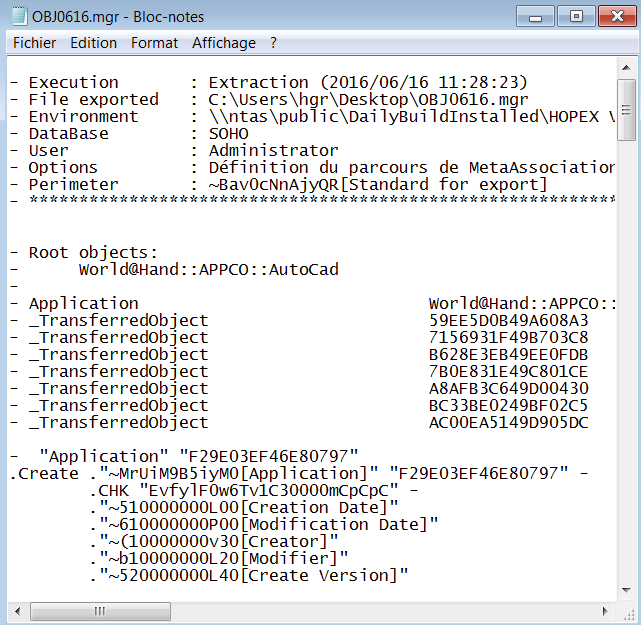
This file lists all objects in text format.
The exported file can then be imported into another repository.
Activating the export perimeter selection option
At the time of export, to be able to select export perimeter, you must activate the Activate export perimeter selection option:
1. From your HOPEX workspace, select the Tools > Options menu.
2. In the HOPEX Data Exchange > Export > Files option group: Generic Options select the Activate export perimeter selection option.