Sharing with other users (social)
In HOPEX (Web Front-End), you can share with other users. You can:
• add tags to an object
• share by email: an object, a diagram, or your breadcrumb
• like an object
• add an idea
• follow an object
See also:
Sharing an Object as Email
You can share an object as email:
• either by selecting the recipients
• or by entering the email address of the recipients
The recipients of the email receive a link which enables to open HOPEX and display the properties of the shared object (the recipient must have the rights to view this object).
To share an object as email:
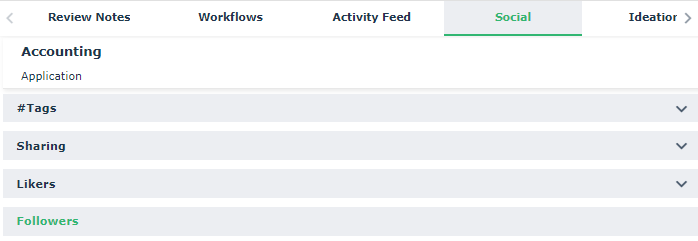
1. From your HOPEX desktop, access the Social feature.
The Collaboration window appears and displays the Social tab.
 .
.2. In the Shared section, click Share as email .
.The Share <Object name> as email window appears.
3. In the Recipients field, enter the first letter of the name of the person (HOPEX user) with whom you want to share this object.
The list of persons whose name starts with this letter appears.
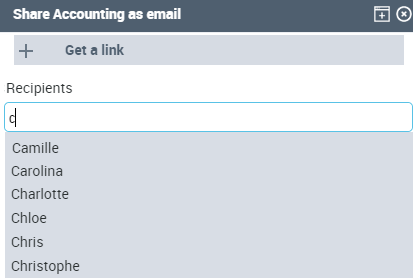
4. Press the down navigation key to select the person's name or select it with the mouse.
5. Press [Enter].
6. Click outside the list to close it.
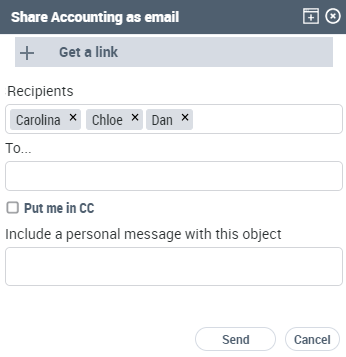
 beside its name. to which you want to send this object sharing.
7. (If needed) In the A field, enter the email address to which you want to send the object sharing.
8. To receive a copy of the email, select Put me in CC.
9. (Optional) In the Include a personal message with this object pane, enter the text of the email.
10. Click Send.
An email is sent to the recipients of the message as well as to you if you have selected the option.

11. When the recipient clicks Open, a HOPEX desktop opens (a second desktop if the user is already connected, otherwise the HOPEX connection window opens) and displays the characteristics of the object.
