Configuring a Profile
From the profile properties window you can define:
• products accessible to users with the current profile

See step
2.
• if the profile is assignable or not.
See step
3.
• if the profile is an administrator profile or not
See step
4.
• if the profile is provided at connection.
See step
5.
• if the profile is active or not.
See step
6.
• the profile display name in the interface.
See step
7.
• the profile icon in the interface.
See step
8.
• perform a mass profile assignment to persons
• applications accessible to users of the profile
• desktops accessible to users of the profile
• the terminology associated with the profile
• object types available
• the sub-profiles used to define the profile.
To check that the profile complies with the connection regulation:
Configuring profile characteristics
To configure profile characteristics:
1. Access the properties of the profile.
2. (Optional) In the Command Line field, enter the command defining products that can be accessed by users with the current profile.
3. (Optional) In the Assignable field, modify the attribute value via the drop-down menu. By default, the profile is not assignable.
4. (Optional) In the Administrator Profile field, modify the attribute value.
By default, the profile is not an administrator profile.
5. (Optional) In the Profile Display field, modify the default behavior of the profile display at connection.
A profile is provided by default at connection when it is not included in another profile.
6. (Optional) In the Profile Status field, modify the attribute value.
By default, the profile is active.
7. (Optional) In the _GUIName field, enter the profile name displayed in the interface.
8. (Optional) In the MetaPicture field, click the arrow and select Query MetaPicture.
• In the query field, enter the characters you want to find and click Find.
• In the results list, select the icon and click OK.
Defining applications accessible to profile users
So that a user of a profile can connect to an application, you must connect this application to the profile concerned.
To define applications available for a profile:
1. Access the properties pages of the profile.
2. Select Available Applications.
3. In the toolbar, click
Connect 
.
The applications query tool appears.
4. (Optional) In the second field, enter the characters to find.
5. Click
Find 
.
6. In the query results, select the application you want to connect.
7. Click Connect.
The applications are connected to the profile.
Defining application desktops accessible to profile users
A user can connect to applications via customized desktops according to actions to be performed.
If an application contains several desktops, you can specifically define application desktops that are accessible to the concerned profile.
To do this, you must connect to the profile:
• the application containing the desktops.
• the desktops to which you want users of the profile to connect.
The application desktops that are not connected to the profile are not accessible to users of the profile.
To define application desktops available for a profile:
Prerequisite: The application accessible to users of the profile is defined.
1. Access the properties pages of the profile.
2. Select Available Desktops.
3. In the toolbar, click
Connect 
.
The desktop query tool appears.
4. (Optional) In the second field, enter the characters to find.
5. Click
Find 
.
6. In the query results, select the desktop you want to connect.
7. Click Connect.
The desktops are connected to the profile.
Associating a terminology with a profile

A Terminology defines a set of terms used in a specific context instead of the standard term.
To associate a terminology with a profile:
1. Access the properties pages of the profile.
2. Select Terminology.
3. In the toolbar, click
Connect 
.
The business roles query tool appears.
4. (Optional) In the second field, enter the characters to find.
5. Click
Find 
.
6. In the query results, select the terminology you want to connect.
You can select several terminologies.
7. Click Connect.
The terminology is connected to the profile.
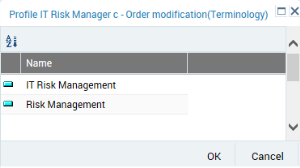
If you associate more than one terminology with the profile, you must define an order of priority for them.
To define the priority of the terminologies of a profile:
1. Access the properties pages of the profile.
2. Select Terminology.
3. In the toolbar, click
Reorganize 
.
4. Drag and drop to place the priority terminology at the top.
In the example above, the terms of the Risk Management terminology are used when they are not defined in the IT Risk management terminology.
Defining the object types available for a profile
You can define which specific object types are available for a profile:
• document categories
• document models
• Report DataSet Definitions
• widgets
To define the object types available for a profile:
1. Access the properties of the profile.
2. Select Available Types.
3. Select Available Objects.
4. In the toolbar, click
Connect 
.
The object type query tool appears.
5. (Optional) In the query tool, in the first field, select the object type category.
6. (Optional) In the second field, enter the characters to find.
7. Click
Find 
.
8. In the query result, select the object types to make available for the profile.
9. Click Connect.
The object types selected are made available for the profile.