7. Installation errors and tests
If you have followed the previous chapter about the installation your installation should work properly. Nonetheless, there are area that can prevent the installation to be successful. Follow the steps described below to ensure your installation is good.
All screenshots, in this documentation, are performed with Google Chrome. Error message may vary on Firefox or Edge.
Ensure that:
• all servers of the cluster (IIS+HAS) have access to the public DNS
• all servers of the cluster (IIS+HAS) have valid SSL public certificate otherwise the public certificate must be on all servers.
• the root.pfx certificate is replicated on all servers.
• the file cluster.cfg is identical on each HAS server
• each HAS Instance Manager is launched by the same domain user.
7.1. Testing URL DNS
Ensure that the public DNS is accessible from all servers.
1. Go on all servers (HAS+IIS) in RDP (Remote Desktop Protocol) session.
2. From this RDP session open a supported web browser: Chrome, Firefox, Edge.
|
Test Failed
|
Test Successful
|
 |
 |
|
This server cannot access your public DNS thus HOPEX will not work properly.
Fix it before proceeding.
|
If you get a 502 error this test is successful, but some other configurations are invalid: see Checking communication between servers.
|
7.2. Checking communication between servers
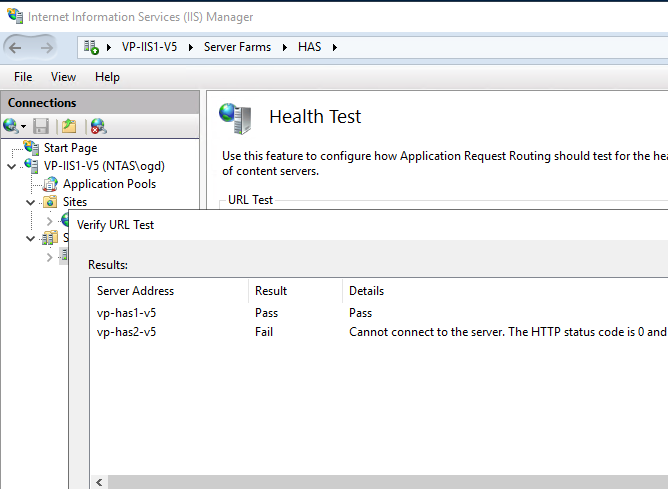
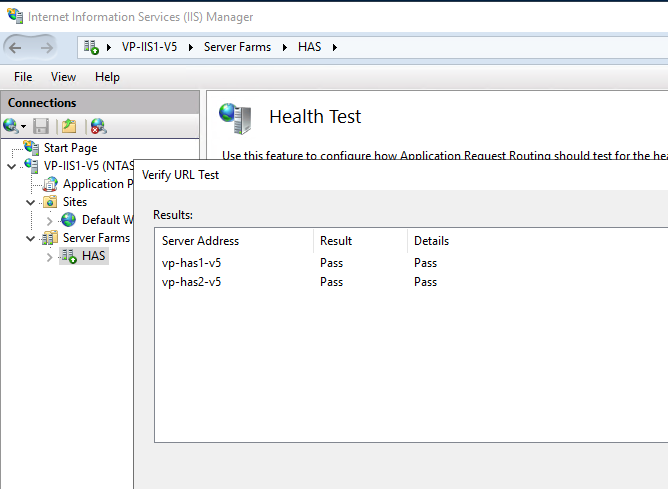
7.2.1. From IIS to HAS Servers
Ensure that all HAS Server nodes can be visible from IIS:
1. Access each IIS Web Server.
2. Launch IIS Management Console.
3. Go on the Server Farms.
4. Go on Health Test.
|
Test Failed
|
Test Successful
|
 |
 |
|
If one of the servers has a Result “Fail”:
Ensure the HTTP/HTTPS is properly configured.
|
If all of the servers of the farm have a Result “Pass”:
The communication is successful.
|
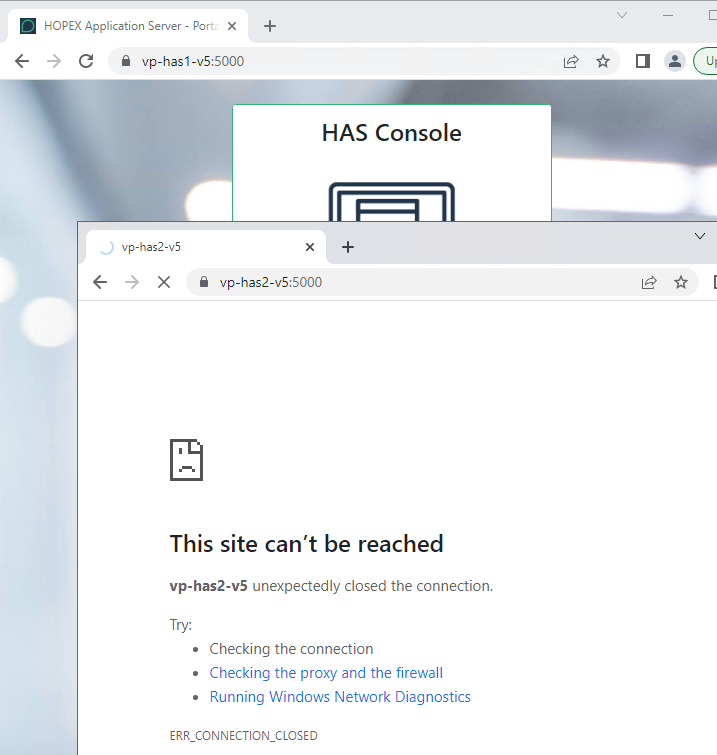
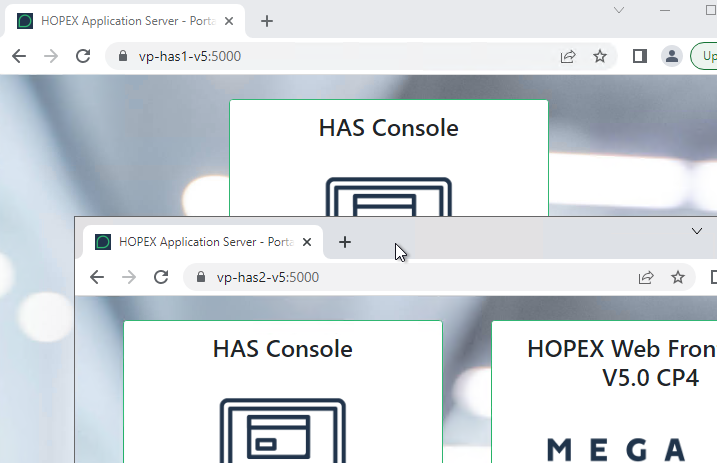
7.2.2. Servers to HAS Servers
If you are in a cluster scenario and have several HAS Server.
1. Go on all servers (HAS+IIS) in RDP session
2. From this RDP session open a supported web browser: Chrome, Firefox, Edge.
3. Open 2 tabs in your web browser and on each tab enter the server internal address. In this example (adjust to your case):
|
Test Failed
|
Test Successful
|
 |
 |
|
Ensure server are visible from each other on the chosen port (default 5000)
|
This allows you to check that each server is independently started properly
|
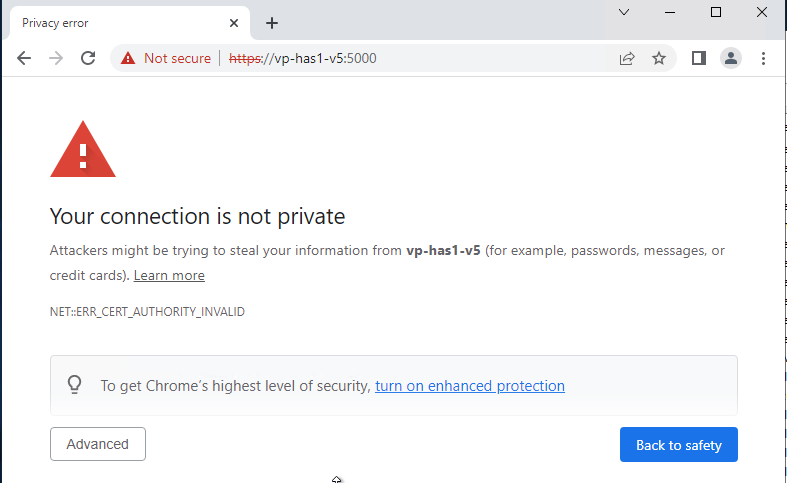
7.3. Testing SSL Certificates
7.3.1. Testing public certificate
To validate that the certificate generated by the customer is valid:
1. Access all servers (HAS+IIS) in RDP session
2. From this RDP session open a supported web browser: Chrome, Firefox, Edge.
|
Test Failed
|
Test Successful
|
 |
|
|
If you get this message:
• Ensure that the URL entered in the web browser is the same as the one defined in the SSL certificate.
• Ensure that the SSL certificate is properly imported on all servers (HAS+IIS) windows certificate store.
|
|
7.3.2. Testing self-signed HAS certificate
To validate that the root.pfx certificate has been properly imported on all servers and that each server has the same root.pfx certificate:
1. Access IIS Web Server in RDP session
2. From this RDP session open a supported web browser: Chrome, Firefox, Edge.
3. Open 2 tabs in your web browser and on each tab enter the server internal address. In this example (adjust to your case):
|
Test Failed
|
Test Successful
|
 |
|
|
If one of the HAS Servers returns a Not Secure certificate:
You must fix it.
|
|
4. Repeat the operation:
o Go on HAS Server 1 and test HAS Server 2 access
o Go on HAS Server 2 and test HAS Server 1 access
If any fails to fix it:
1. Stop all HAS Servers.
2. Delete from all servers:
o the file root.pfx located in C:\…\MEGA\Hopex Application Server\5000\.certificates
o the certificate called “Hopex Application Server” imported in windows from the mmc console
3. Start HAS Server 1.
7.4. Testing HAS
7.4.1. Checking port 5000 is available
You may encounter situation where port 5000 is either blocked by a firewall or already in use.
To check port 5000:
1. Open your web browser.
2. Access the private server URL.
|
Test Failed
|
Test Successful
|
 |
|
|
To fix, delete the instance and select another port number.
|
|
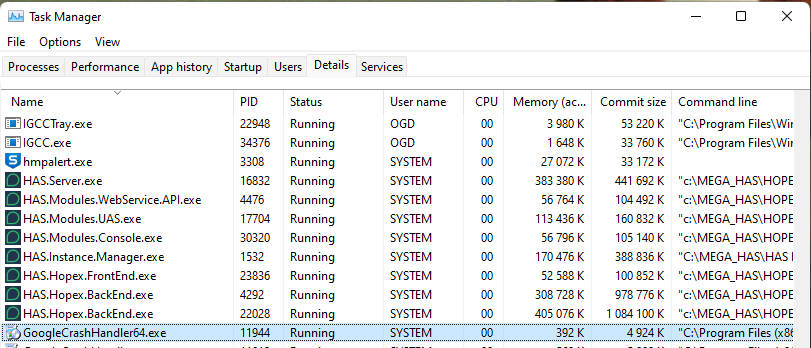
7.4.2. Checking running processes
When successfully running an instance should contain the following windows processes running:
• HAS.Instance.Manager.exe
• HAS.Server.exe
• HAS.Modules.Console.exe
• HAS.Modules.UAS.exe
• HAS.Hopex.BackEnd.exe
o There should be two of type O and one of type J
• HAS.Hopex.FrontEnd.exe
• HAS.Modules.WebService.API.exe
To check the running processes:
1. Open the Windows Task Manager.
2. Select Details tab.
3. Ensure you have the Command line column enabled.
4. Ensure you have waited enough time to let the processes launched.
|
Test Failed
|
Test Successful
|
 |
 |
|
Read the HAS log to understand why the other processes did not start.
|
|
7.4.3. Checking login page
To test the installation
1. Open a supported web browser: Chrome, Firefox, Edge. From anywhere you can access the URL (not from the server itself)
3. On the portal select either:
|
Test Failed
|
Test Successful
|
 |
 |
|
Ensure the URL you wrote in the web browser is the same
Ensure the SSL certificate is valid
Ensure your SSO configuration is valid
|
|
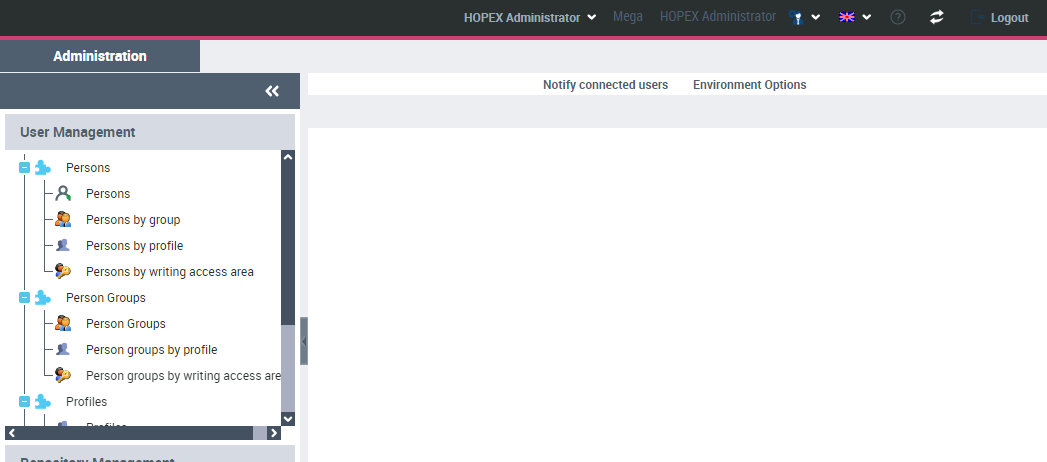
7.4.4. Login to HAS Console
To conclude that your installation is valid from an HAS point of view (regardless of functional modules):
1. Open a supported web browser: Chrome, Firefox, Edge. From anywhere you can access the URL (not from the server itself).
3. On the portal select:
|
Test Failed
|
Test Successful
|
|
|
 |
|
If you are unable to connect read the log.
|
|
7.5. Testing Web HOPEX
7.5.1. Login to Web Front End
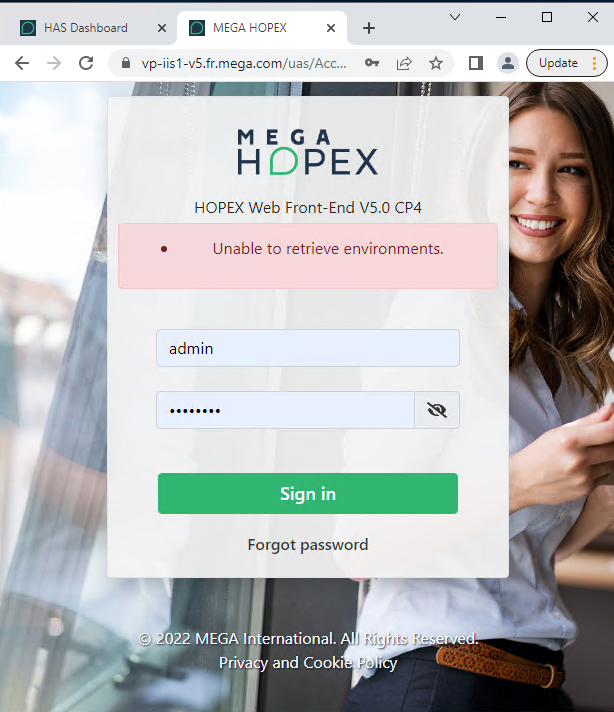
To conclude that your installation is valid from an end-user point of view:
1. Open a supported web browser: Chrome, Firefox, Edge. From anywhere you can access the URL (not from the server itself)
2. Type your public URL. In my example https://vp-iis1-V5.fr.mega.com
3. On the portal select either
a. the HAS Console https://vp-iis1-V5.fr.mega.com/hopex
4. As a login use “Mega” with default password “Hopex”
5. If prompted select HOPEX Administrator profile.
|
Test Failed
|
Test Successful
|
 |
 |
|
If you are unable to connect read the log.
If you get Unable to retrieve environments, ensure the domain user has the right password or access right to shared folder.
|
|
7.6. Testing Desktop client
Complementary to testing the Web part you need to test the Desktop part as well. This desktop part is used mainly for development platform. if it doesn't work it can be a sign of an unproper installation.
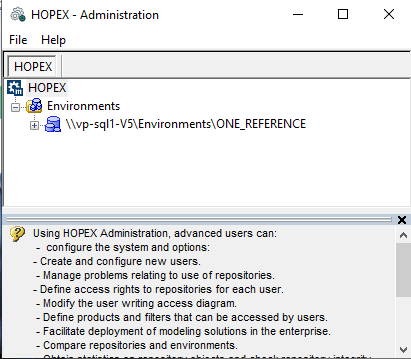
7.6.1. Login to Administration.exe
This is to validate that HAS Server node has been properly configured.
1. Go on all HAS servers in RDP session.
2. Go in the installation folder. Default: C:\...\HOPEX Application Server\5000
3. Launch Administration.exe
|
Test Failed
|
Test Successful
|
|
The process does not launch and closes immediately
Or
The process launches with error message
|
 |
|
Read Windows Event logs
Read megaerrr logs
Ensure HAS Server is up and running
Ensure access to must license works
|
|
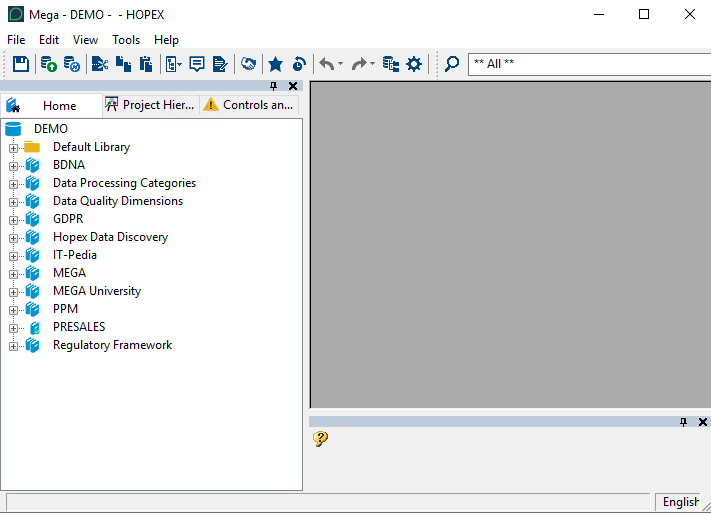
7.6.2. Login to HOPEX.exe
To validate that HAS Server node has been properly configured:
1. Go on all HAS servers in RDP session.
2. Go in the installation folder. Default: C:\...\HOPEX Application Server\5000
3. Launch HOPEX.exe.
4. Login “Mega” with default password “Hopex”.
|
Test Failed
|
Test Successful
|
|
The process does not launch and closes immediately
Or
The process launches with error message
|
 |
|
Read Windows Event logs
Read megaerrr logs
Ensure HAS Server is up and running
Ensure access to must license works
|
|