Adding Objects to Diagrams
You can add existing objects to a diagram:
• from the Browsing area by drag-and-drop via:
• a tree
• a list of cards
• a search result
• with the object inserting bar,
• from the insert toolbar available on each object.
Adding an object by drag & drop
The drag & drop feature is available from a tree, a card list or a search result.
To drag & drop an object into a diagram:
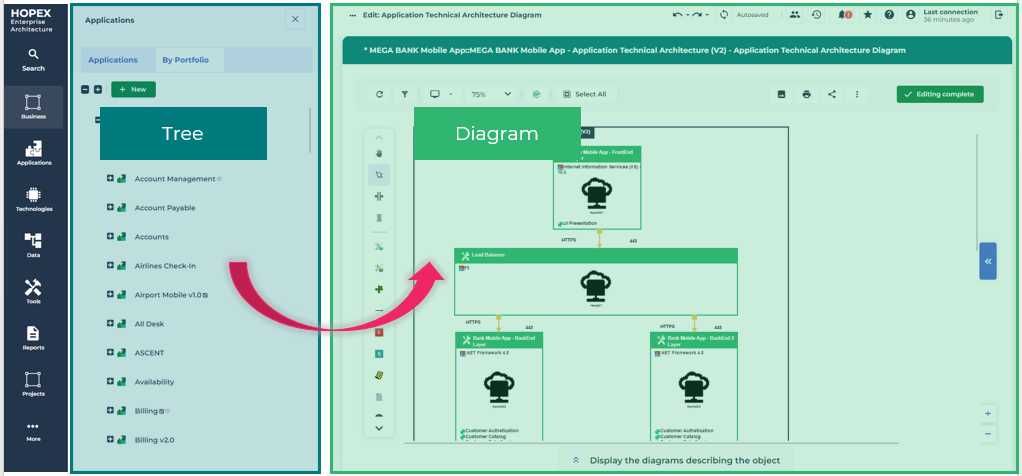
1. From an object in the Browsing area, open its diagram in the edit zone.
The diagram displays to the right of the tree or the initial list.
2. In the tree or the list, select the object of interest to you and add it to the diagram by drag & drop.
Adding an object via the diagram inserting bar
You can add an object to a diagram from its lateral inserting bar on one click, using the object ghost as a guide. One single object can appear several times in the same diagram.
To add an object from the diagram inserting bar:
1. In the object inserting bar, click the icon corresponding to the object type needed.
Example: Application Service  .
.
.The object ghost sticks to your cursor.
2. Click in the diagram.
The window to add an object appears.
3. You can:
• insert an object of your repository: in the dropdown menu of the Name field, select the object.
• create an object: click Create.
4. Click OK.
The object is added (and connected) to the diagram.
Adding an object from an object contained in the diagram
You can add an object to your diagram from an existing object. From this object, you have access to an inserting toolbar. It only suggests objects that you can connect to the current object.
To add an object from an object in the diagram:
1. Click the object of the diagram.
2. Select the direction you want to add the object in.
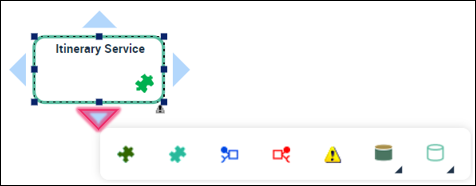
3. Click the icon corresponding to the object you want to add in the diagram.
4. In the wizard, select the object you want to add.
5. The object is automatically added to the diagram, on the side of the current object that you have selected. The link between the current object and the new one appears automatically.

Adding several objects of the same type
You can add several objects of the same type without using the object inserting bar every time.
To add several objects of the same type:
1. In the object inserting bar, double-click the icon corresponding to the object type needed.
2. Add the first object.
The ghost of the second object of the same type sticks to your cursor.
3. Repeat the action to add as many objects as you want.
The object type remains selected as long as you do not press [esc] or Selection  or an other object type.
or an other object type.Inserting an object in a sequence flow
You can insert an object directly into a sequence flow. The original sequence flow is automatically divided into two parts, which spares you to create, delete or move sequence flows.
Example: you can insert an operation into an organizational process sequence flow.
To insert an object in a sequence flow:
1. In the object inserting bar, click the icon representing the object type you want to insert.
Example: an operation.
2. Hover the cursor over the sequence flow on which you want to insert the object.
The sequence flow is highlighted in gray.
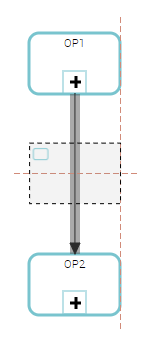
3. Let off your click.
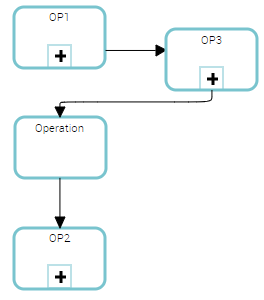
The object is inserted in the sequence flow.
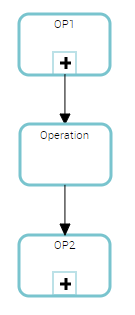
The source sequence flow is automatically split into two sequence flows. Both of the sequence flows keep the customization applied to the source sequence flow (if any).
Note:
If you do not have enough space between both objects, the object is placed above the others. You must then move it.