Defining the Data Used by Applications
HOPEX Data Governance allows you to make an inventory of applications that use the data you have modeled.
Thanks to the HOPEX integrated platform you can use this inventory in the HOPEX solutions specific to the description of the application architecture, such as HOPEX IT Architecture or HOPEX IT Portfolio Management.
Dedicated reports allow you to visualize in which applications certain data is used. See Data Usage Reports.
Creating Applications with HOPEX Data Governance
The inventory of application assets is carried out by the Data Functional Administrator.
To create an application in HOPEX Data Governance:
1. Click the Inventories > Applications navigation menu.
2. Click the Applications tab, then New.
3. Enter the name of the application and an owner if necessary.
4. Click OK.
In the same way you can create application systems, application services, microservices and application flow scenarios.
For more details on objects of the application architecture, see Modeling Applications and System Architectures.
Connecting Data to an Application
The Data Asset Manager can define the data used by applications.
To connect conceptual or logical data to an application, you must create a data store on the application. The data store provides a mechanism for storing and consulting data through the application.
The data store references a data domain that represents the structure of the data that the process needs.
Creating a data store on an application
To create a data store on an application:
1. Open the properties of the application in question.
2. Click the Components page.
3. Go to the Data Stores section.
4. Click the New button.
5. In the window that appears, select the data domain referenced by the data store and click OK.
The new data store appears in the application properties.
Defining data access mode
To define the data access mode (create, read, delete, etc.):
1. In the application properties, select the data store.
Data of the corresponding data domain appear.
2. Select the data item and click the CRUD button.
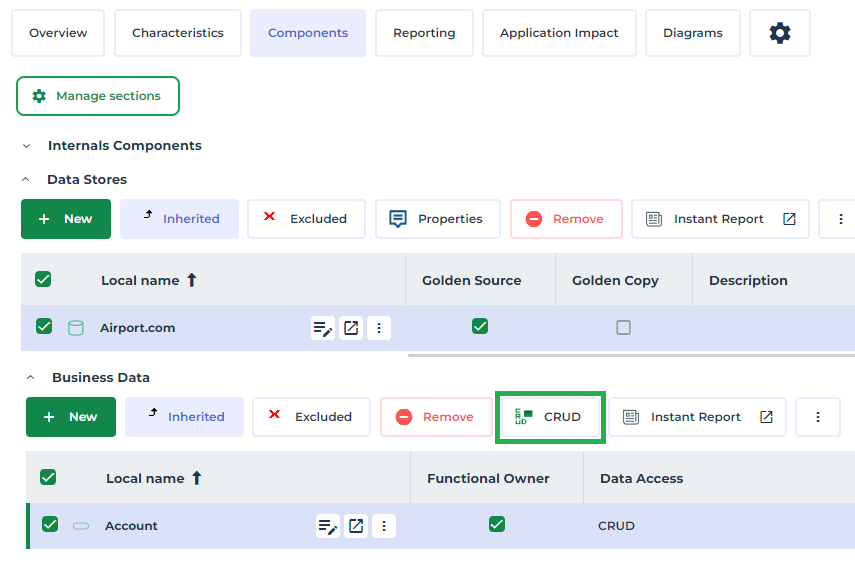
3. Select the check boxes that correspond to the types of access in question (Creation, Read-only, etc.).
Defining an application as the golden source
You can indicate that an application is “Golden Source” for data that is under the responsibility of the domain referenced by the data store.
To indicate that an application is the “Golden Source” of data:
1. In the application properties, select the data store that references the data in question.
2. Check the Golden Source box.
To indicate that a data item is under the responsibility of the domain to which it belongs:
1. In the application properties, select the data store.
Data of the corresponding data domain appear.
2. On the data concerned, check the Functional Owner box.
Impact of the Data Used
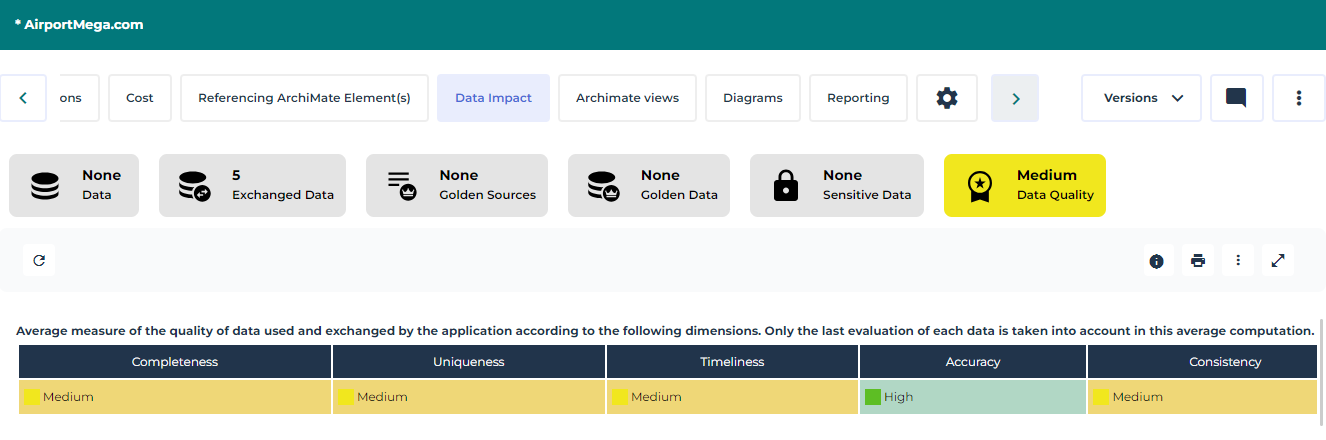
The Data Impact property page lets you visualize the data used by an application and measure:
• the impact of the application on the data it uses (for example, the impact of deleting an application when it is a golden source of data)
• and conversely, the impact of the data on the application (for example, the impact of unreliable data).
To view the impact of data on an application:
1. Open the application properties.
2. Click the Data Impact page.
The page displays the following labels:
• Data: data used by the application
• Exchanged Data: data contained in the flows exchanged by the application.
• Golden Source: data for which the application is declared "Golden Source".
• Golden Data: application data classified under the category “Golden data”.
• Sensitive Data: application data classified as "Sensitive Data".
• Data Quality: quality level of the data used by the application. The report provides an average of the data quality of the latest evaluations performed on all data used by the application, at the level of the application's store or through flow exchanges with other applications.
3. Click on a label to view the details.
See also: Data Usage Reports.