Managing Triggers
Accessing Triggers
In the Administration application (Administration.exe), the Trigger Management window displays the following tabs:
• Triggers
Triggers defined by a HOPEX administrator. These Triggers can be defined on a data repository or on the System repository.
• Triggers (Mega)
Triggers provided with HOPEX and available in all the installations. These Triggers are defined on the System repository.
• Trigger Definitions
Predefined Triggers available for you to create your Triggers.
Example: "Computation of OnDemand and expired OnUpdate MetaAttributes”
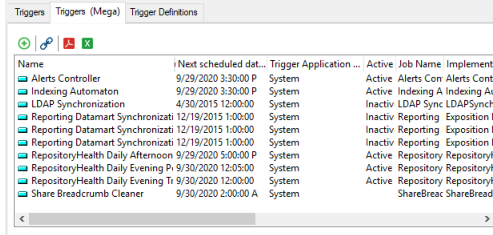
For each scheduled Trigger, the list indicates in particular:
• its name
• its next execution date and time
• its status (active or inactive)
• the name of the executed job
• the name of the job implementing macro
To access the Trigger management:
1. From HOPEX Administration, connect to the environment.
2. In the Repositories folder, expand the repository concerned.
3. Right-click the Scheduler folder and select Manage Triggers.
Creating a Trigger
A Trigger is based on a Trigger Definition. This definition consists of a job which includes the macro that the Trigger will execute.
Trigger Definitions are available in the Trigger Definitions tab.
To create a Trigger:
1. Access the Trigger management window.
2. In the Triggers tab, click New  .
.
.3. Select the Trigger Definition.
4. Click Next.
The job definition window opens.
5. Enter the Name of the job.
6. In the Job Context pane, define the job execution context.
7. Click Finish.
The Trigger is created.
By default, the Trigger is active.
You can execute the Trigger to test it.
Managing a Trigger
You can:
• update the Trigger scheduling
To modify the job execution dates, times, and frequencies.
• activate/deactivate a Trigger
By default, a Trigger is active.
To temporarily suspend the job execution, you can temporarily deactivate its Trigger.
• execute a Trigger
To immediately execute the job associated with the Trigger (outside its scheduling).
For example, to test a job.
• delete a Trigger
If you want to reuse the Trigger later, instead of deleting the Trigger you can deactivate it.
• display the Trigger properties
• The Scheduling tab details the scheduling definition and lists all the next executions of the trigger
• The System Job tab details the job executed by the Trigger (especially the macro and execution context).
• The Characteristics page enables to keep the Trigger in the list after its last execution and to modify its retention period (by default 15 days).
To manage a Trigger:
1. Access the Trigger management.
2. Right-click the Trigger concerned and select:
• Update Scheduling
• Activate/Deactivate
• Execute
• Delete
• Properties
Defining the Trigger Execution Context
A Trigger is triggered on the objects defined in the associated job macro.
To define on which MetaClass the Trigger applies:
1. Access the Trigger management.
2. Right-click the Trigger concerned and select Properties.
3. Select the System Job tab.
4. In the Context pane define the Trigger execution context, i.e. the objects on which the job applies.