Creating a Dendrogram Instant Report (list)
A dendrogram illustrates the environment of an object.
You can create a dendrogram displaying the relationships between objects of your choice:
• a source object
You can also select several objects (up to 50) of the same type, to compare several objects for example.
• a target object type and its relationship with the source object
These relationships can be links or queries.
You can create up to 10 levels.
If needed, at anytime you can:
• navigate through the levels
• group the objects according to a criteria value, this action adds a level
• hide/display a level
• delete a level (the following levels are also deleted)
To create a dendrogram-type instant report:
1. In an object list, select a source object.
E.g.: an application.
2. Click Instant Report  .
.
. .
.
3. Select Dendrogram.
4. Click OK.
The dendrogram building pane is displayed in the current page (or in a new tab).
The dendrogram is initialized with the source object type.
E.g.: Application.
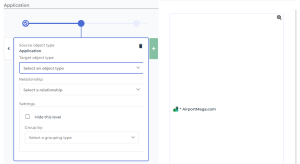
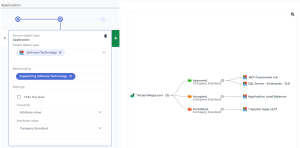
5. Define the target object type and its relationship with the source object type:
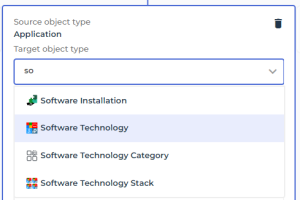
• In the Target object type field, select the target object type.
E.g.: Software Technology.
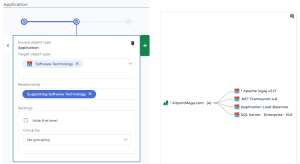
• In the Relationship field, select the link or the query between both object types.
E.g.: Supporting Software Technology.
6. (Optional) To group objects according to a parameter, in Parameters, Group by, select the grouping type and its value.
Grouping folders are automatically added to the dendrogram. Their number is indicated at the root.
 .
.E.g.: Group the Software technologies by “Company Standard" Attribute value. Here three grouping folders are created: “Approved”, “Accepted”, “Forbidden”.
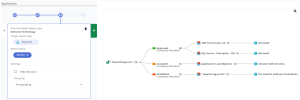
7. (To add one more level) Click  (to the right of the current level definition) and define the following target object type and its relationship with the previous object type as detailed step 5.
(to the right of the current level definition) and define the following target object type and its relationship with the previous object type as detailed step 5.E.g.: the “Org-Unit” target object type with the “Vendor” Relationship.
8. (If needed) To hide/display a level: in its Settings pane, select/clear Hide this level.
• the hidden level is identified by 
• the displayed level is identified by
9. (If needed) To delete a level and all of its following ones, click  .
.
.You can:
• save the report and then customize it
• access the properties of the objects contained in the dendrogram (and modify them)
With a Functional Administrator of a Solution, HOPEX Customizer, or HOPEX Customizer-Publisher profile, you can also:
• add the report to the Reporting property page of the source object
• save the report as a report template