Using Pools: Improving Graphical Presentation
To improve the graphical presentation of certain diagram types, you can add your participants in a pool.
E.g.: process diagram, System Process diagram.
• The pool is a zone made up of several swimlanes. It can be horizontal or vertical.
• When you add a Participant to a diagram, it is automatically included in a swimlane.
You can add the Participant:
• next to an isolated Participant to form a pool
• in a pool
• elsewhere in the diagram (it forms an isolated swimlane).
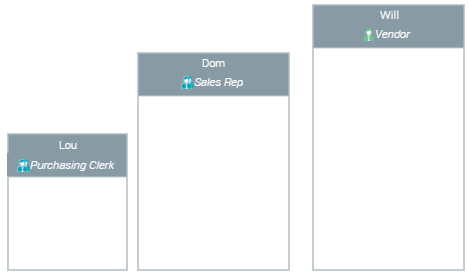
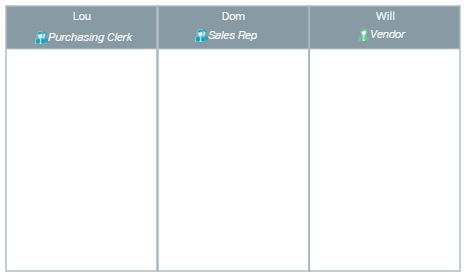
Example of 3 Participants (Org-Unit) in a diagram
Participants isolated in 3 swimlanes. Each participant can have its own specific dimensions.
Participants are grouped together in a pool. Participants are aligned with identical height.
You can add Participants with specific assignment types to the diagram.
Example: system process diagram
You can add Participants with Application assignment type (by default) or select another type (Org-unit, microservice, system process).
Creating a pool
To create a pool:
1. In the diagram insert bar, click Participant (< Assignment type>)  .
.
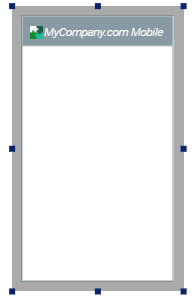
.Example: Participant (Application) by default in a System Process diagram.
You can also add participants without any assignment type, or modify their assignment later.
2. Click in the diagram, where you want to insert the pool.
3. (Optional) Enter the Local Name of the Participant.
If you enter it, the Local Name of the Participant is displayed in the diagram.
4. In the <Assignment Type> drop-down list, select the assignment.
E.g.: in the Application drop-down list, select the application.
5. (If needed) Click Next to check your configuration and/or modify it.
You can modify the Local Name and modify the assignments.
6. Click OK.
The pool comprises a swimlane, which includes the Participant and its assignment.
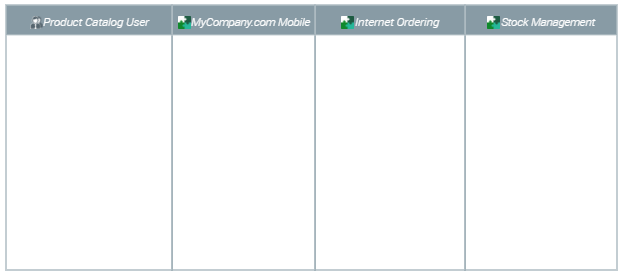
7. Add other participants to form a pool.
Adding a participant to a pool
You can add a participant:
• in a pool
• next to an isolated participant to form a pool
To add a participant to a pool:
1. In the diagram insert bar, click Participant (< Assignment type>) .
.Example: Participant (Application) by default in a System Process diagram.
2. In the diagram, click the participant next to which you want to add the participant
For the participant to be included in the pool, it must cover more than the half horizontal part of a participant already in the pool (horizontal pool).
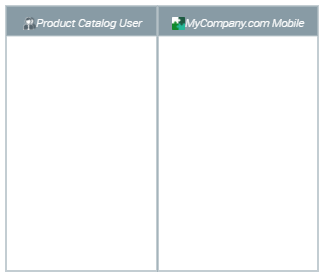
E.g.: the Participant will be added to the left of “MyCompany.com” Particiapnt (Application).
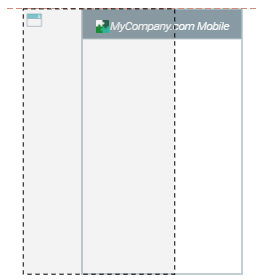
The new participant is added to the side which is half covered.
E.g.: the “product Catalog User” Participant (org-unit) is added to the left of “MyCompany.com” Participant (Application).
3. Add as many participants as needed.
Adding a participant next to another participant
In a horizontal pool, you can add a participant to the left or to the right of an other participant.
In a vertical pool, you can add a participant above or below an other participant.
To add a Participant to the right/left of a Participant:
1. In the diagram, click the Participant next to which you want to add the Participant.
2. In the insert bar of the Participant (or of the pool), click:
• Add a participant to the left 
• Add a participant to the right 
The Participant is added to the left/right of the Participant.
Adding an assignment to a participant
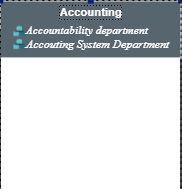
A participant can have several assignments.
When a Participant has several assignments, its Local Name is automatically displayed.
To add an assignment to a Participant:
1. In the diagram, click the Participant.
2. Click Add an assignment  .
.
.3. In the drop-down list field, select the assignment.
Add as many assignments as needed: each assignment selected in the list is added.
 .
.4. Click outside the field of the drop-down list.
Each assignment is displayed.
Modifying the order of participants in a pool
To modify the Participant order in a pool:
1. Select the Participant you want to move.
2. Hold the mouse button down and move the Participant to the required position.
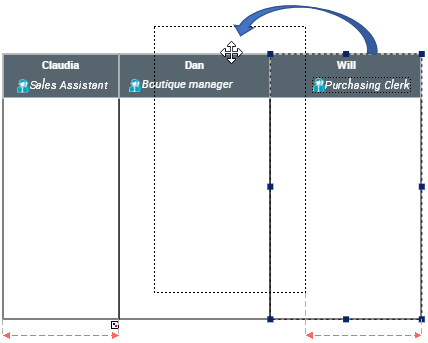
The Participant is moved and the order modified.
Removing a Participant from a pool
You can remove a Participant from a pool and keep it in the diagram.
To remove a Participant from a pool:
1. In the pool, select the Participant.
2. Hold the click down and drag & drop the Participant outside the pool.
The Participant and its content are moved outside the pool.
Deleting a Participant from a pool
You can remove a Participant from a pool and remove it from the diagram.
To delete a Participant from a diagram:
1. In the diagram, right-click the Participant and select Remove.
2. In the deleting window, click Delete.
The Participant is deleted from the diagram.
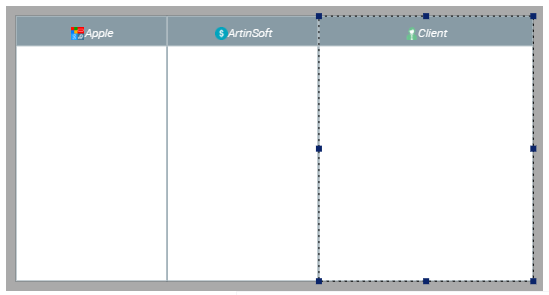
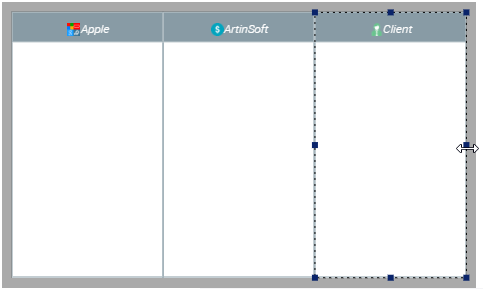
Globally modifying the size of Participants of a pool
From a pool, you can modify the size of all of its Participants at once.
To globally modify size of objects in a pool:
1. Select the pool: click one of its outer edges.
2. Position the cursor on one of the pool handles.
A double arrow appears.
E.g.: right edge handle.
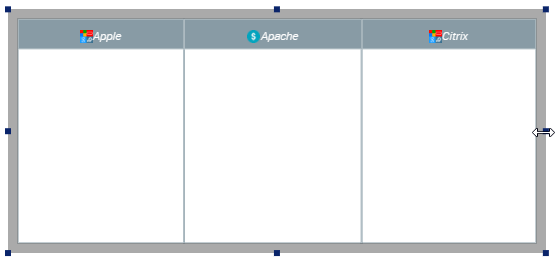
3. Click the double arrow, hold your click down and move the cursor to modify the size of the selection.
4. Let off your click.
The size of all other participants of the pool is modified in identical proportion.
E.g.: the width of each Participant is modified similarly.
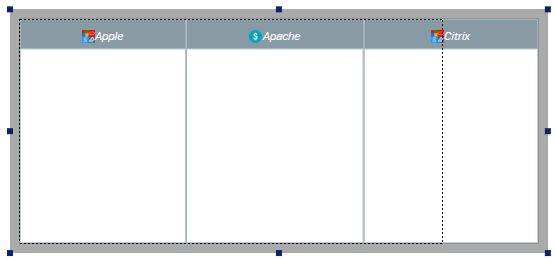
Modifying the size of a single Participant of a pool
In a horizontal/vertical pool, you can modify the width/height on a single Participant.
To modify the size of a single Participant of the pool:
1. Select the Participant you want to modify.
2. Position the cursor on one of the Participant edge handle.
A double arrow appears.
Example of a horizontal pool: select the right (or left) edge handle.
3. Click the double arrow and hold your click down while moving the cursor to the right/left so as to increase/decrease the size of the Participant.
E.g.: move the cursor to the right.
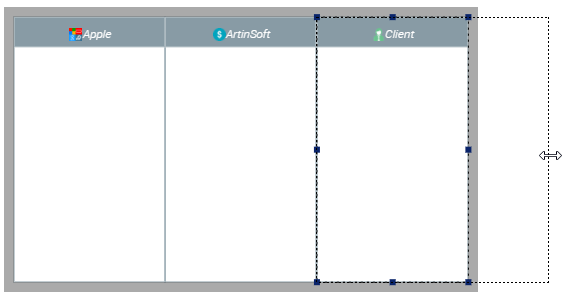
4. Let off your click.
Only the width of the selected Participant is modified.