Creating Collaborative Workspaces
You can create a collaborative workspace:
• when you have created or modified one or several objects in your private workspace and you want to share your work with other users before dispatching it in the repository (when it will be available to all users).
• from opening your private workspace, to directly share your work with other users.
Once you have created a collaborative workspace:
• you can create another collaborative workspace (to work on other repository objects).
• you cannot modify, in your collaborative workspace, repository objects that are not reserved in Check Out in your collaborative workspace.
• you can be invited to other collaborative workspaces as a participant.
• you can create a private workspace (if you do not already have one).
To create a collaborative workspace:
1. In your HOPEX desktop, click Main menu > Collaborative Workspace > New Workspace.
The collaborative workspace creation dialog box appears
2. In the Name field, enter the name of the collaborative workspace.
3. (Optional) Select Send notification by e-mail to warn each collaborative workspace participant (including yourself) of certain modifications in this collaborative workspace (change of collaborative workspace state, addition/deletion of participants).
4. (Optional) In the Comment pane, you can enter information on creation of this collaborative workspace.
For example, enter information on objects you want to share with users.
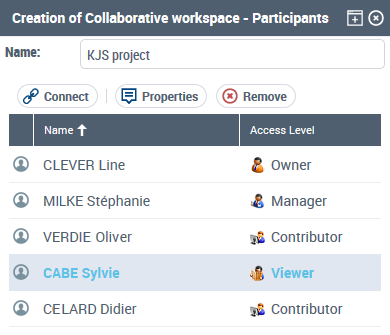
5. Click Next to define users with whom you want to share your private workspace.
The add participants dialog box appears, presenting you as Owner of the collaborative workspace.
6. Click Connect  .
.
.The add persons dialog box appears.
7. Select the person (use [CTRL] key to select several persons) with whom you want to share your work, then click Connect.
The person or persons are added to the list of collaborative workspace participants as Contributor.
8. (Optional) To change access level of a participant, in the Access Level field of the person, select another access level.
9. Click Next.
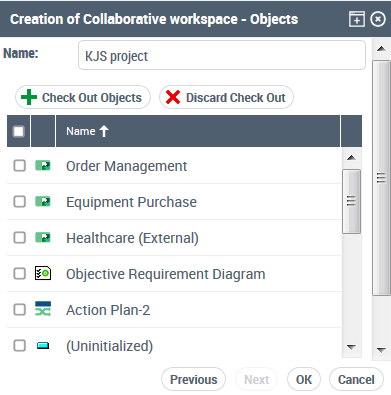
If you have already created objects in your private workspace, these appear in the list of objects of your collaborative workspace.
 .
.10. (Optional) To reserve repository objects for your collaborative workspace, click Check Out Objects  .
.
.The add generic objects dialog box of the workspace appears.
• (Optional) Clear Propagation if you do not want to add objects that depend on the selected object as a function of the chosen perimeter.
• By default, export perimeter is as defined in the properties of the Export tool. To modify default perimeter, in the Perimeter field, select the propagation perimeter.
• In the Objects to Reserve in Check Out pane, click the Add Objects to List button  .
.
.• Perform object search and select the objects in the result dialog box.
• Click OK.
The objects appear in the list of objects in Check Out in your collaborative workspace.
 .
.• Click Next.
The list of objects and their dependent objects appears.
• In case of an error, select the object (use the [CTRL] key to select several) that you do not want to reserve, then click Remove Objects from Propagation List .
.• Click OK/Finish.
11. Click OK/Finish.
The selected objects are reserved in Check Out for your collaborative workspace. They are locked for users who are not participants in your collaborative workspace.
If you selected option Send notification by e-mail:
• an invitation message is sent immediately to all participants (including yourself) of your collaborative workspace, with their status in this collaborative workspace.
• you receive a notification message on sharing your collaborative workspace.