Prerequisites
Operating System
MEGA HOPEX Web Front-End can be installed on the following systems:
• Windows Server 2008 R2 (not recommended because of the coming end of Support by Microsoft, but supported)
• Windows Server 2012
• Windows Server 2012 R2
• Windows Server 2016
• Windows Server 2019
To install MEGA HOPEX Web Front-End, you must open a Windows session with a domain user that has administrator rights on the server machine.
This document describes installation steps for Windows Server 2016. Some steps might need to be adapted when using Windows Server 2008 R2.
.Net
.Net 4.7 is required.
It is already installed by default with Windows Server 2019.
For more information on installing it on previous versions, see:
.NET Core 2.1 Runtime & Hosting Bundle
Warning: only necessary with Update 04 of Hopex V2R1, or above.
This component installs a module in IIS to allow the execution of ASP.NET Core web services.
With Update 04, a diagnostic/benchmark page is available, using this feature.
You can download the installer following this link:
JRE IBM Eclipse OpenJ9
HOPEX is no more installing Oracle JRE, it is installing JRE IBM Eclipse OpenJ9 instead.
The new JRE IBM Eclipse OpenJ9 is automatically installed by HOPEX.
Prior Hopex versions
If installing on a server that has had other major Hopex versions installed, please uninstall them completely before proceeding with the installation of this version of Hopex.
Required roles
If the roles are already in place, at least check that all sub features are active.
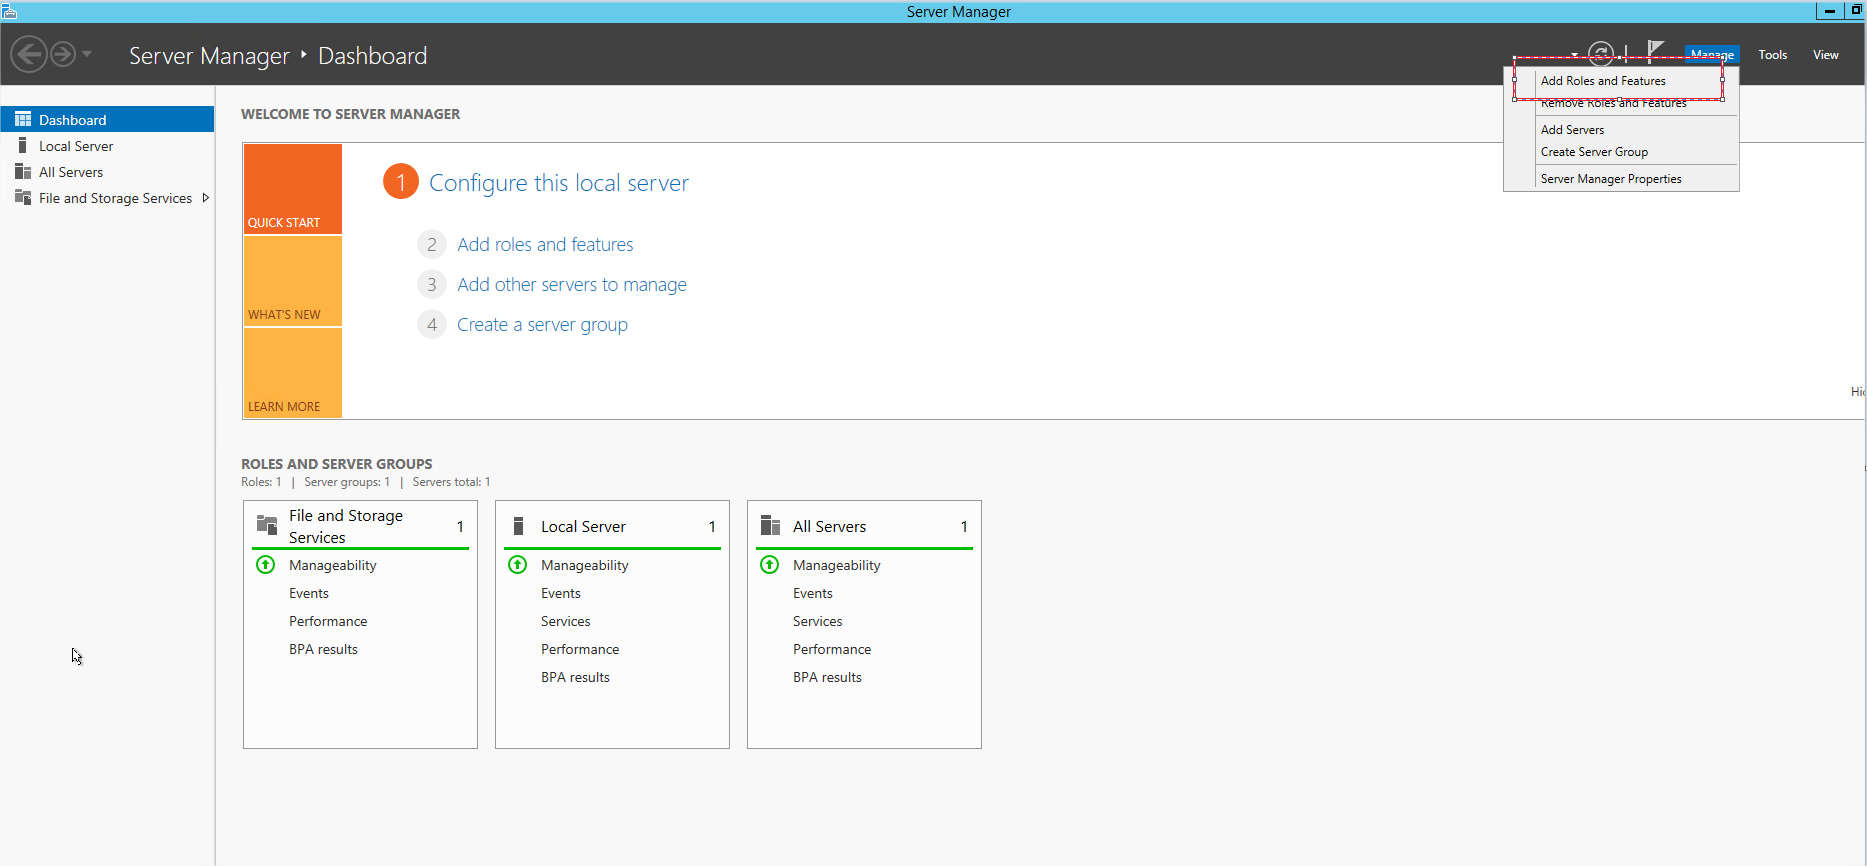
1. Through the “Server Manager”, click “Manage” and select “Add Roles and Features”:
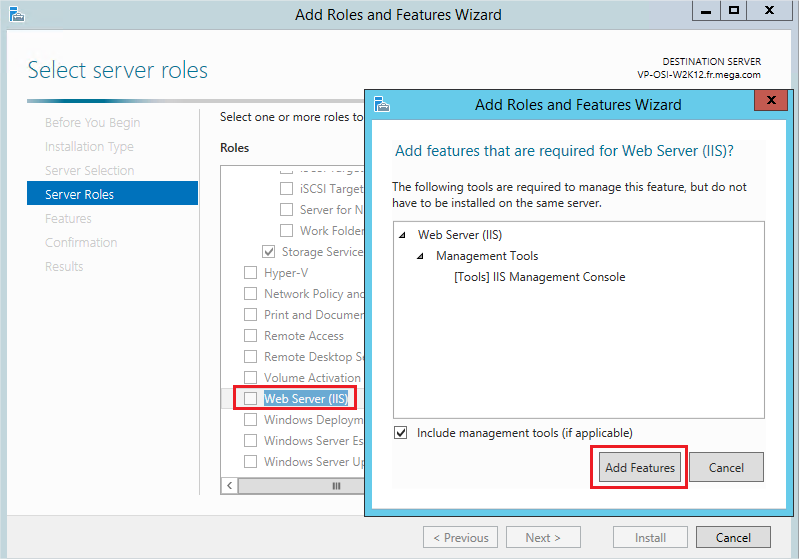
2. In the Roles, activate both:
• « File Server » :

• « Web Server (IIS) » and its related features :
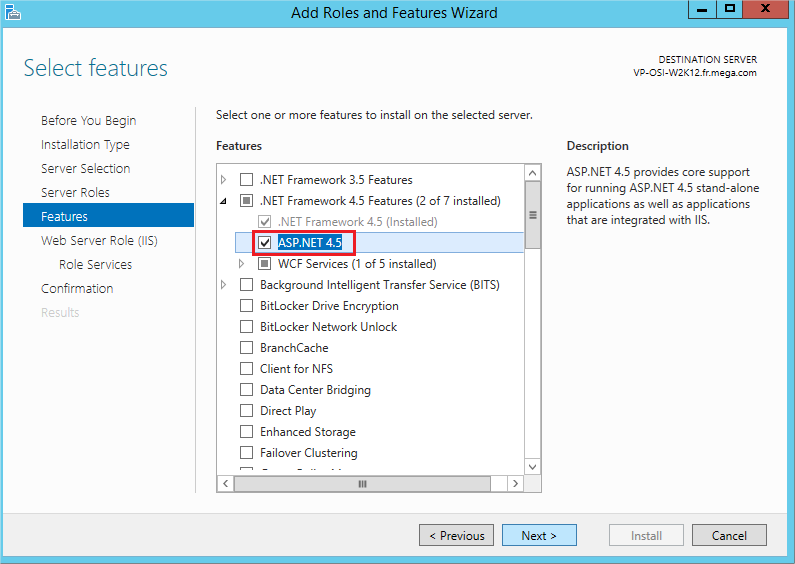
3. In the “Features”, make sure to activate the “ASP.NET 4.5”. Normally, if you installed 4.6.2 prior to this activation of features, it shouldn't be needed:
4. In the “Role Services” of IIS, make sure that “Static Content” is checked:

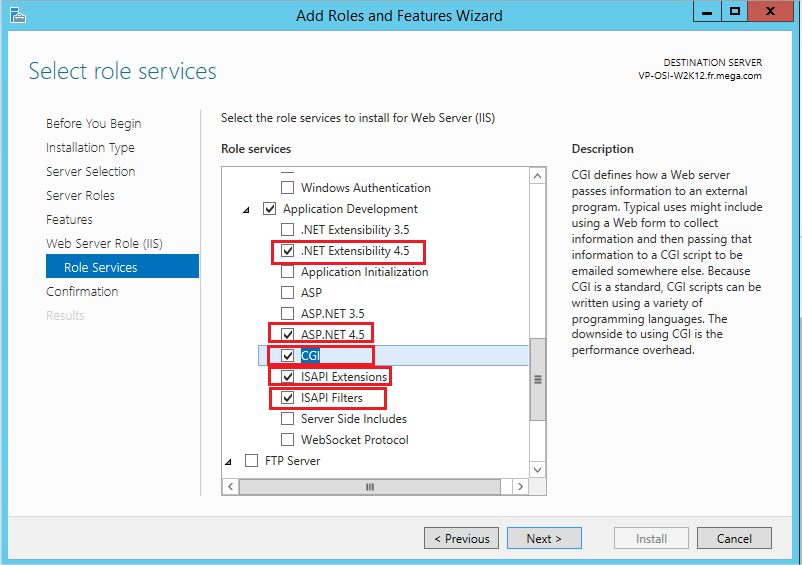
5. In addition, for the “Web Server (IIS)” role, the following “Role Services” and their dependencies must be installed:
• ASP.NET 4.5 (and related features)
• CGI
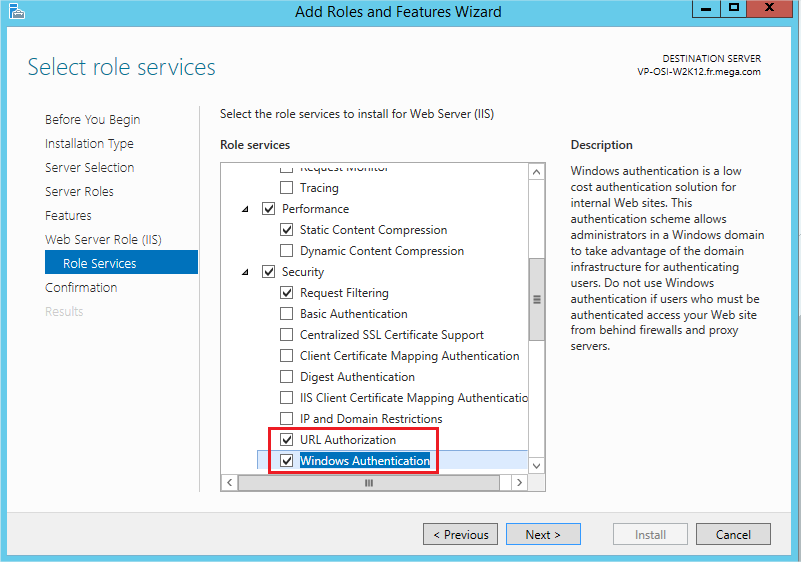
6. To manage specific rights on the website (such as restricting access to the admin page), you can also:
a. activate “URL Authorization” and “Windows Authentication”:
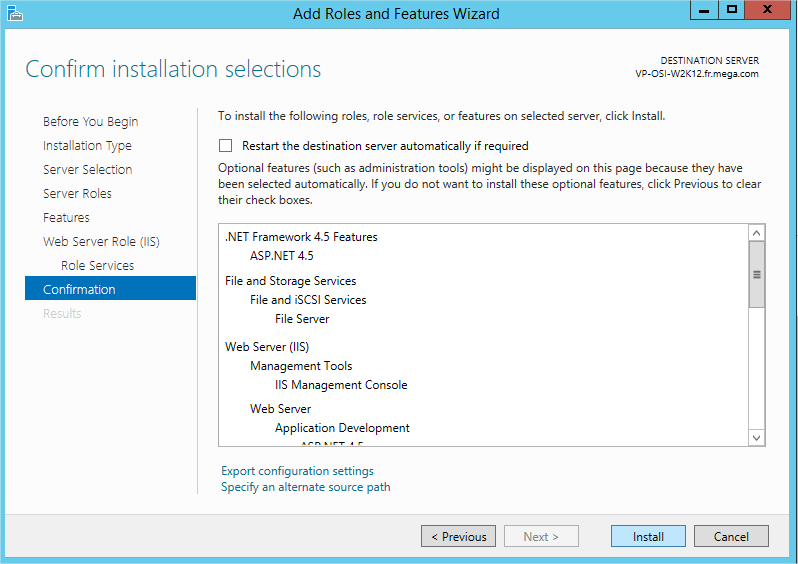
7. Install:
Desktop heap configuration
The Desktop Heap is an internal memory of Windows. It is heavily used by the web application. It is thus mandatory to update this value.
Thus, when running several users simultaneously on the same server, the Windows session of the impersonation user might start running out of desktop heap. This will create execution errors.
This is especially true because the impersonation user uses a non-interactive session, and the default value set for the non-interactive desktop heap for in this case is very low.
With the latest version of the application, we check that the desktop heap is set to at least 8 MB. If it isn't, anyone that will access the website will receive a warning message.
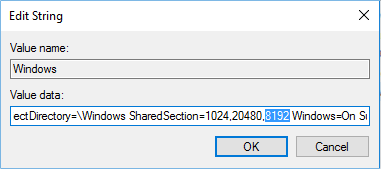
This modification needs to be made in the Windows Registry. Look for the “Windows” value in HKEY_LOCAL_MACHINE\SYSTEM\CurrentControlSet\Control\Session Manager\SubSystems. There's a long string for this value that will look similar to this: %SystemRoot%system32csrss.exe ObjectDirectory=Windows SharedSection=1024,3072,512 Windows …
It is the Shared Section part that might need to be modified. The three values are, in order: the shared heap, the interactive desktop heap, and the non-interactive desktop heap. They are expressed in KB. Default values vary significantly between Windows versions. You will need to modify the non-interactive desktop heap.
Be careful of not using excessive values, as this could stop you from logging into your server. It is therefore recommended to change this value using small increments.
The minimum value to put is therefore: 8192.
It works for small/medium deployments. For configuration when a large amount of concurrent users is expected on the Web Front-End server, please get in touch with your Mega contact that will ask for the assistance of appropriate people.
Configuration of SSL / TLS
To ensure data protection, it is mandatory to use SSL/TLS.
Therefore, the installer allows to install the web application on a website where HTTPS is already deployed.
It is therefore a prerequisite to configure your IIS platform to activate the SSL/TLS.
You will need to have a certificate. You can bind the HTTPS protocol to any wanted port, the installer will ask you on which website you want to install Hopex, and on which port.
You will need to choose the “Custom Setup” type of install (see section “MEGA HOPEX Setup” for details). In a standalone web deployment, we deploy without SSL/TLS which is not supported in production to ensure appropriate data protection.
You can find on the following link some documentation of IIS:
We also provide a technical article that explains how to secure the Hopex platform that contains some guidelines about the actions of SSL/TLS, as well as an example of configuration. Please refer to the article “Web Front-End - Securing the platform.doc”.
!!Warning!! Do not choose to use the SSL/TLS when installing Hopex unless you have made the deployment on your web server, with a proper certificate on the appropriate port.
If you are not able to have this deployment at the time of HOPEX installation, you may temporarily install without SSL/TLS and switch your installation to SSL/TLS before putting in production by following the “Activating SSL on the website” section of the “Web Front-End - Securing the platform.doc” article.
Windows User(s) for MEGA HOPEX
When installing MEGA HOPEX, a user is required to manage process authentication. It is recommended not to execute the Web Application processes with an administrator user. You will therefore need a second domain user.
This user will be used as an impersonate user in the web application. It is specifically linked to the feature called “Mega Web Access for Hopex”. All the actions carried out in MEGA HOPEX will be done under the identity of this windows user.
This is only the user that will run some application pools for the web front-end part of the application.
Moreover, if you need to use web services, and thus, you activate the feature called “HOPEX API”, you will need a second Windows user. It cannot be the same as the first one, or it will create side-effects such as navigation issues and errors for users.
Define Group permissions
This user (or users) must belong to specific windows groups:
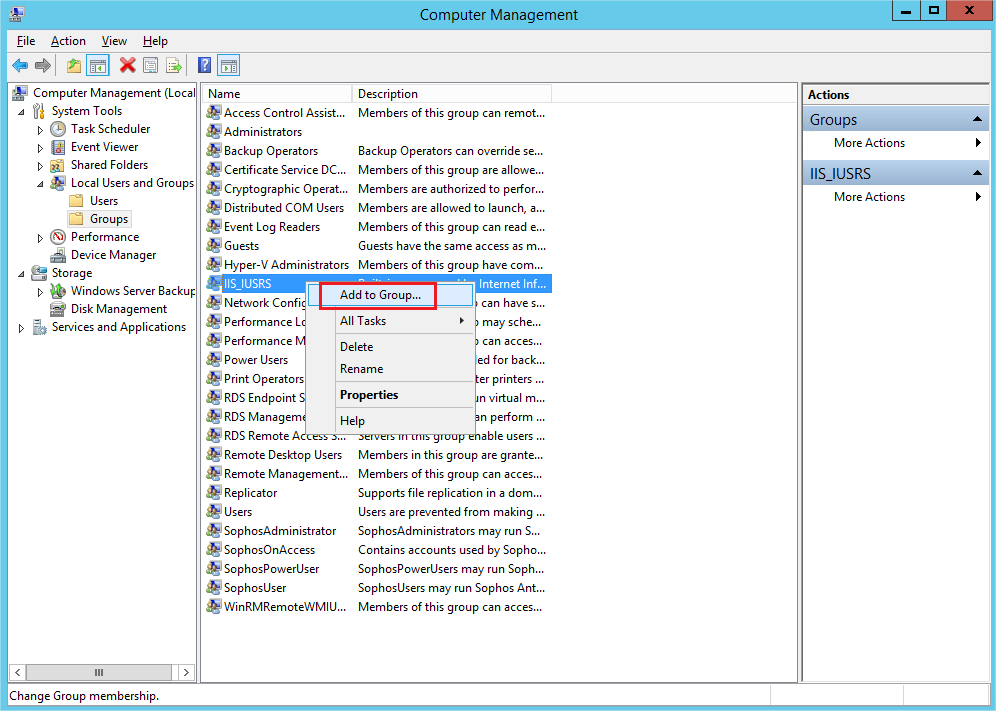
He must belong to the “IIS_IUSRS” group of the server. To add the user to this group, use the “Computer Management” dialog box in the “Tools” of the “Server Manager”. Browse to the “Groups” node. Right-click “IIS_IUSRS” and select “Add to Group…”
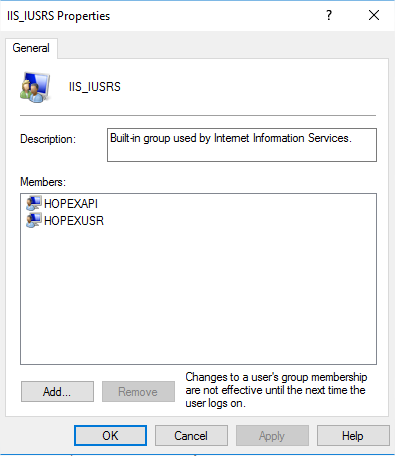
Example with local users called “…\hopexusr” and “…\hopexapi”:
Define MUST Licence Access
He must be registered in the MUST license tool, have the rights to read and write data in the MUST license folder and to share data. For more details, see the “Must License Installation Guide” technical article located in the Documentation folder of your MEGA installation.
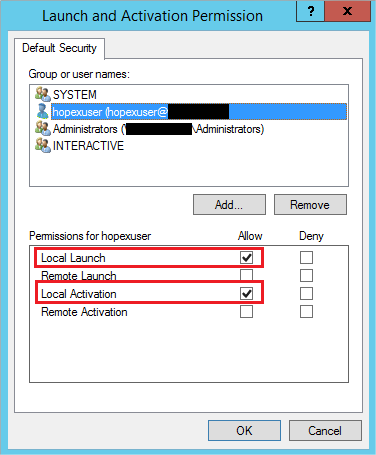
Define COM Access rights
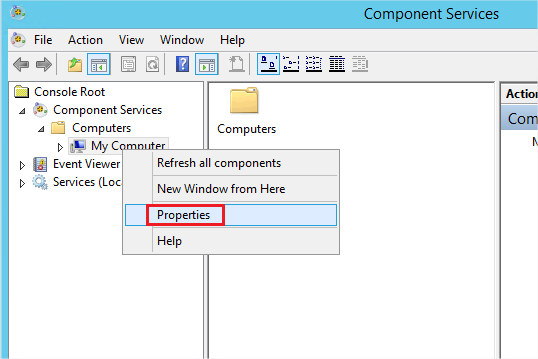
He must be able to launch COM applications by default. To assign this right, proceed from the “Component Services” dialog box through the “Tools” section of the “Server Manager”:

1. Expand the “Component Services” node, then Computers.
2. Right-click “My Computer” and select “Properties”.
3. Select the “COM Security” tab and click “Edit Default…” on “Launch and Activation Permissions” group.
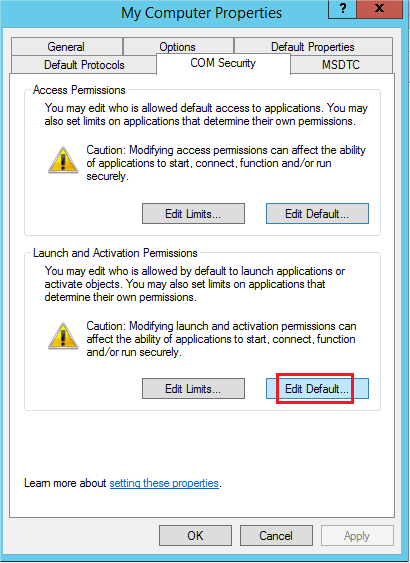
4. Add the Windows user, in this example “…\hopexuser”, and give him “Local Launch” and “Local Activation” rights.