Completing Installation
Define “Windows User for MEGA HOPEX” files Access Rights
• Go to the installation folder of MEGA HOPEX (By default, “C:\Program Files (x86)\MEGA\HOPEX V2R1” on 64 bits systems).
Give read/write access rights to the IIS_IUSRS group, that contains your Windows User that does the impersonation.
This way, if you change that user, you will not have to change that security, but just update the above group:

• Repeat this operation for:
o The installation folder of MEGA HOPEX Web Front-End (by default at C:\Inetpub\wwwroot\hopex)
o The environments folders to be reached through MEGA.
By default, environments are created in sub-directories of C:\Users\Public\Documents.
By default, environments are created in sub-directories of C:\Users\Public\Documents.
o The Temporary folder used for Web Access. Usually, it is at C:\Windows\Temp.
Make sure your user is correctly configured for the MUST license (for more details see the “Must License Installation Guide” technical article located in the Documentation\Articles folder of your installation).
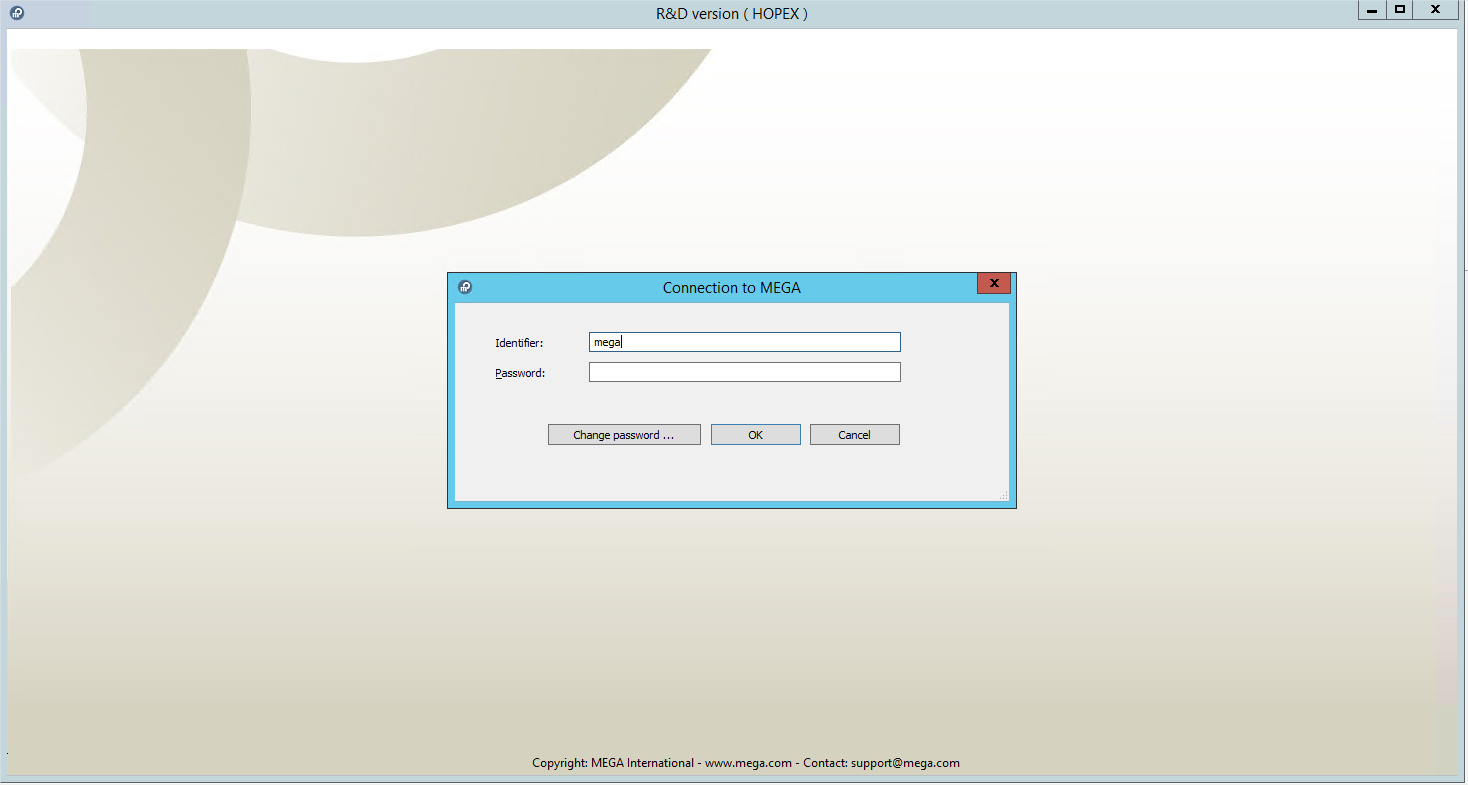
As a first test, run HOPEX application as the “windows user for MEGA HOPEX”.
Prerequisite: a Mega HOPEX environment is referenced on your platform. An environment that you created in a separate step.
To do so, go into the Mega installation folder.
Hold down the “Shift” button, right-click Hopex.exe and select “Run as different user”:
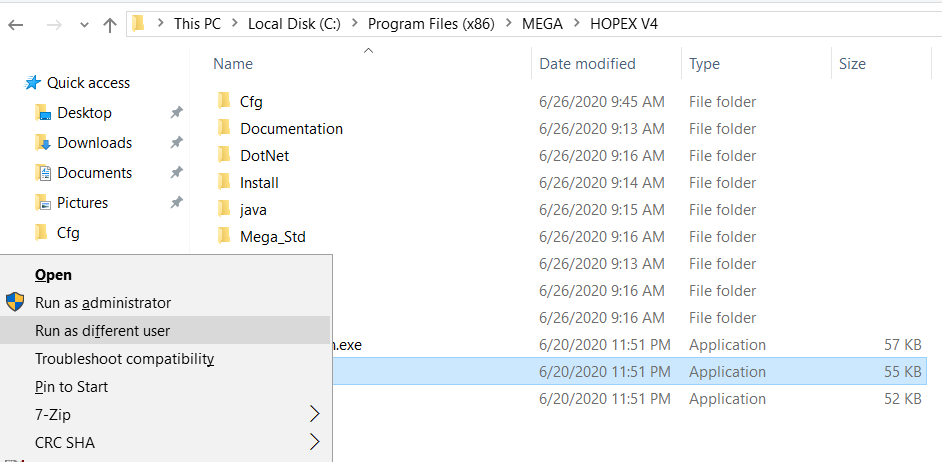

You must be able to launch MEGA.
Tune IIS
A default option of IIS makes the worker process of the HOPEX/HOPEX2 recycle every 29 hours.
This is what Microsoft chose to make sure that the w3wp.exe process, that manages websites and/or web applications within websites, to be stable.
However, the fact that this process restarts, makes the browsing of connected users to fail, as they lose their browsing context.
To avoid that, the installer disables completely this recycling, and use the default idle timeout, that says that after 20 minutes of complete inactivity, the worker process will stop (it will automatically start next time someone tries to access the website).
We recommend to manually add a restart at a fixed hour, when you know that no one will actually be connected on the website, to be sure it restarts at least once a day.
To do this.
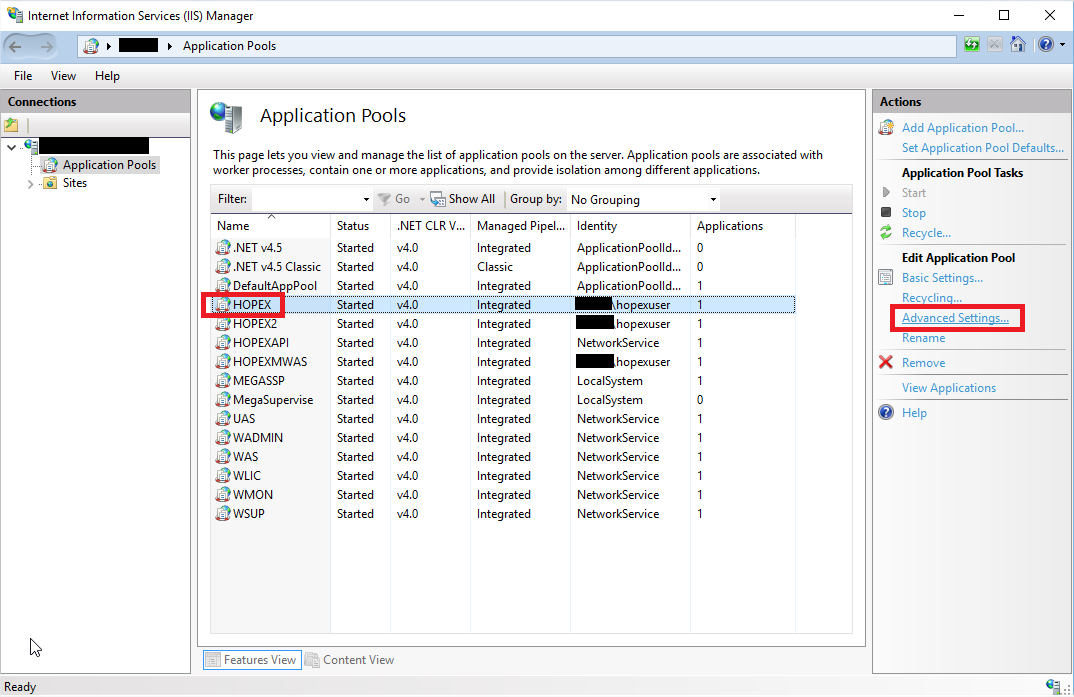
1. Open the “Internet Information Services (IIS) Manager”, and go to Application Pools.
2. Select HOPEX.
3. In the Action pane, click Advanced Settings:
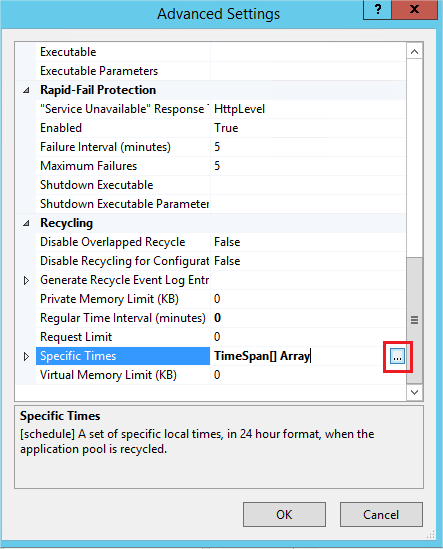
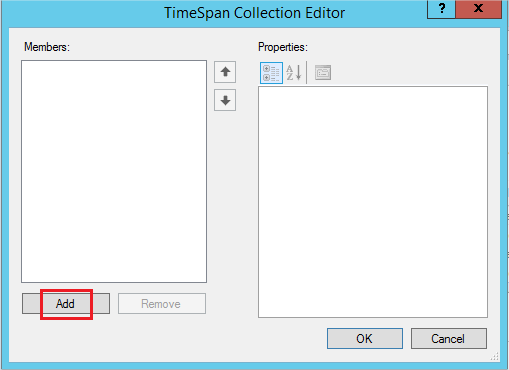
4. In the Recycling section, select Specific Times row, and click the “…” button:
5. Click Add:
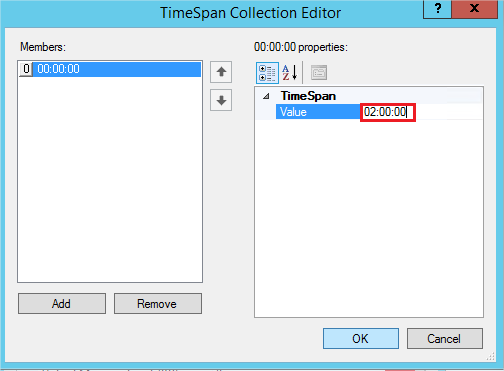
6. Enter the wanted restart time (in this example it is at 2am everyday), and click OK to validate:
7. Close the Advanced Settings.
8. Repeat this procedure for the HOPEX2 application pool if you deployed HOPEX.
A restart of IIS will be needed to make this configuration active.
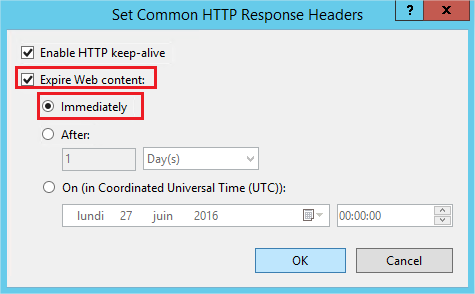
Configure Web Content expiration
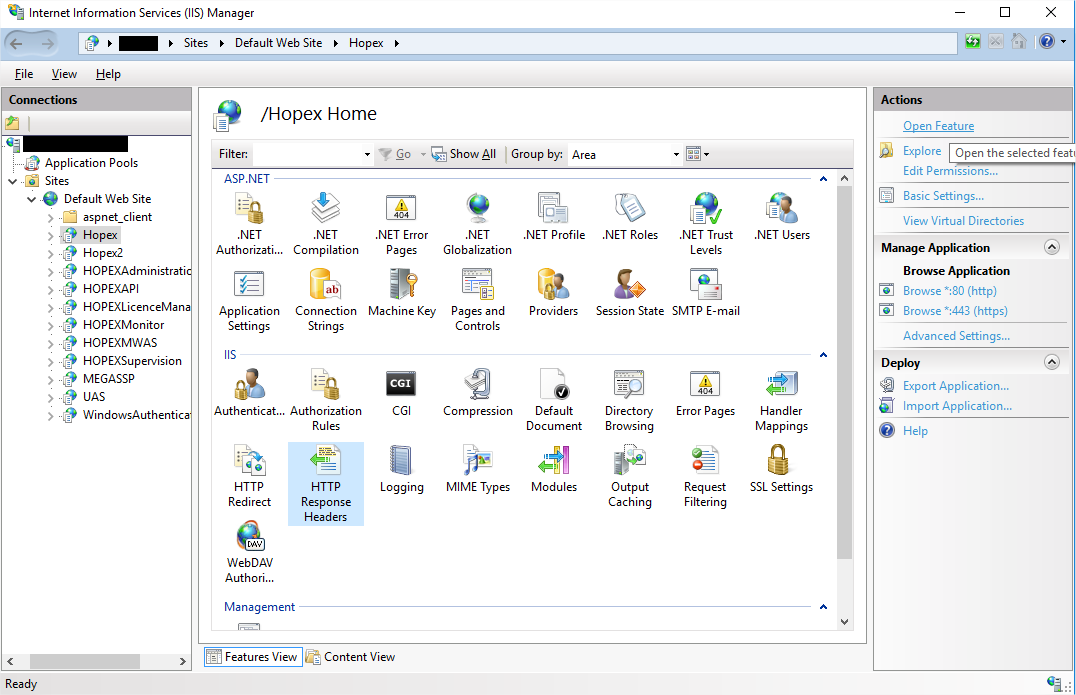
1. In the “Internet Information Services (IIS) Manager”, expand Web Sites, then Default Web Site.
2. Select “HOPEX”
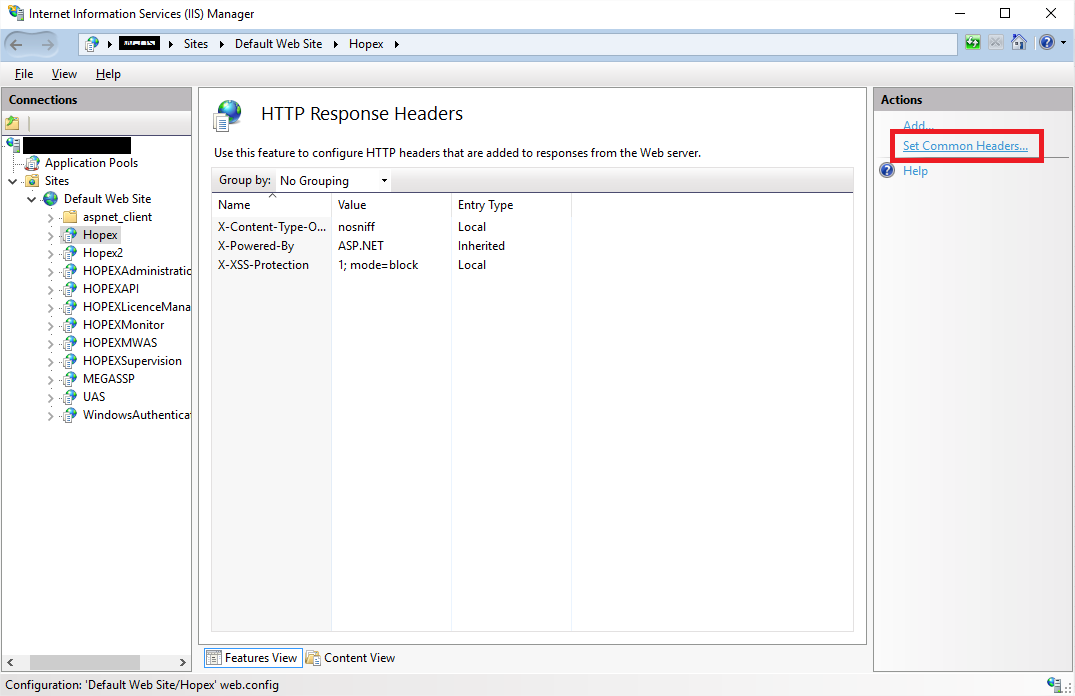
3. Double-click the HTTP Response Headers functionality to open the feature:
4. Click Set Common Headers on the right panel:
5. Set it to expire immediately:
6. In the “Internet Information Services (IIS) Manager”, expand HOPEX.
7. Select the script folder and choose “HTTP Response Headers” again.
8. Click Set Common Headers on the right panel.
9. Enable content expiration after 31 days.

10. Repeat this step on the images folder.