Infrastructure Requirements
RDBMS Client
An RDBMS Client is necessary on each workstation that uses HOPEX with data stored on an RDBMS.
• SQL Server
Installation of Microsoft SQL Server 2012 Native Client is required. This client is compatible with the 2008, 2012, 2014, 2016, and 2017 versions of SQL Server. See corresponding Microsoft articles for more details:
The SQL Server 2012 Native Client installation program is available in a subfolder of the HOPEX installation, for:
• 64bits Windows operating systems:
Under < HOPEX installation>\Install\RDBMS client\Sqlserver\x64\sqlncli.msi
• 32bits Windows operating systems:
Under <HOPEX installation>\Install\RDBMS client\Sqlserver\x86\sqlncli.msi
Network Capability to Database Server
On a client computer running HOPEX, it is recommended to ping the RDBMS server with a filled buffer to have an evaluation of the infrastructure. To do this, download the hrPING freeware tool available at https://www.cfos.de/en/ping/ping.htm. To use this tool, you must first accept the terms of the licence. Use it with the following command in a command window from a computer that will be running HOPEX:
hrping.exe -W -l 5000 -n 50 -y <RDBMS Server name or IP>
Example for this command output:

If the value returned for “RTTs of replies in ms/avg” (0.535 in the example) is higher than 1 ms, contact MEGA. See hrPING help for details on this command.
File Server and RDBMS local cache
See Deployment guide for generality.
For RDBMS deployments, there is a specific data caching option that is enabled by default. The purpose of this option is to improve the application response time by saving the environment data to the RAM of the server, so that fewer roundtrips to the database server are necessary. This cache is filled as the data is accessed during the use of HOPEX. The data cached that is out of date is deleted from that cache during dispatches.
The “Activate RDBMS local cache” is both accessible at the site level, or at the environment level.
To modify the RDBMS local cache globally for all environments:
1. Start Administration.exe.
2. At the top of the tree, right-click HOPEX and select Option > Modify.
3. Expand the Installation folder.
4. Select Advanced.
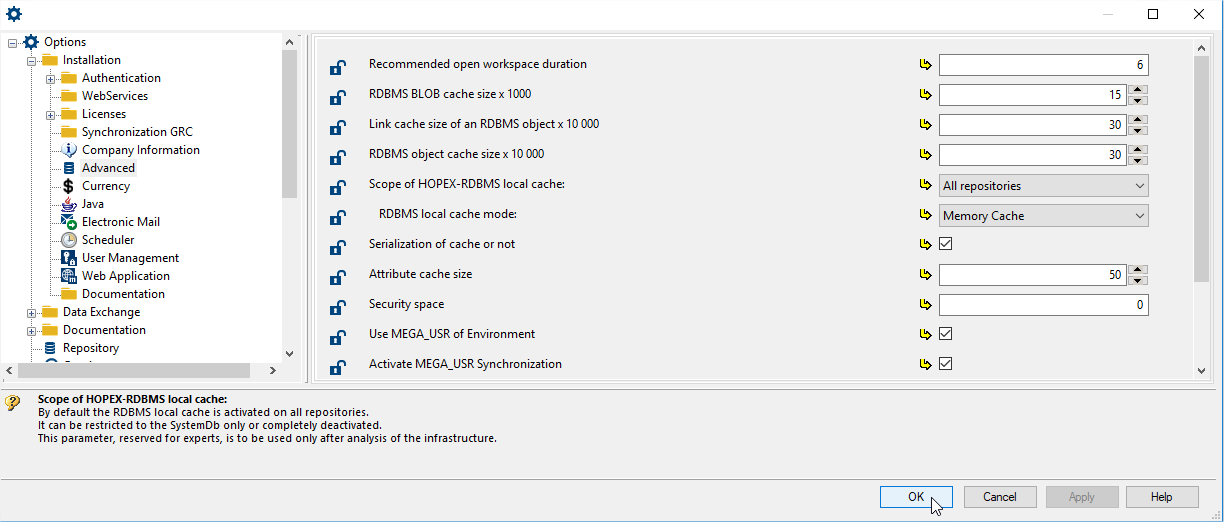
5. In the right pane, for the Scope of HOPEX-RDBMS local cache option, use the drop-down list to modify the range of that cache:
o “SystemDb only”.
o “Disabled”: if you do not want to use it, for example if your RDBMS instance is located on the same server as your application.
o “All repositories” (default value): if for example you have a network latency with your RDBMS server.
Architecture Model
All the architecture models described in the “Web Front-End Architecture Overview HOPEX V4” document can use the RDBMS storage.
Database Server
The following sections will help your database administrator (DBA) size the Database server according to the profiles and the number of HOPEX users you plan to use.
Server disk size
Each new object takes up 30 KB on a disk (object with its attributes and links).
If you activate the HOPEX Repository Log file each action on the HOPEX repository creates an object.
You should reserve 5GB on the server disk.
Reminder:
HOPEX will stop working if the datafile is full. To avoid this, the databases can be created with the autoextend property activated. If this is not possible, the datafiles growth must be monitored carefully in order to provide more space if fullness is about to be reached.
Number of connections opened by HOPEX on the RDBMS for each HOPEX workstation
This information will help you define the amount of memory (RAM) required for the database instance used to run HOPEX on the database server
• SQL Server
One connection is used for each RDBMS storage. It means that, when a HOPEX User is connected to HOPEX, two connections to SQL Server are open (one for the SystemDb and one for the User repository).
An additional connection is used for each RDBMS storage when you use the HOPEX locks.
Each opened connection uses 24 KB of memory on the SQL Server.