Finish the installation
Create share folders
All shares will be hosted on the RDBMS Server. This is a choice that needs to be made before the deployment. Here we chose the server that was alone and had a unique role.
License share
The license was generated to be hosted on the RDBMS server, and accessed on this address:
\\V-CLUST-SQL\Must
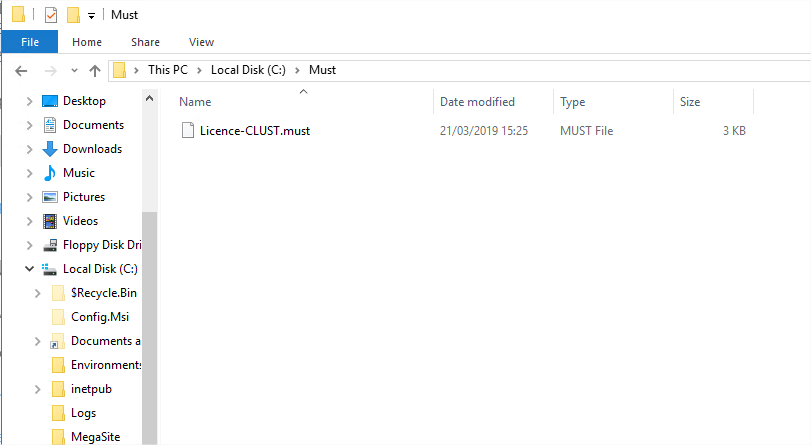
The physical folder is located on the RDBMS Server, and is “C:\Must” (note that the license file was already copied in the folder):
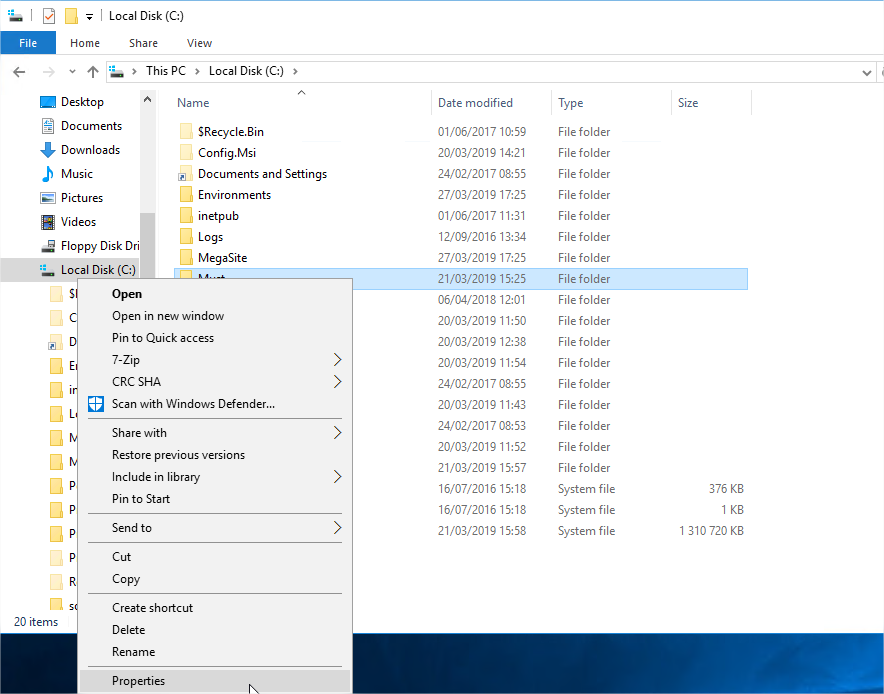
1. Open the properties of the folder:
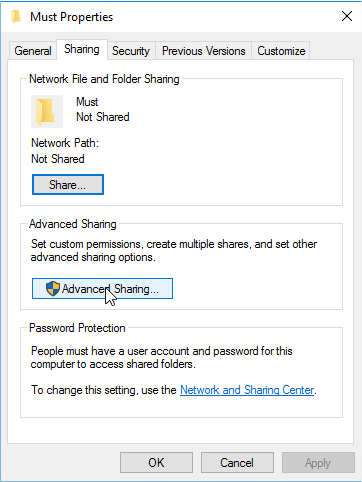
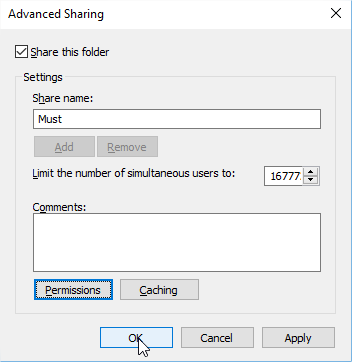
2. In the Sharing tab, click Advanced Sharing:
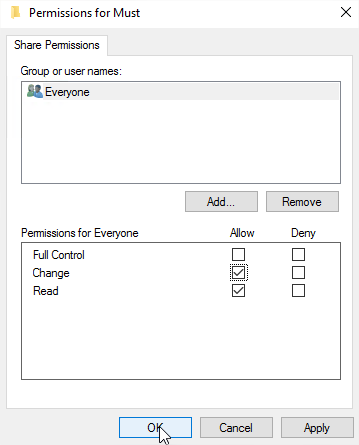
3. Select Share this folder, keep the default share name, and click Permissions: 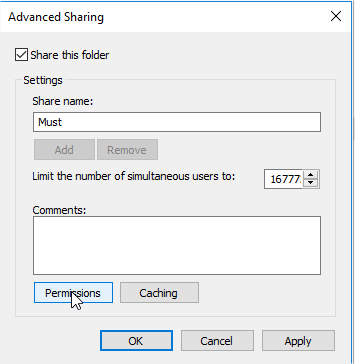
4. Allow Everyone the “Change” right, then click OK:
5. Click OK to close the advanced sharing interface:
6. In the Security tab, confirm that the “HOPEXUSR” and “HOPEXAPI” users have read/write access:
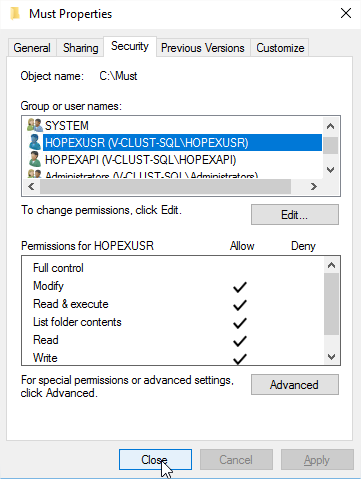
7. Close the Properties.
The share is operational.
Environment share
Perform the same steps on the “C:\Environments” folder, to have a share called \\V-CLUST-SQL\Environments :

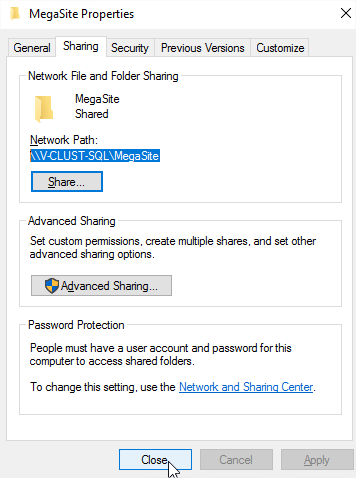
MegaSite share
Eventually, the share that will host the clustered MegaSite file on folder “C:\MegaSite” to have the share \\V-CLUST-SQL\MegaSite :
Configure the license
1. Connect to one of the application servers (in our case, on the first SSP Server V-CLUST-S1).
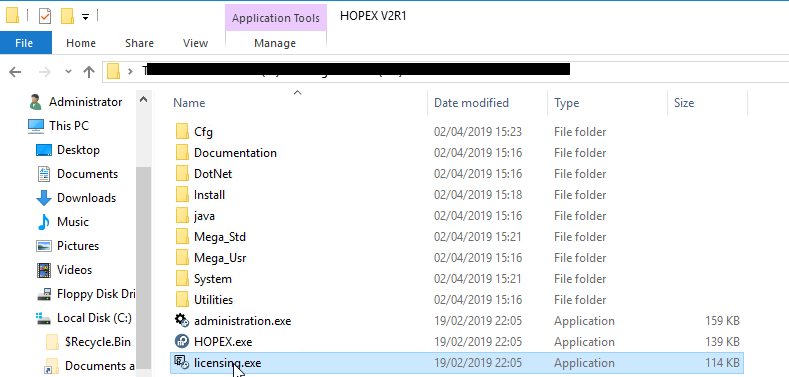
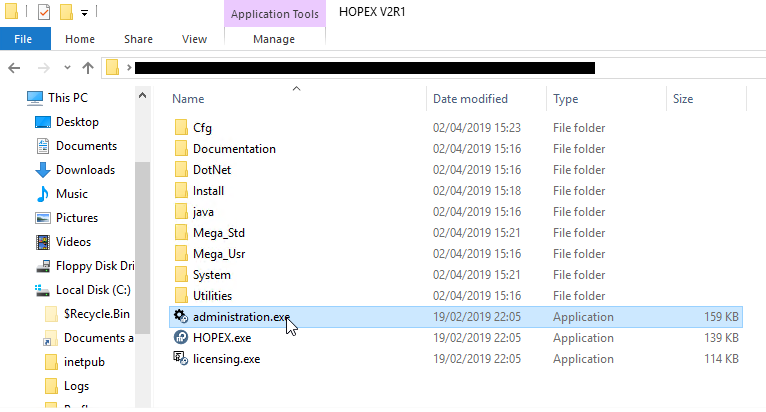
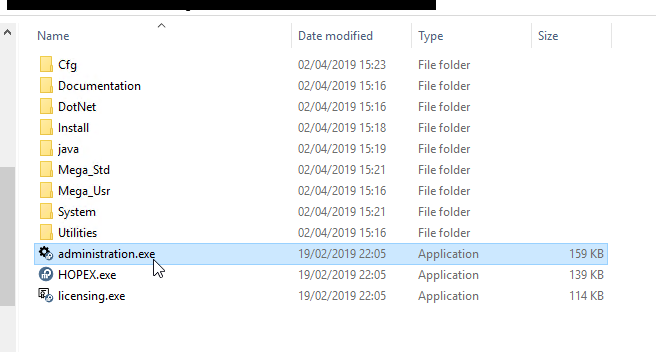
2. Go to the installation folder of Mega, and launch the « licensing.exe » tool:
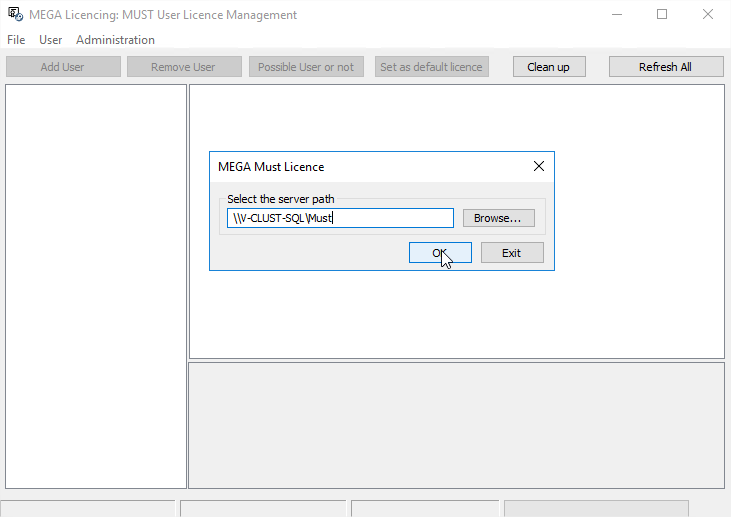
3. Enter the UNC path and click OK. In our case, it is \\V-CLUST-SQL\Must:
4. Expand the tree to check that you have the requested products:

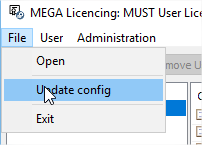
5. Select File > Update Config to write this parameter in the “MegaSite.ini” file located in the “Cfg” folder of the Mega install:
6. Keep the default folder, and click OK, then exit the tool.
7. Close the tool.
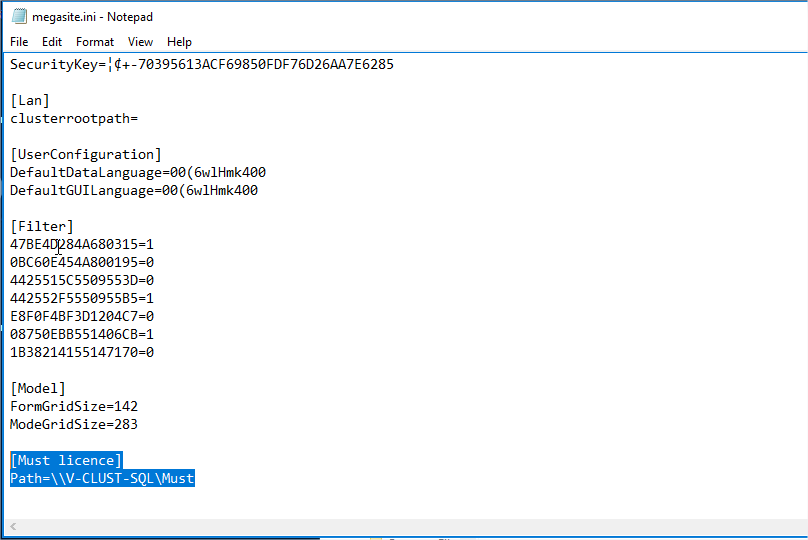
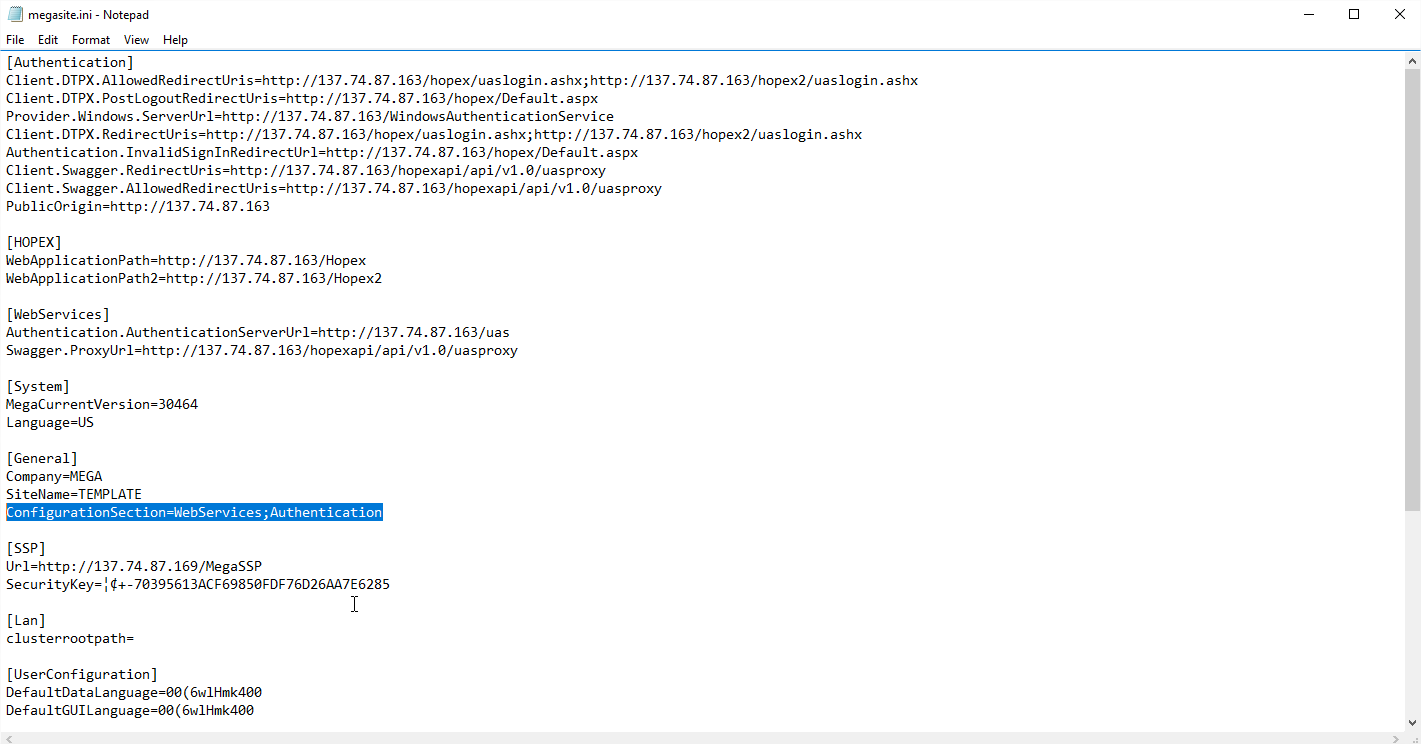
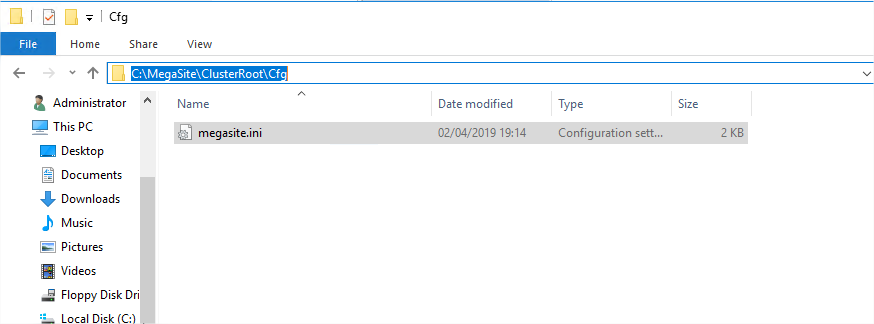
You can check that the license information is written in the “MegaSite.ini” file in “.\Cfg” folder of the Mega binaries C:\Program Files (x86)\MEGA\HOPEX V4\Cfg:

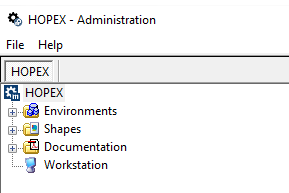
You can open “Administration.exe” to make sure that it can open:
Update the Desktop Heap
To be done on the Web Servers.
This is an internal memory of Windows. It is used by the application to manage the graphical objects of the website.
We need to increase the default value of this memory size, in order for users to connect and work in the website.
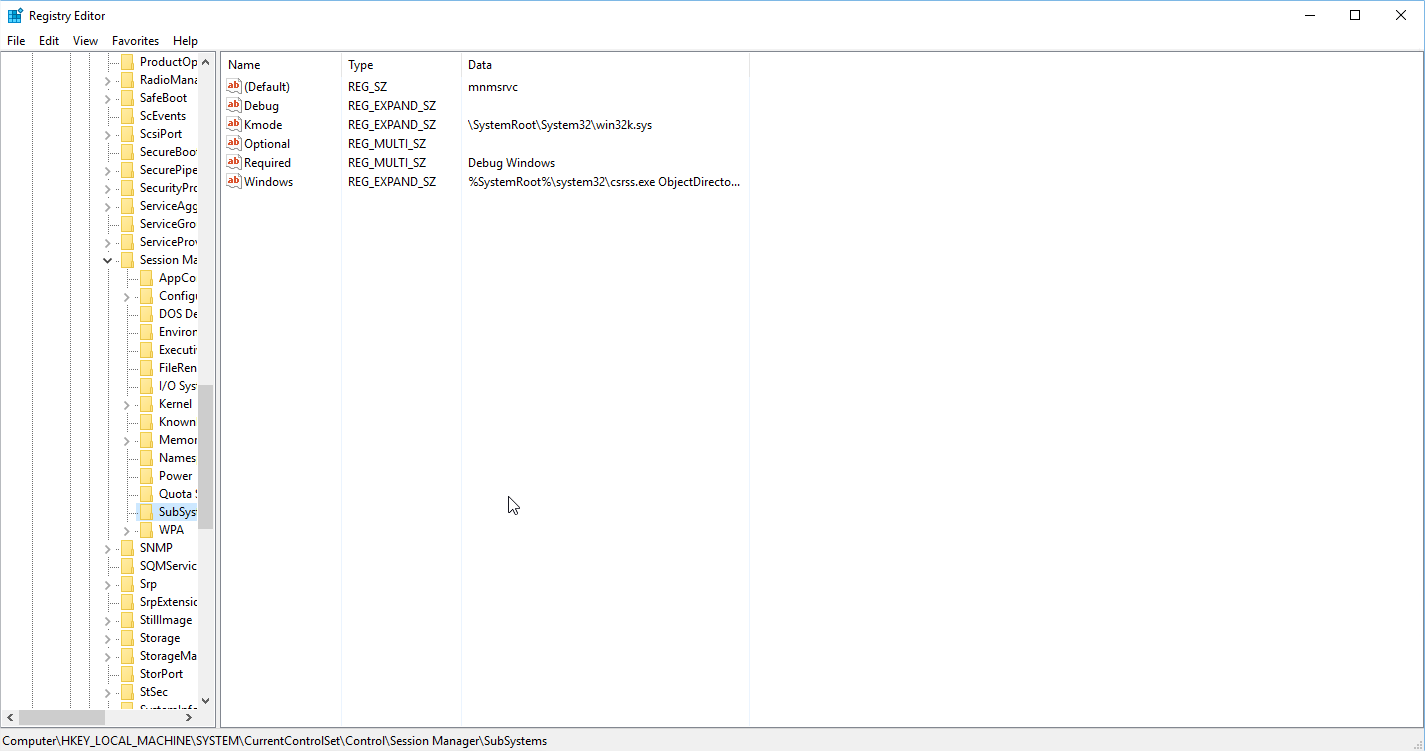
1. Open the registry:

2. Go to the key:
HKEY_LOCAL_MACHINE\SYSTEM\CurrentControlSet\Control\Session Manager\SubSystems
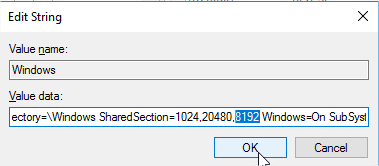
3. Update the “Windows” entry:
Find, in the string, the part called “SharedSection”, and update the 3rd number to 8192. The number is in KB, so that means that it will be set to 8MB:
Warning ! Reboot each server you apply this configuration. Otherwise, this parameter won't be taken into account.
Install SQL Server native client
To be done on all MWAS and SSP servers. Because those are the ones that will need to make direct communication with the SQL Server databases.
You can find the installation program in “C:\Program Files (x86)\MEGA\HOPEX V4\Install\RDBMS client\Sqlserver\x64”.
1. Launch it:

2. Click Next:
3. Click Next:
4. Keep the default and click Next:

5. Click Install:
6. Click Finish:
Centralize the MegaSite
Now that we have our shares, we want all servers to use the same central configuration file.
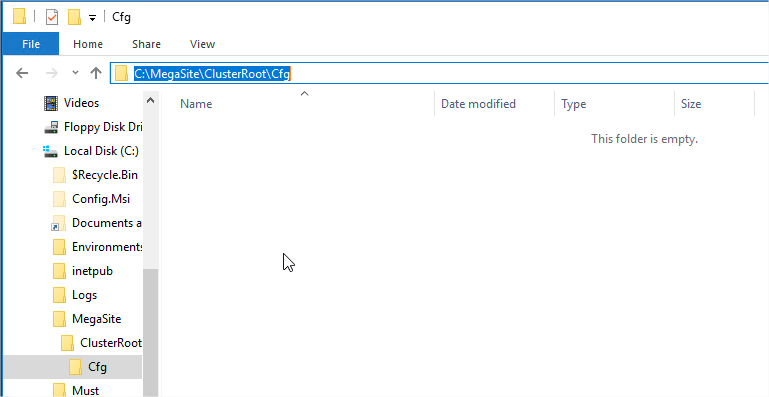
To do that, we will first create, on the RDBMS server, subfolders to the „C:\MegaSite“ folder. Two levels called „\ClusterRoot\Cfg“:
Then, we connect on the first SSP server, where we configured the licence, and copy the “MegaSite.ini” file in “C:\Program Files (x86)\MEGA\HOPEX V4\Cfg”:

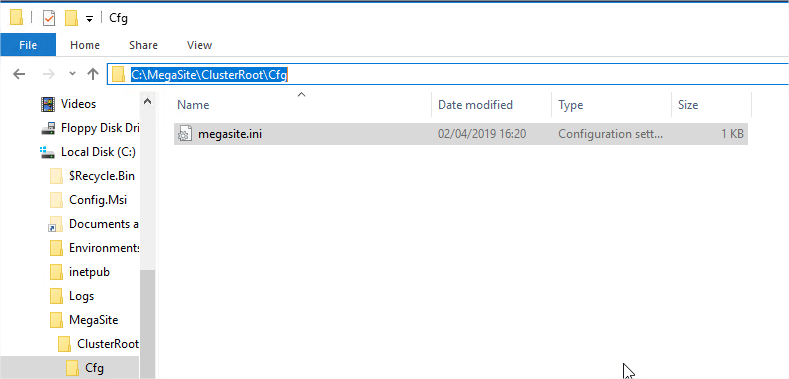
That we copy in “C:\MegaSite\ClusterRoot\Cfg” on the RDBMS Server:
After that, we need to retrieve some parts that were only written on the Web servers, linked to the UAS module to manage the authentication.
So we connect on one of the Web servers, and edit the “MegaSite.ini” file:
C:\Program Files (x86)\MEGA\HOPEX V4\Cfg
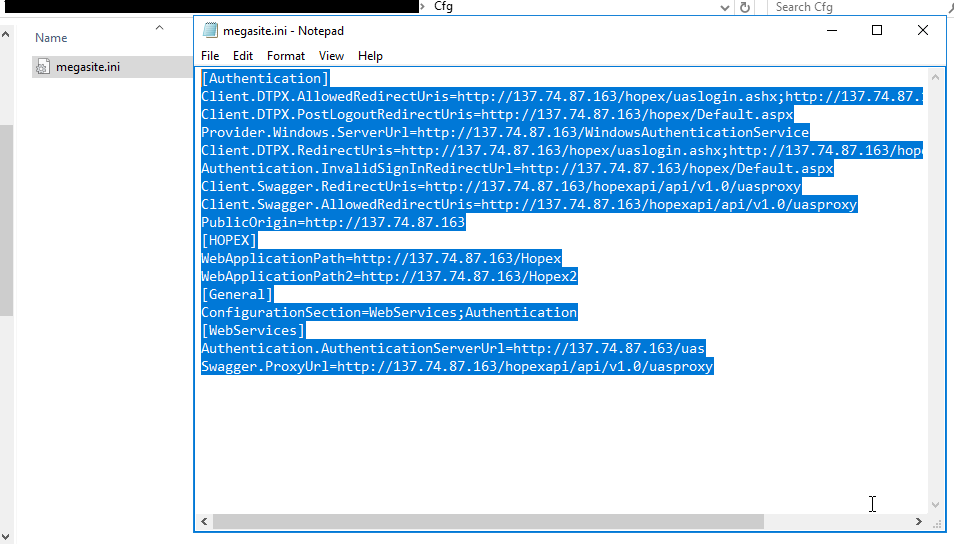
We copy all the lines.
That we paste in the file of the RDBMS Server, at the beginning of the file:
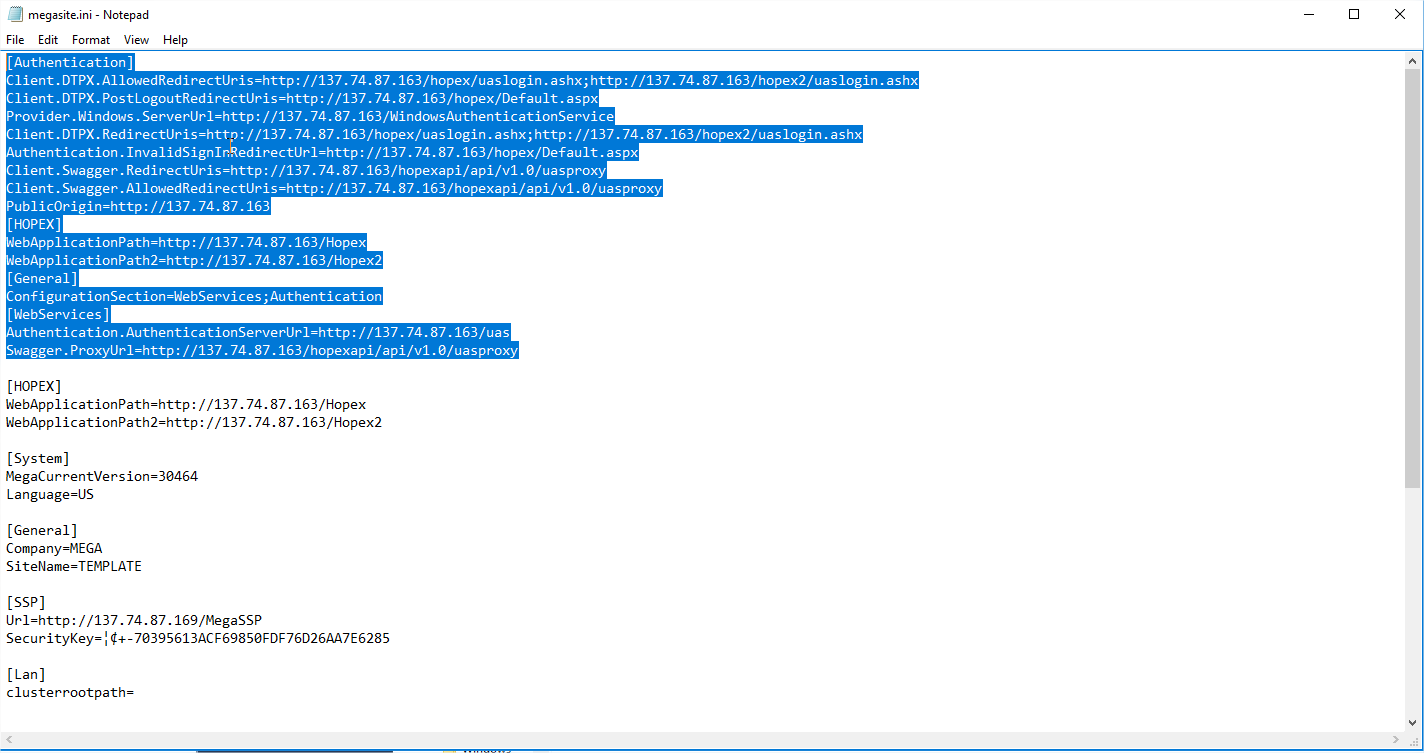
You notice that the section called [HOPEX] is duplicated. To clean this, remove the second occurrence of this section:

The [General] section is also showing in two parts now. You can transfer one line from the first part of the file to the second section, and remove the first one:
Save and close the file.
Lastly, on all MWAS and SSP servers, we edit the file located in “C:\Program Files (x86)\MEGA\HOPEX V4\Cfg”.
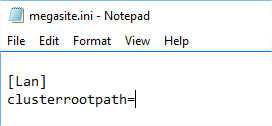
We remove everything except the [Lan] section:
And we give the “clusterrootpath” value the path of the “MegaSite” share, so in our case \\V-CLUST-SQL\MegaSite :
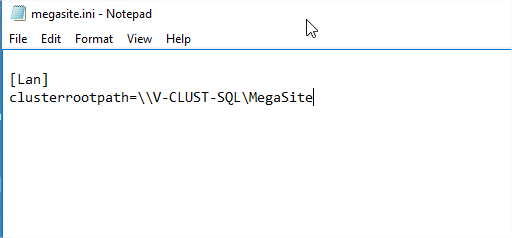
Do not provide the full path. The application will look, inside that share, in “\ClusterRoot\Cfg”, to locate the MegaSite.ini file.
We save the file. And on each server, to make sure that the configuration is valid, we open “administration.exe”. If no error message appears, it means it was able to reach the centralized file and read its configuration:

Managing the RDBMS setup
Instance and databases
We use SQL Server as our RDBMS and data storage.
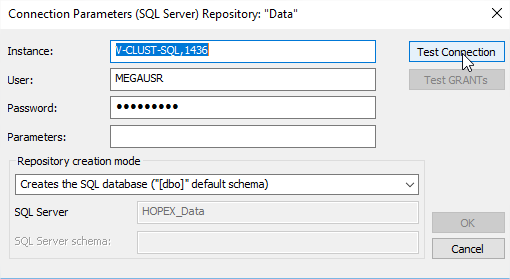
The instance name is “V-CLUST-SQL,1436”.
We use a SQL Server native account called “MEGAUSR”. Password is shared to the people that can use this platform to deploy the solution. It has “dbcreator” right at the instance level, as well as the securable “view server state”. Thus, it will be able to create new databases through Hopex.
Configure the default connection string
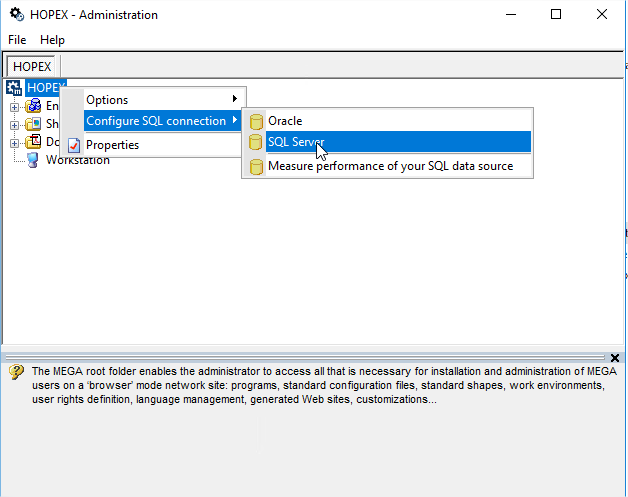
1. From one of the application servers (it does not matter which), open “administration.exe”:
2. Select HOPEX > Configure SQL Connection > SQL Server:
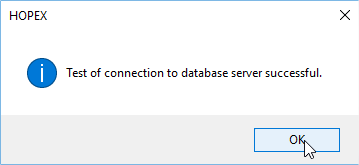
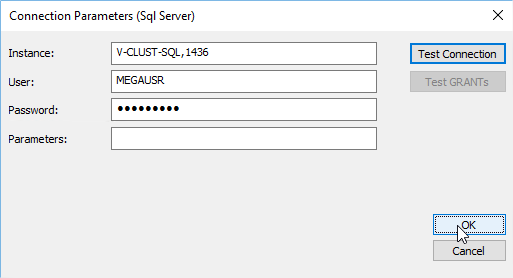
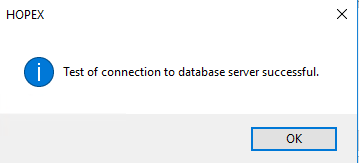
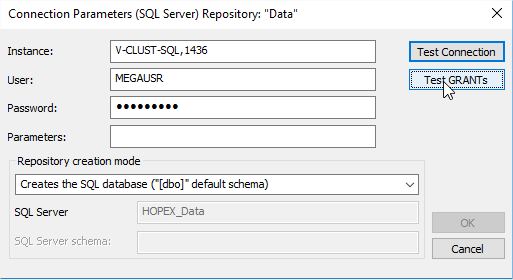
3. Provide the instance name, and the credentials of the „MEGAUSR“ native account, then click Test Connection:

4. Click OK:
5. Click OK to validate this configuration:
Creating an environment
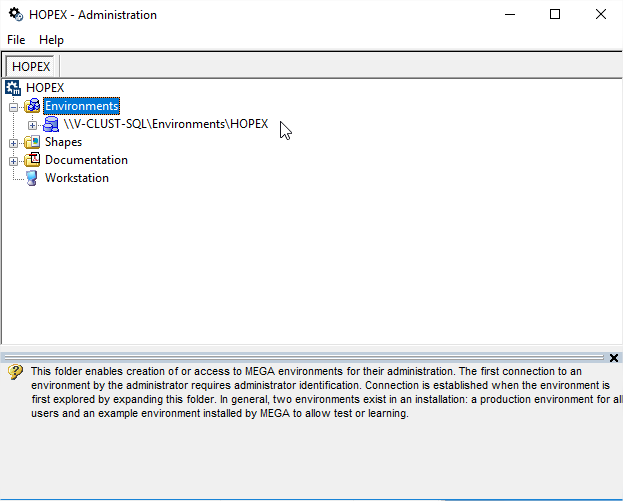
1. Open the “Administration.exe” tool from one of application servers:
2. Right-click Environments and select New:

3. Enter the name of the environment (in our case “HOPEX”), the location of the folder (\\V-CLUST-SQL\Environments) to be created, its type (SQL Server), and click OK:

4. All parameters are set by default, click Test Connection:
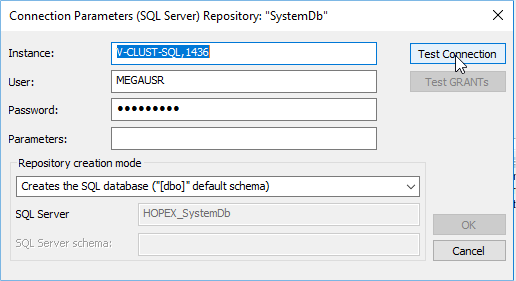
5. Click OK.

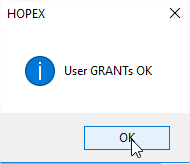
6. Click Test GRANTs:

7. Click OK to start the creation:

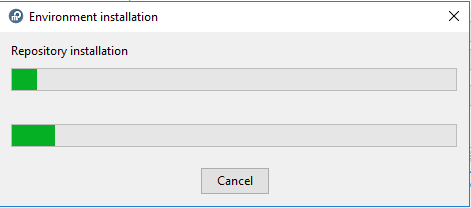
Started around 7:15pm on the 2nd of April. Finished at 11:14pm.
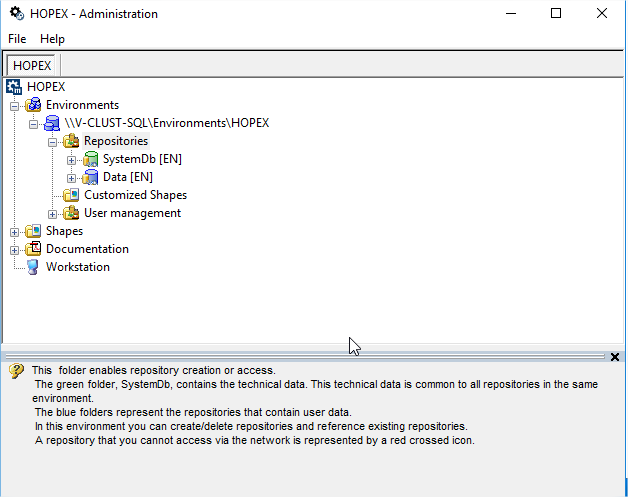
The environment is created:
1. Connect to the environment (click the + in front of the environment name), with the « system » account :
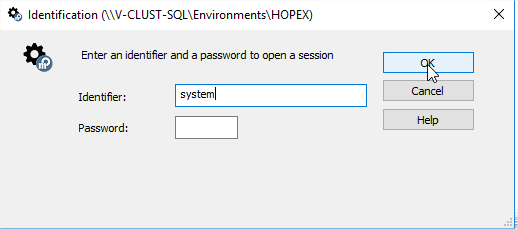
Two accounts are created by default on every new environment:
- “System” account (no password) allowing a connection to the environment in the Administration module.
- “Mega” account (no password) allowing to connect to the rich client and the web client, with basic assignments.
You can see a star at the end of the environment name, showing that some compilation is missing. This is normal, as technical data is not compiled at creation:

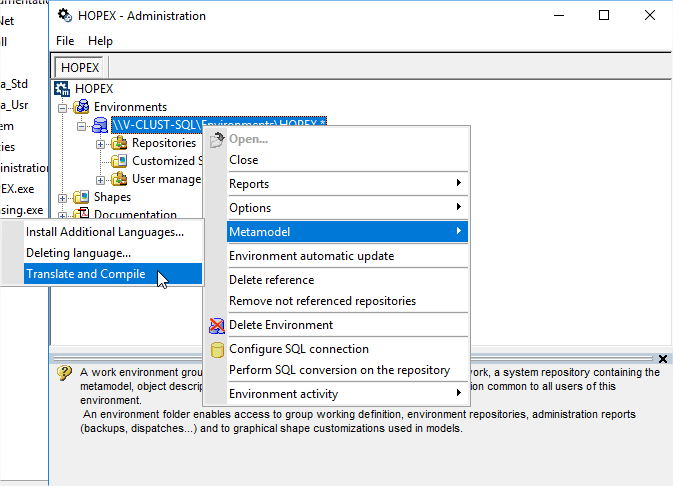
2. Right-click he environment, and select Metamodel >Translate and Compile:
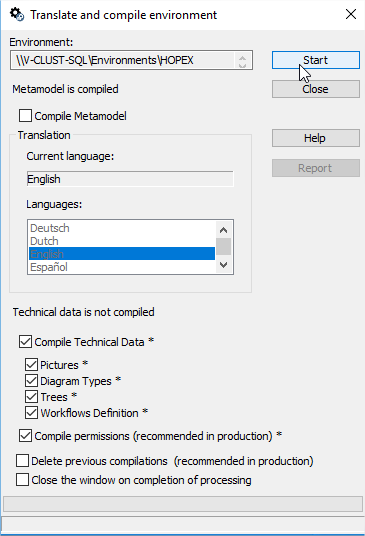
3. Clear the last check box and click Start:
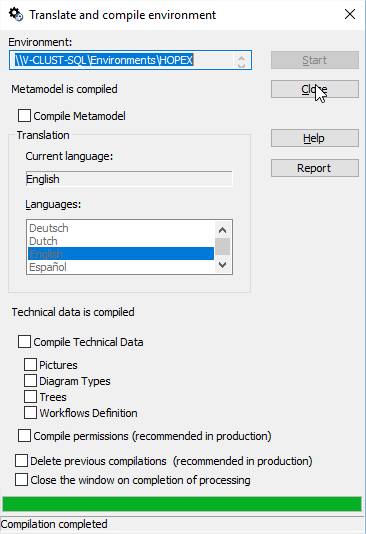
4. Let it run, and when finished, click Close :
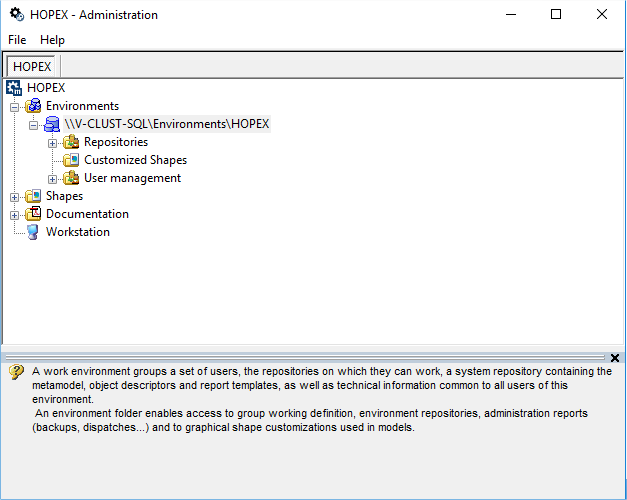
And the ‘*' at the end of the environment name disappears:
Creating a repository
Create at least one repository in the environment.
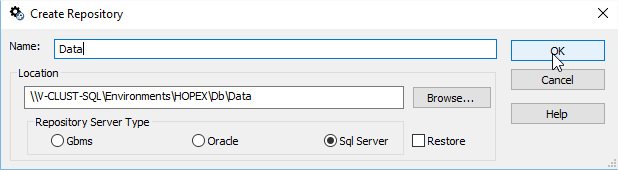
1. Right-click Repositories and select New:
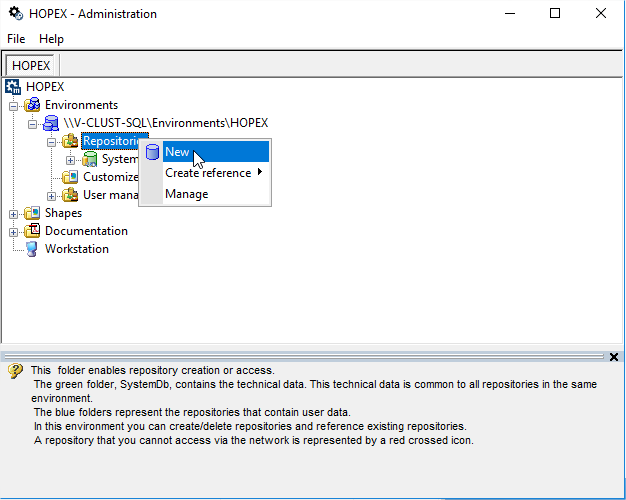
2. Enter the name of the repository (here, “Data”), check that “SQL Server” is the chosen storage, and click OK:
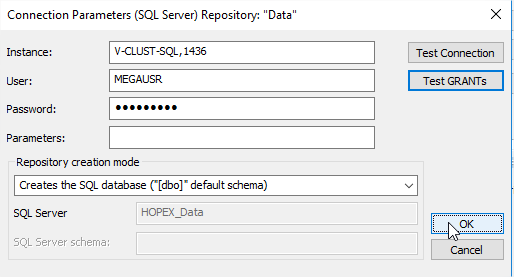
3. Keep the default settings and pass both tests:
4. Click OK in the previous window to start the creation, and let it run (a minute or two) :
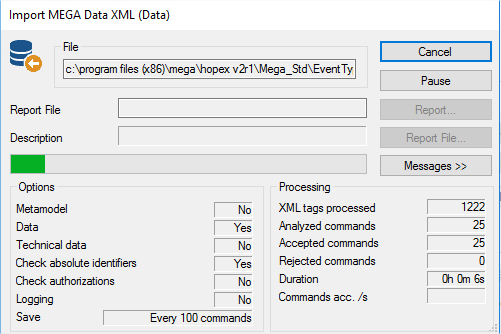
The repository is created:
Perform the same steps to create some additional repositories, if necessary. In our example, it is not relevant.
Configure the mega account
You need to be connected to the environment, using the „administration.exe“ tool.
Provide a password
Open „Manage“ for the „Users“ in the environment:

Go to the „Logins“ tab, select the „Mega“ user, right-click and choose „Password“:
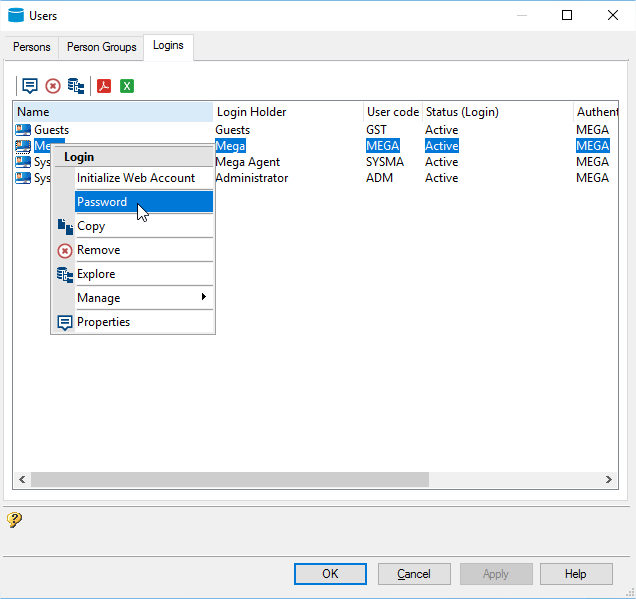
Provide an easy password. In our case we enter „Hopex“. As it will be updated later on when connecting to the web client:
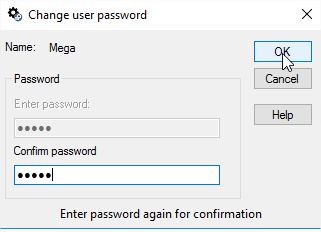
Close the Users interface after applying this password.
Create assignments
Then, in „Manage“ of „Assignment of Profiles“:
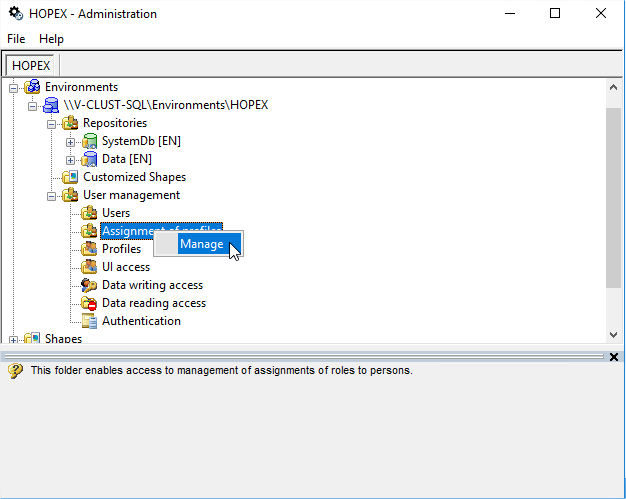
Select the „Mega“ user and click the ‚+‘ button:

In the dropdown list, select the profiles that you are interested in, based on your license. Here, we will just add the „HOPEX Customizer“ one:
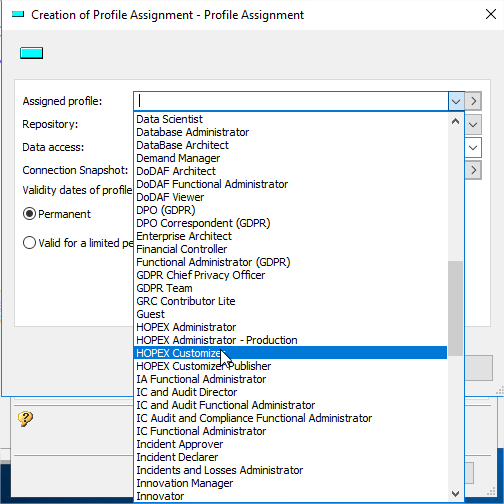
And click „OK“:

Add more assigments if necessary. Otherwise, you can close the window when the list is correct:

Configure the services
To be done on all MWAS and SSP Servers.
Because we have a cluster deployment, and have shared folders containing licenses/environments/megasite, that all need to be accessed by the different components of the application, some Windows Services are installed with the application. Two of them need to be updated, so that the account that runs them, has access to the different shares of the platform:
• Hopex Service Watchdog.
• Hopex Site Service Provider.
The goal is to run those services with the impersonate user (“Windows users for Mega” section).
Depending on the type of server, you will find one or two of those services:
• Nothing on the Web Servers.
• Only the Watchdog service on the MWAS Servers.
• Both services on the SSP Servers.
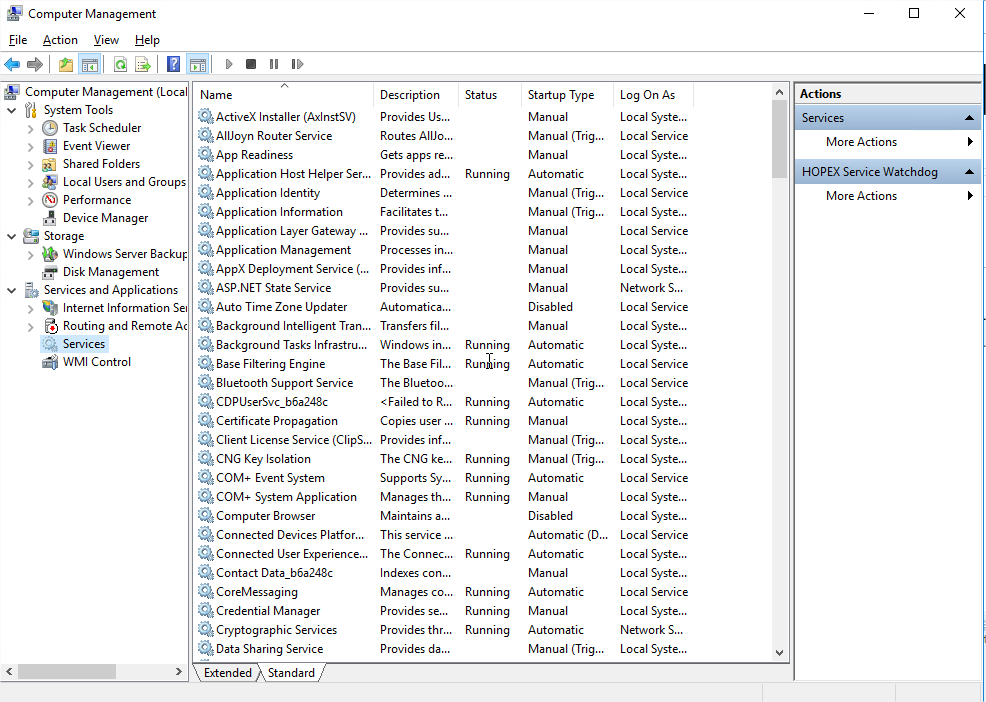
First, open the “Computer Management” interface:

And go to “Services”:
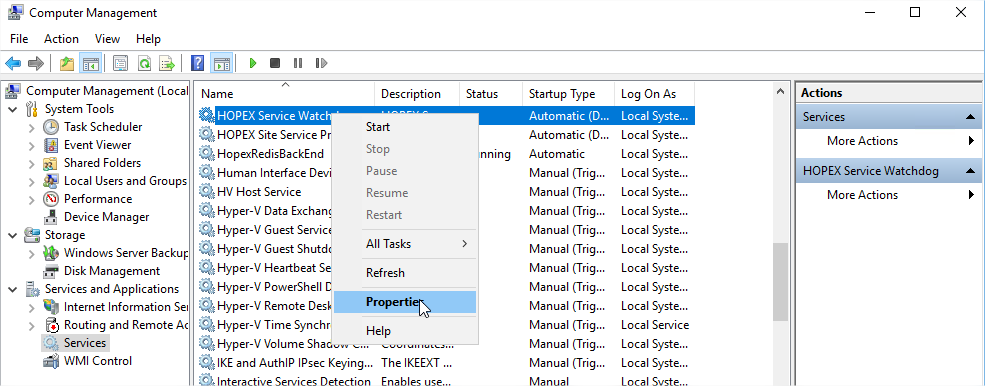
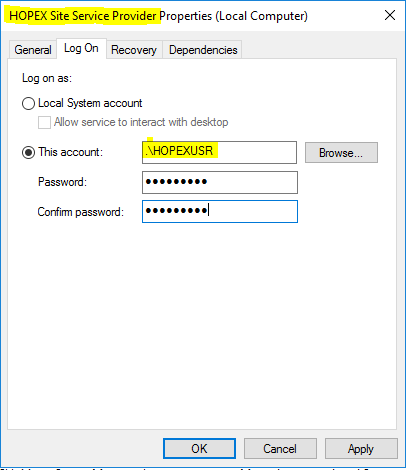
Locate the first service to update (here “Hopex Service Watchdog”) and open its properties:
In the “Log On” tab, select “This account”, and put the proper user. We will use “.\HOPEXUSR” (the “.\” forcing the use of a local account).
With its password, and click “OK” to validate:
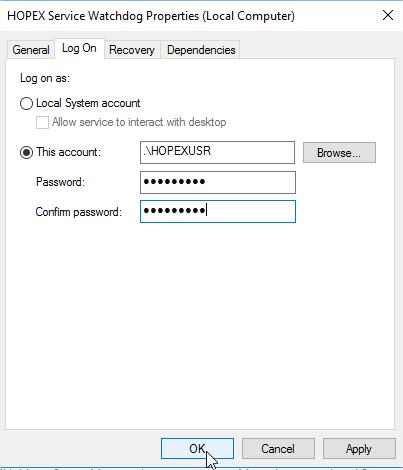
And on “OK” again if the service was started:
Repeat those actions for the “Hopex Site Service Provider” on the SSP servers:
Declare the SSP nodes
When you have multiple SSP Servers, they need to be declared in the MegaSite.ini file, explicitly, so that they can talk to each other to share the information about the activity of the platform, and write in a centralized place the Supervision log.
Since it is not a standard option, you need to edit the centralized “MegaSite.ini” file.
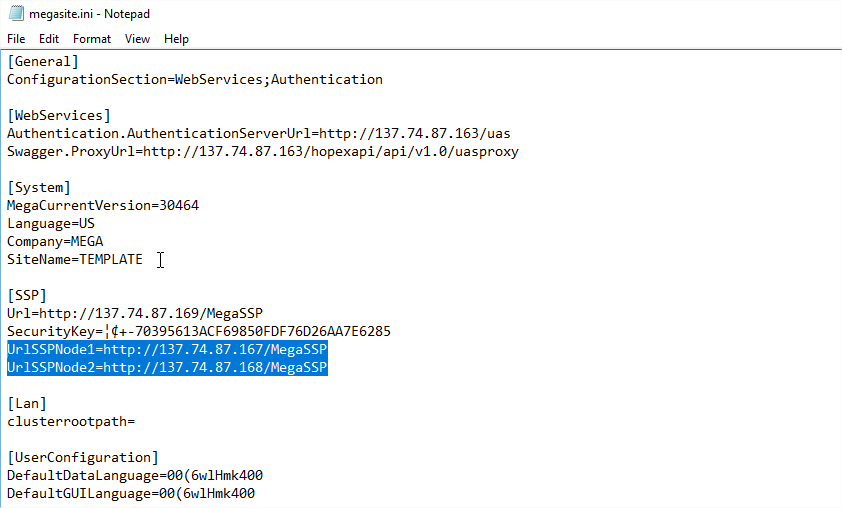
In our case, go to the RDBMS Server, and open the file in “C:\MegaSite\ClusterRoot\Cfg”:
Go to the [SSP] section, and add new lines. Each node needs to be listed with its direct URL. Here we have two nodes, so we will create variables “UrlSSPNode1” and “UrlSSPNode2”.
You get the idea if you have more than two nodes, on how to name the other variables.
The URL for each server is the same as the one of the Load Balancer, but it targets directly the servers instead of going through the LB. We use IPs in this deployment, so it looks like this:
Save the file and restart the application so it is taken into account.
Test the web client
Prerequisite: the application must be started on all servers. See Annex for the procedure.
The URL is:
We are redirected to the UAS authentication page. When we enter the credentials of the “mega” user (at that time, password is “Hopex”):

We then choose an assignment, like „Application Architect“, check the box to agree to the privacy policy (only for the first connection), and click „Login“:

As the password was set up by the „system“ account in the administration tool, the application forces the user to set up its own password with the complexity show below:

We provide a strong password and click „Apply“:

The password is updated:

The desktop is showing properly:

Click the „Logout“ button:

Click „Yes“, otherwise the password change won't be done and you will have to do it again:
IIS Tuning
To be done on the Web Servers only.
Application pools recycling
We need to configure the “HOPEX” application pool on each web server, in order to avoid an automatic recycling of the processes during users' activity.
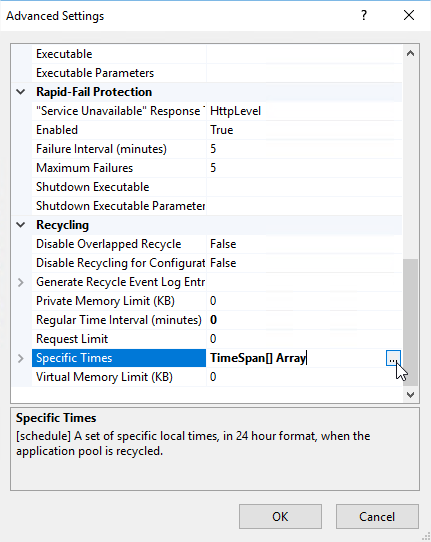
Go to the IIS Management console, then to the "Application Pools" section, select the “HOPEX” one, and open the “Advanced settings”:

Select the “Specific Times” line, and click the “…” button:
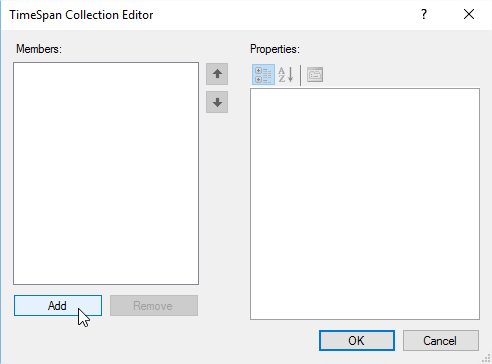
Click “Add” :
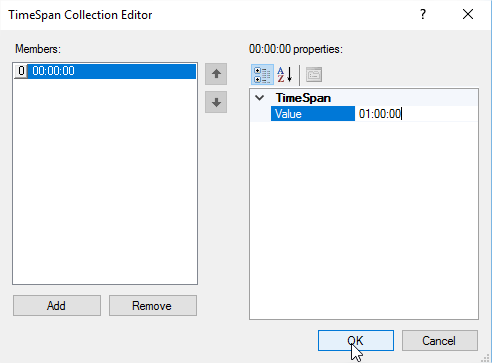
We decided to recycle every night at 1am, and validate:
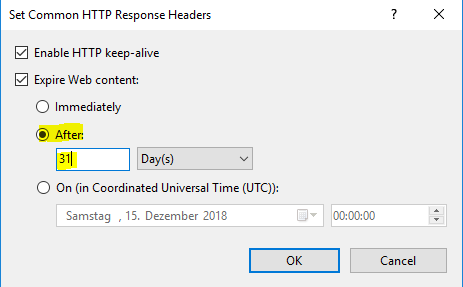
Manage expiration of HTTP response headers
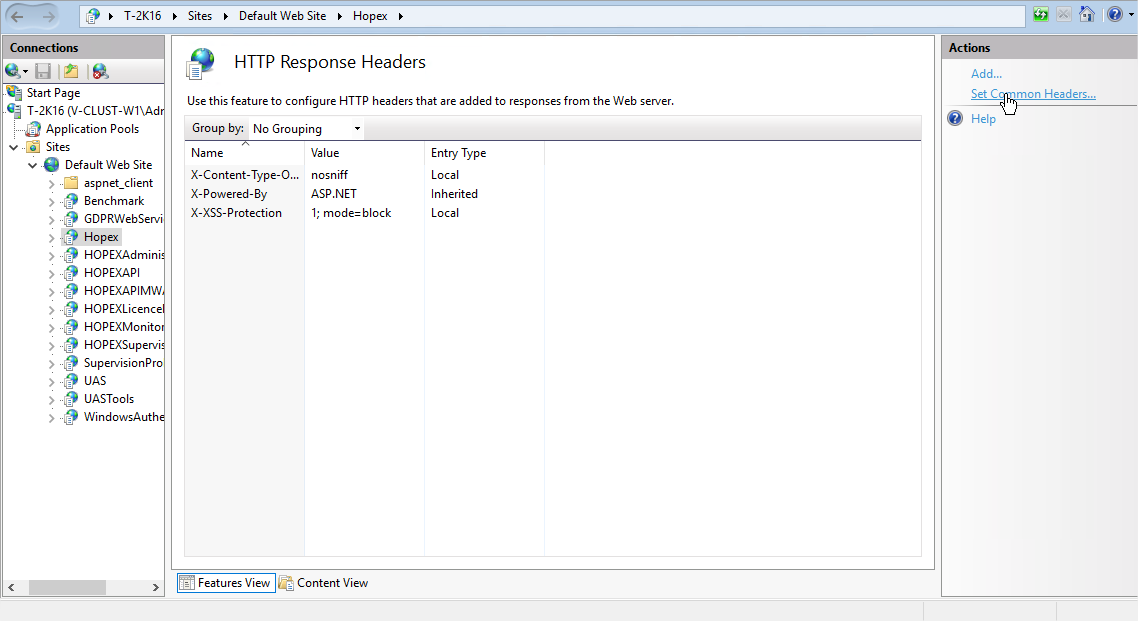
On the “HOPEX” web application within your website, we open the feature called “HTTP Response Headers”:
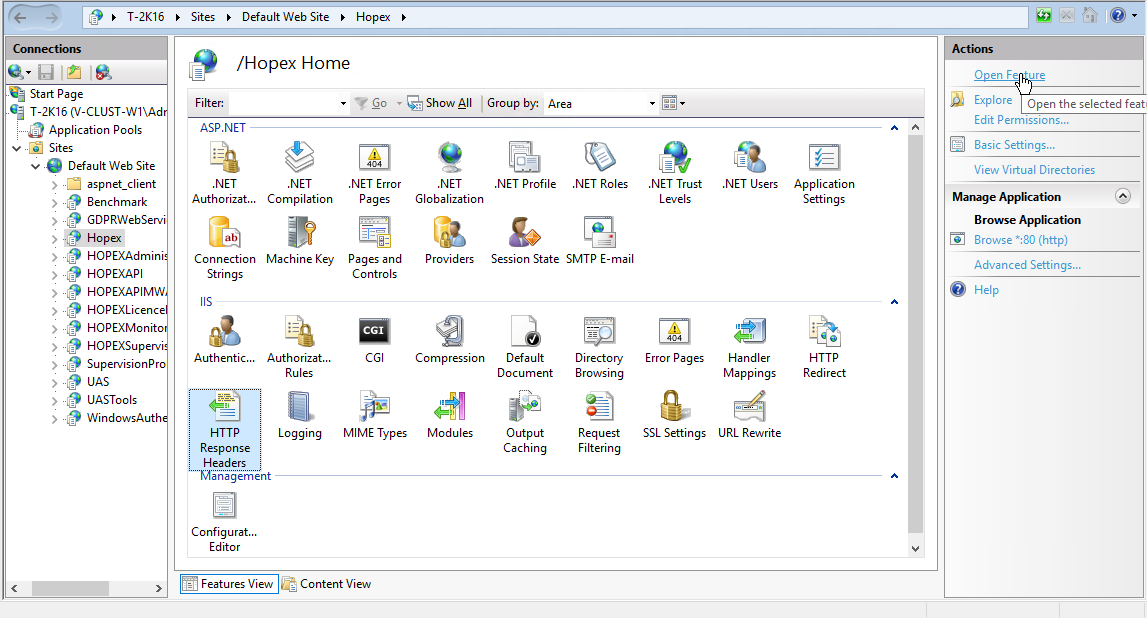
We click "Set Common Headers…”:
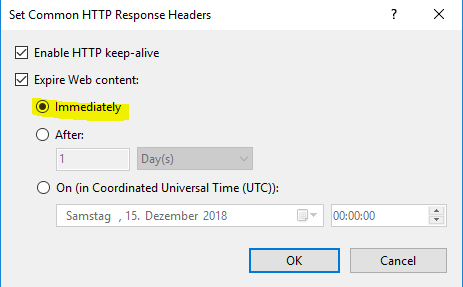
We check the box “Expire web content” and we keep the “Immediately” setting :
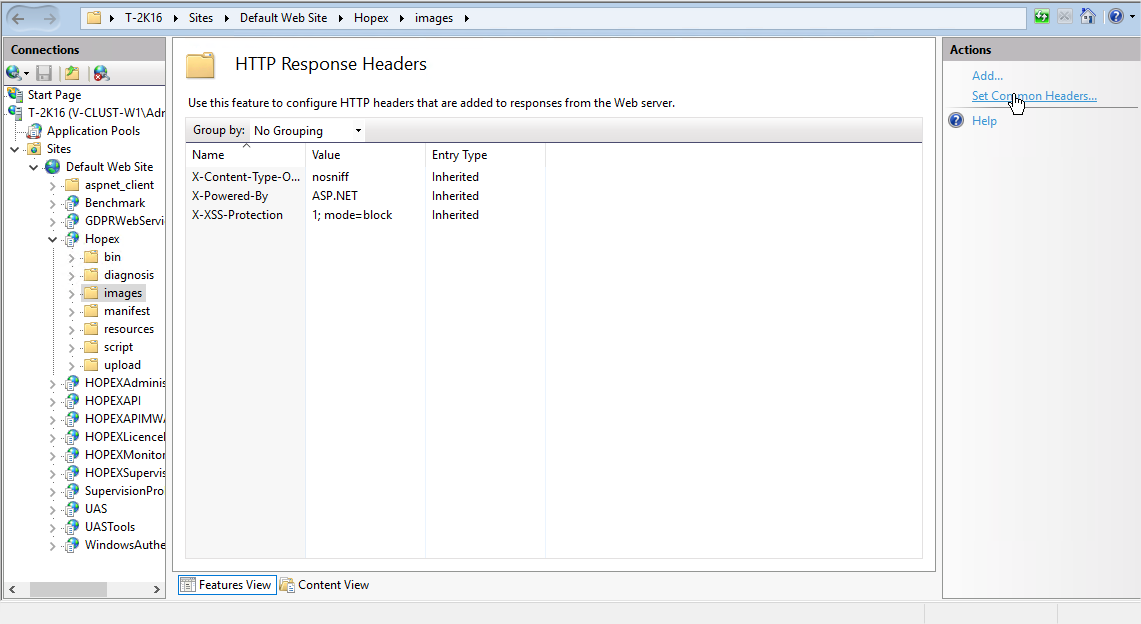
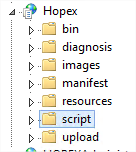
Then, we expand the web application, we select the “images” folder, and we open the same feature:

And click the same link:
This time we change the setting so that it expires after 31 days:
We do the same on the “script” folder:
Diagnostic Tools
We ran a series of tests in order to estimate the performance that could be attained on the Production platform.
The tools must run on all MWAS and SSP Servers.
Latency test with hrping
The latency between the application server and the database server is crucial. It is important for it to be small. Ideally, lower than 1ms.
On this installation, it was put in the “C:\sources\hrping” folder:
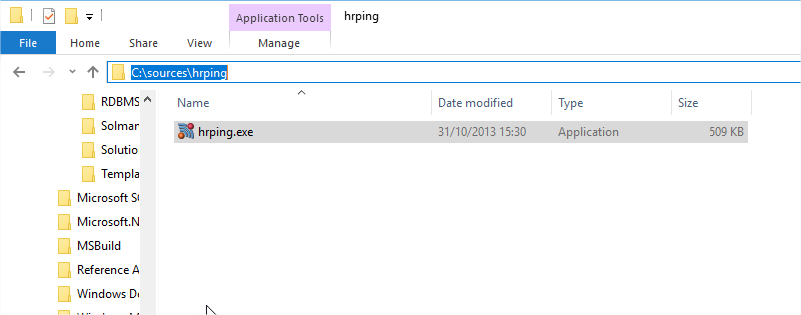
Otherwise you can get it from this link: https://www.cfos.de/en/ping/ping.htm. Only the “hrping.exe” is needed.
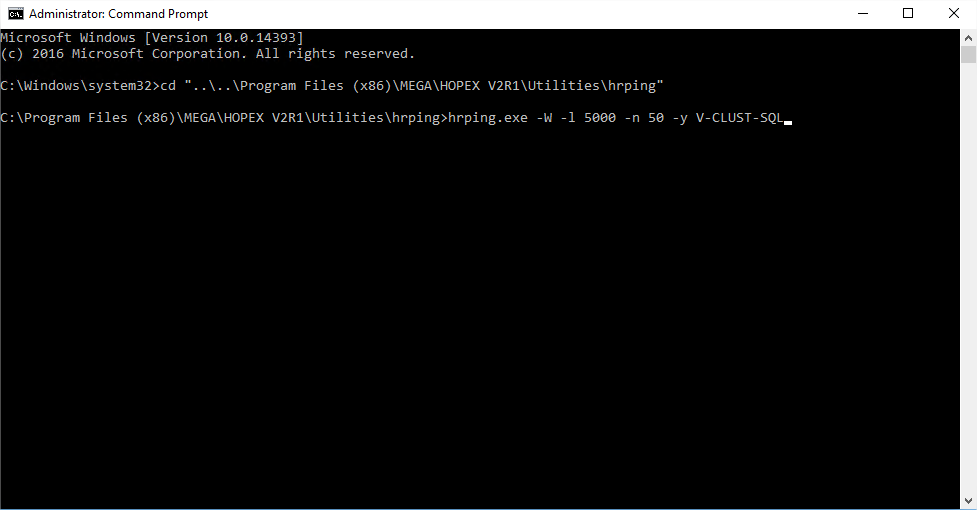
Then we copied it on all MWAS and SSP servers in “C:\Program Files (x86)\MEGA\HOPEX V4\Utilities\hrping”:

We then must execute the following command between the two servers.
Please note that the first execution on a server of the hrping tool requires to accept the disclaimer. We just must parse through them and reply “Y” for yes at the end to accept.
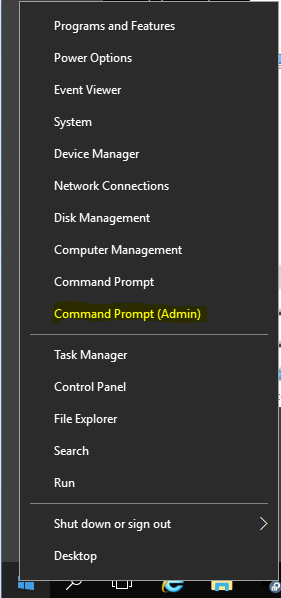
Also, when the UACs are activated on a server, the command invite window needs to be run with a “Run as Administrator” option:
Explaining of the command line for hrping:
hrping.exe -W -l 5000 -n 50 -y V-CLUST-SQL
The parameters:
-W : warm-up, the 1st ping is not taken into account
-l number : size of the packet, in bytes
-n number : number of sent pings
-y : regroup the results instead of writing line after line
Press “Enter”, then “Esc”, to accept to read the disclaimer, and go at the end. Then press J to reply Ja to the question at the end.
First MWAS Server (V-CLUST-MW1)
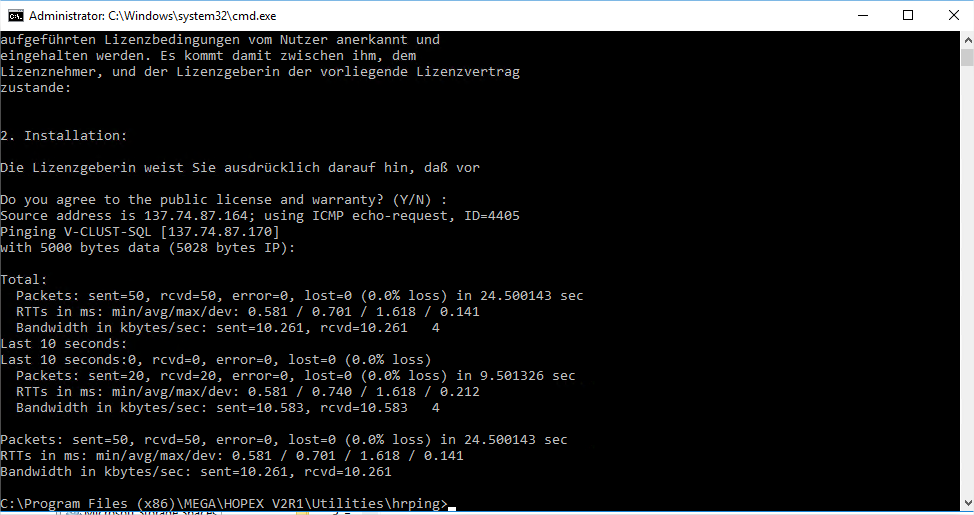
Source address is 137.74.87.164; using ICMP echo-request, ID=4405
Pinging V-CLUST-SQL [137.74.87.170]
with 5000 bytes data (5028 bytes IP):
Total:
Packets: sent=50, rcvd=50, error=0, lost=0 (0.0% loss) in 24.500143 sec
RTTs in ms: min/avg/max/dev: 0.581 / 0.701 / 1.618 / 0.141
Bandwidth in kbytes/sec: sent=10.261, rcvd=10.261 4
Last 10 seconds:
Last 10 seconds:0, rcvd=0, error=0, lost=0 (0.0% loss)
Packets: sent=20, rcvd=20, error=0, lost=0 (0.0% loss) in 9.501326 sec
RTTs in ms: min/avg/max/dev: 0.581 / 0.740 / 1.618 / 0.212
Bandwidth in kbytes/sec: sent=10.583, rcvd=10.583 4
Packets: sent=50, rcvd=50, error=0, lost=0 (0.0% loss) in 24.500143 sec
RTTs in ms: min/avg/max/dev: 0.581 / 0.701 / 1.618 / 0.141
Bandwidth in kbytes/sec: sent=10.261, rcvd=10.261
Second MWAS Server (V-CLUST-MW2)

Source address is 137.74.87.165; using ICMP echo-request, ID=e407
Pinging V-CLUST-SQL [137.74.87.170]
with 5000 bytes data (5028 bytes IP):
Total:
Packets: sent=50, rcvd=50, error=0, lost=0 (0.0% loss) in 24.500359 sec
RTTs in ms: min/avg/max/dev: 0.399 / 0.500 / 0.655 / 0.050
Bandwidth in kbytes/sec: sent=10.261, rcvd=10.261
Last 10 seconds:
Last 10 seconds:0, rcvd=0, error=0, lost=0 (0.0% loss)
Packets: sent=20, rcvd=20, error=0, lost=0 (0.0% loss) in 9.501167 sec
RTTs in ms: min/avg/max/dev: 0.441 / 0.522 / 0.655 / 0.054
Bandwidth in kbytes/sec: sent=10.583, rcvd=10.583
Packets: sent=50, rcvd=50, error=0, lost=0 (0.0% loss) in 24.500359 sec
RTTs in ms: min/avg/max/dev: 0.399 / 0.500 / 0.655 / 0.050
Bandwidth in kbytes/sec: sent=10.261, rcvd=10.261
First SSP Server (V-CLUST-S1)

Source address is 137.74.87.167; using ICMP echo-request, ID=4808
Pinging V-CLUST-SQL [137.74.87.170]
with 5000 bytes data (5028 bytes IP):
Total:
Packets: sent=50, rcvd=50, error=0, lost=0 (0.0% loss) in 24.484270 sec
RTTs in ms: min/avg/max/dev: 0.545 / 0.668 / 1.083 / 0.099
Bandwidth in kbytes/sec: sent=10.267, rcvd=10.267 6
Last 10 seconds:
Last 10 seconds:0, rcvd=0, error=0, lost=0 (0.0% loss)
Packets: sent=21, rcvd=21, error=0, lost=0 (0.0% loss) in 9.985041 sec
RTTs in ms: min/avg/max/dev: 0.545 / 0.646 / 0.760 / 0.045
Bandwidth in kbytes/sec: sent=10.574, rcvd=10.574 6
Packets: sent=50, rcvd=50, error=0, lost=0 (0.0% loss) in 24.484270 sec
RTTs in ms: min/avg/max/dev: 0.545 / 0.668 / 1.083 / 0.099
Bandwidth in kbytes/sec: sent=10.267, rcvd=10.267
Second SSP Server (V-CLUST-S2)

Source address is 137.74.87.168; using ICMP echo-request, ID=ac16
Pinging V-CLUST-SQL [137.74.87.170]
with 5000 bytes data (5028 bytes IP):
Total:
Packets: sent=50, rcvd=50, error=0, lost=0 (0.0% loss) in 24.499875 sec
RTTs in ms: min/avg/max/dev: 0.536 / 0.699 / 1.070 / 0.074
Bandwidth in kbytes/sec: sent=10.261, rcvd=10.261 3
Last 10 seconds:
Last 10 seconds:0, rcvd=0, error=0, lost=0 (0.0% loss)
Packets: sent=20, rcvd=20, error=0, lost=0 (0.0% loss) in 9.500592 sec
RTTs in ms: min/avg/max/dev: 0.615 / 0.718 / 1.070 / 0.092
Bandwidth in kbytes/sec: sent=10.584, rcvd=10.584 3
Packets: sent=50, rcvd=50, error=0, lost=0 (0.0% loss) in 24.499875 sec
RTTs in ms: min/avg/max/dev: 0.536 / 0.699 / 1.070 / 0.074
Bandwidth in kbytes/sec: sent=10.261, rcvd=10.261
Conclusion
Network latency is below the recommended value, which is 1ms. This is what we want to have between the application servers and the database server.
“RDBMS Diagnostic” Tool
This tool allows us to make a kind of stress test between the application and the database, by playing different types of SQL queries on a database and measure the response time.
It is split between different types of tests to check the infrastructure, and the capability of the database server to execute, as fast as possible, queries that are typical of how the application is going to trigger.
We will use the already existing “HOPEX_SystemDb” database to run the test.
Please note that the version delivered with Update 04 doesn't work. We got the version from Update 03 FP01 and copied it on all application servers in “C:\sources”:
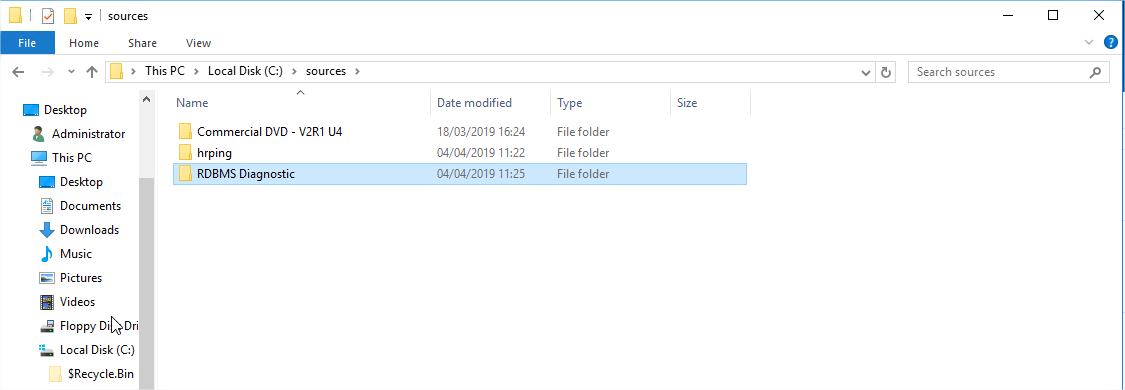
First, we need to prepare the servers so that the tool can be launched.
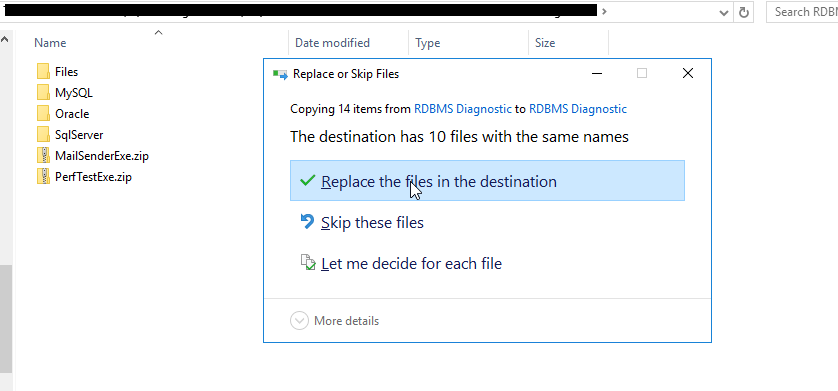
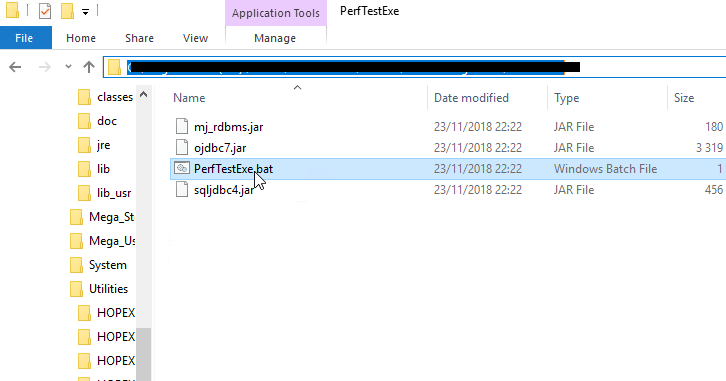
We go to the “C:\Program Files (x86)\MEGA\HOPEX V4\Utilities\RDBMS Diagnostic” folder, in the Mega binaries, and replace the content of the “RDBMS Diagnostic” with what was put in the sources:
Then we extract the content of the “PerfTestExe.zip” archive file:


We now need to create an environment variable, so that the tool can know where the Java executable is being stored.
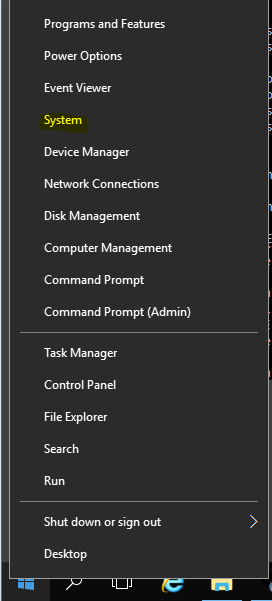
We open the “System” console (right-click the “Start” button):
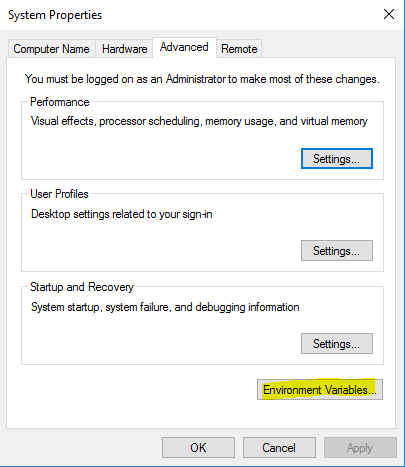
We click “Advanced system settings”:

In the “Advanced” tab, we click “Environment variables”:
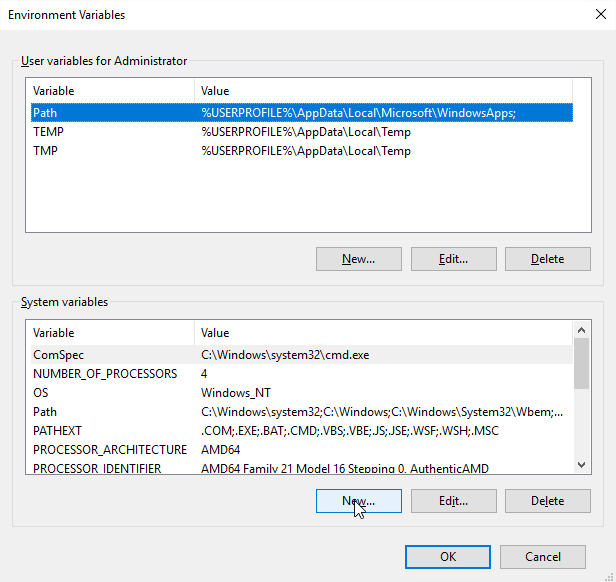
In “System variables” we click “New”:
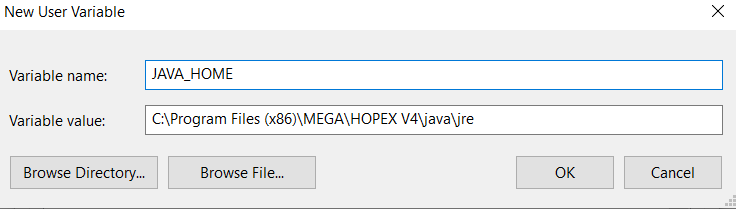
We create the variable called “JAVA_HOME” that will target the jre folder of the Mega binaries, so in this installation it is in “C:\Program Files (x86)\MEGA\HOPEX V4\java\jre”, on click “OK” to validate:
The variable is created, we can click “OK” and close this console:

Now we can go back to “C:\Program Files (x86)\MEGA\HOPEX V4\Utilities\RDBMS Diagnostic\PerfTestExe” and launch the “PerfTestExe.bat” file:
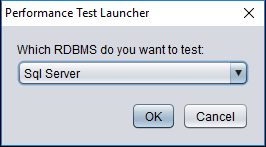
Choose “SQL Server” in the dropdown list:
Fill-in the instance name (be careful, in our case, the syntax is a bit different here than in Hopex, it is “V-CLUST-SQL:1436”). We chose “HOPEX_SystemDb” for the database. And “MEGAUSR” for the SQL account:
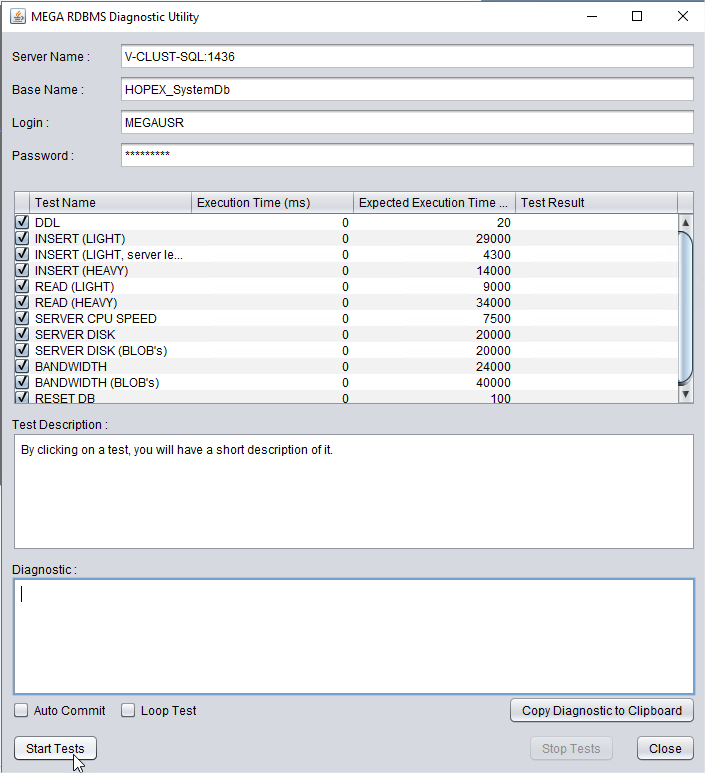
Then click « Start Tests ». And do it twice, to have better results.
First MWAS Server (V-CLUST-MW1)

Results of the test in text mode:
###### Start Batch Test: Thu Apr 04 11:34:11 CEST 2019 ######
###### Autocommit mode is OFF ######
TEST 1 (DDL):
NOK: time=47ms , expected time=20ms
TEST 2 (INSERT (LIGHT)):
PASSABLE: time=35952ms , expected time=29000ms
TEST 3 (INSERT (LIGHT, server level)):
OK: time=3500ms , expected time=4300ms
TEST 4 (INSERT (HEAVY)):
PASSABLE: time=17078ms , expected time=14000ms
TEST 5 (READ (LIGHT)):
OK: time=6515ms , expected time=9000ms
TEST 6 (READ (HEAVY)):
OK: time=23922ms , expected time=34000ms
TEST 7 (SERVER CPU SPEED):
OK: time=6250ms , expected time=7500ms
TEST 8 (SERVER DISK):
OK: time=20780ms , expected time=20000ms
TEST 9 (SERVER DISK (BLOB's)):
OK: time=17406ms , expected time=20000ms
TEST 10 (BANDWIDTH):
OK: time=14578ms , expected time=24000ms
TEST 11 (BANDWIDTH (BLOB's)):
OK: time=5078ms , expected time=40000ms
TEST 12 (RESET DB):
OK: time=16ms , expected time=100ms
##### Batch Test Finished: Thu Apr 04 11:36:43 CEST 2019 #####
###### Start Batch Test: Thu Apr 04 11:36:49 CEST 2019 ######
###### Autocommit mode is OFF ######
TEST 1 (DDL):
OK: time=16ms , expected time=20ms
TEST 2 (INSERT (LIGHT)):
NOK: time=38702ms , expected time=29000ms
TEST 3 (INSERT (LIGHT, server level)):
OK: time=3063ms , expected time=4300ms
TEST 4 (INSERT (HEAVY)):
OK: time=12968ms , expected time=14000ms
TEST 5 (READ (LIGHT)):
OK: time=6015ms , expected time=9000ms
TEST 6 (READ (HEAVY)):
OK: time=23062ms , expected time=34000ms
TEST 7 (SERVER CPU SPEED):
OK: time=6156ms , expected time=7500ms
TEST 8 (SERVER DISK):
OK: time=17734ms , expected time=20000ms
TEST 9 (SERVER DISK (BLOB's)):
OK: time=17625ms , expected time=20000ms
TEST 10 (BANDWIDTH):
OK: time=15374ms , expected time=24000ms
TEST 11 (BANDWIDTH (BLOB's)):
OK: time=5219ms , expected time=40000ms
TEST 12 (RESET DB):
OK: time=0ms , expected time=100ms
##### Batch Test Finished: Thu Apr 04 11:39:14 CEST 2019 #####
Second MWAS Server (V-CLUST-MW2)

Results of the test in text mode:
###### Start Batch Test: Thu Apr 04 11:40:31 CEST 2019 ######
###### Autocommit mode is OFF ######
TEST 1 (DDL):
NOK: time=31ms , expected time=20ms
TEST 2 (INSERT (LIGHT)):
OK: time=28843ms , expected time=29000ms
TEST 3 (INSERT (LIGHT, server level)):
OK: time=3093ms , expected time=4300ms
TEST 4 (INSERT (HEAVY)):
OK: time=11250ms , expected time=14000ms
TEST 5 (READ (LIGHT)):
OK: time=6094ms , expected time=9000ms
TEST 6 (READ (HEAVY)):
OK: time=23046ms , expected time=34000ms
TEST 7 (SERVER CPU SPEED):
OK: time=6312ms , expected time=7500ms
TEST 8 (SERVER DISK):
OK: time=16984ms , expected time=20000ms
TEST 9 (SERVER DISK (BLOB's)):
OK: time=16937ms , expected time=20000ms
TEST 10 (BANDWIDTH):
OK: time=15594ms , expected time=24000ms
TEST 11 (BANDWIDTH (BLOB's)):
OK: time=5015ms , expected time=40000ms
TEST 12 (RESET DB):
OK: time=16ms , expected time=100ms
##### Batch Test Finished: Thu Apr 04 11:42:45 CEST 2019 #####
###### Start Batch Test: Thu Apr 04 11:43:20 CEST 2019 ######
###### Autocommit mode is OFF ######
TEST 1 (DDL):
OK: time=0ms , expected time=20ms
TEST 2 (INSERT (LIGHT)):
OK: time=27546ms , expected time=29000ms
TEST 3 (INSERT (LIGHT, server level)):
OK: time=3016ms , expected time=4300ms
TEST 4 (INSERT (HEAVY)):
OK: time=7937ms , expected time=14000ms
TEST 5 (READ (LIGHT)):
OK: time=6234ms , expected time=9000ms
TEST 6 (READ (HEAVY)):
OK: time=22202ms , expected time=34000ms
TEST 7 (SERVER CPU SPEED):
OK: time=6312ms , expected time=7500ms
TEST 8 (SERVER DISK):
OK: time=16938ms , expected time=20000ms
TEST 9 (SERVER DISK (BLOB's)):
OK: time=21296ms , expected time=20000ms
TEST 10 (BANDWIDTH):
OK: time=17702ms , expected time=24000ms
TEST 11 (BANDWIDTH (BLOB's)):
OK: time=6032ms , expected time=40000ms
TEST 12 (RESET DB):
OK: time=15ms , expected time=100ms
##### Batch Test Finished: Thu Apr 04 11:45:35 CEST 2019 #####
First SSP Server (V-CLUST-S1)
Results of the test in text mode:
###### Start Batch Test: Thu Apr 04 11:58:43 CEST 2019 ######
###### Autocommit mode is OFF ######
TEST 1 (DDL):
OK: time=15ms , expected time=20ms
TEST 2 (INSERT (LIGHT)):
PASSABLE: time=36814ms , expected time=29000ms
TEST 3 (INSERT (LIGHT, server level)):
OK: time=3281ms , expected time=4300ms
TEST 4 (INSERT (HEAVY)):
OK: time=10766ms , expected time=14000ms
TEST 5 (READ (LIGHT)):
OK: time=6547ms , expected time=9000ms
TEST 6 (READ (HEAVY)):
OK: time=23688ms , expected time=34000ms
TEST 7 (SERVER CPU SPEED):
OK: time=6719ms , expected time=7500ms
TEST 8 (SERVER DISK):
PASSABLE: time=24391ms , expected time=20000ms
TEST 9 (SERVER DISK (BLOB's)):
OK: time=21532ms , expected time=20000ms
TEST 10 (BANDWIDTH):
OK: time=16844ms , expected time=24000ms
TEST 11 (BANDWIDTH (BLOB's)):
OK: time=4671ms , expected time=40000ms
TEST 12 (RESET DB):
OK: time=110ms , expected time=100ms
##### Batch Test Finished: Thu Apr 04 12:01:19 CEST 2019 #####
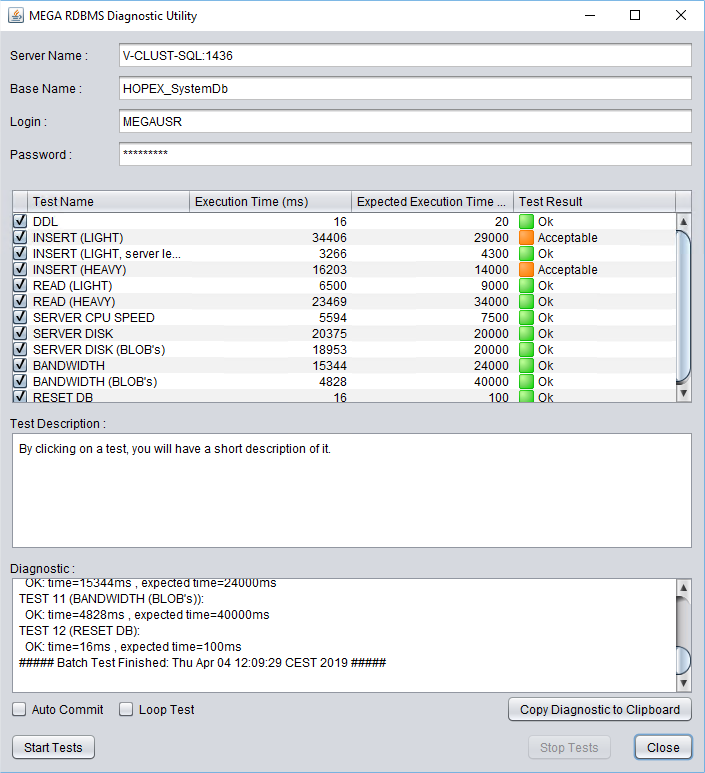
###### Start Batch Test: Thu Apr 04 12:07:00 CEST 2019 ######
###### Autocommit mode is OFF ######
TEST 1 (DDL):
OK: time=16ms , expected time=20ms
TEST 2 (INSERT (LIGHT)):
PASSABLE: time=34406ms , expected time=29000ms
TEST 3 (INSERT (LIGHT, server level)):
OK: time=3266ms , expected time=4300ms
TEST 4 (INSERT (HEAVY)):
PASSABLE: time=16203ms , expected time=14000ms
TEST 5 (READ (LIGHT)):
OK: time=6500ms , expected time=9000ms
TEST 6 (READ (HEAVY)):
OK: time=23469ms , expected time=34000ms
TEST 7 (SERVER CPU SPEED):
OK: time=5594ms , expected time=7500ms
TEST 8 (SERVER DISK):
OK: time=20375ms , expected time=20000ms
TEST 9 (SERVER DISK (BLOB's)):
OK: time=18953ms , expected time=20000ms
TEST 10 (BANDWIDTH):
OK: time=15344ms , expected time=24000ms
TEST 11 (BANDWIDTH (BLOB's)):
OK: time=4828ms , expected time=40000ms
TEST 12 (RESET DB):
OK: time=16ms , expected time=100ms
##### Batch Test Finished: Thu Apr 04 12:09:29 CEST 2019 #####
Second SSP Server (V-CLUST-S2)

Results of the test in text mode:
###### Start Batch Test: Thu Apr 04 14:42:35 CEST 2019 ######
###### Autocommit mode is OFF ######
TEST 1 (DDL):
NOK: time=31ms , expected time=20ms
TEST 2 (INSERT (LIGHT)):
PASSABLE: time=37030ms , expected time=29000ms
TEST 3 (INSERT (LIGHT, server level)):
OK: time=3047ms , expected time=4300ms
TEST 4 (INSERT (HEAVY)):
OK: time=12234ms , expected time=14000ms
TEST 5 (READ (LIGHT)):
OK: time=6187ms , expected time=9000ms
TEST 6 (READ (HEAVY)):
OK: time=23188ms , expected time=34000ms
TEST 7 (SERVER CPU SPEED):
OK: time=5952ms , expected time=7500ms
TEST 8 (SERVER DISK):
OK: time=20359ms , expected time=20000ms
TEST 9 (SERVER DISK (BLOB's)):
PASSABLE: time=24797ms , expected time=20000ms
TEST 10 (BANDWIDTH):
OK: time=15296ms , expected time=24000ms
TEST 11 (BANDWIDTH (BLOB's)):
OK: time=5766ms , expected time=40000ms
TEST 12 (RESET DB):
OK: time=31ms , expected time=100ms
##### Batch Test Finished: Thu Apr 04 14:45:09 CEST 2019 #####
###### Start Batch Test: Thu Apr 04 14:50:22 CEST 2019 ######
###### Autocommit mode is OFF ######
TEST 1 (DDL):
OK: time=16ms , expected time=20ms
TEST 2 (INSERT (LIGHT)):
NOK: time=42093ms , expected time=29000ms
TEST 3 (INSERT (LIGHT, server level)):
OK: time=3421ms , expected time=4300ms
TEST 4 (INSERT (HEAVY)):
OK: time=14328ms , expected time=14000ms
TEST 5 (READ (LIGHT)):
OK: time=6000ms , expected time=9000ms
TEST 6 (READ (HEAVY)):
OK: time=21937ms , expected time=34000ms
TEST 7 (SERVER CPU SPEED):
OK: time=5640ms , expected time=7500ms
TEST 8 (SERVER DISK):
OK: time=18688ms , expected time=20000ms
TEST 9 (SERVER DISK (BLOB's)):
OK: time=17702ms , expected time=20000ms
TEST 10 (BANDWIDTH):
OK: time=15672ms , expected time=24000ms
TEST 11 (BANDWIDTH (BLOB's)):
OK: time=5093ms , expected time=40000ms
TEST 12 (RESET DB):
OK: time=16ms , expected time=100ms
##### Batch Test Finished: Thu Apr 04 14:52:53 CEST 2019 #####
Conclusion
The results are good. The performances between the application layer and the database layer should be satisfactory.
Activation and deployment of stored procedures for SQL Server
To be done once, from any of the application servers.
To avoid having the transaction tables (linked to the activity on the platform) to grow too much, so that they slow down operations such as connections or publications, it is necessary to deploy, on each Mega repository in RDBMS (in Oracle in this context), two stored procedures, and to schedule them to run regularly on the SQL Server databases.
Warning ! The following steps need to be done outside of the periods of activity on the application, because it prevents new users to connect, or connected users to publish their work.
To create those, and execute those a first time, we use the Administration module:
1. Start the « Administration.exe ».
2. Connect to the environnement on which we want to perform those operations.
3. Expand the repositories.
4. Right-click each repository, starting with the SystemDb : choose « RDBMS Administration », then « Remove Private workspace temporary data »
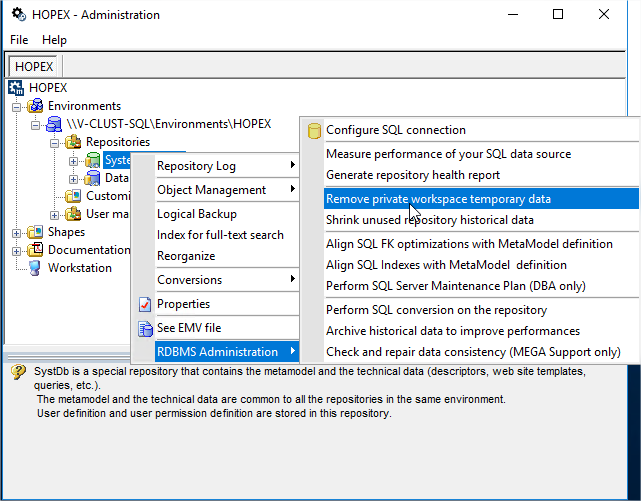
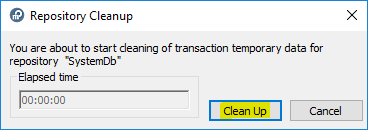
5. This opens up the following window, where you have to click « Clean Up », which will have the effect of creating a stored procedure in the SQL Server related database, and to execute it at once :
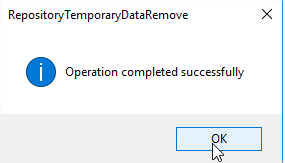
6. Click „OK“:
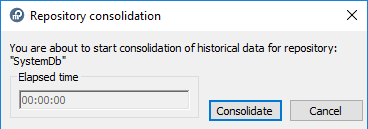
7. Do the same operation with the second option in « RDBMS Administration », called this time « Shrink unused repository historical data », that will create the second stored procedure and execute it, by pressing the “Consolidate” button :
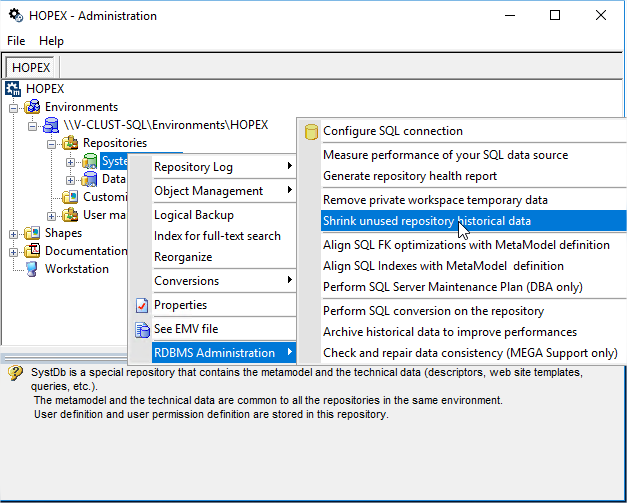
8. Click « Consolidate »:
9. Click „OK“:
10. Reproduce all those steps on all Mega repositories for all environments (here we have only one).
Those must be executed on a regular basis, at least once a week, to avoid keeping two much logs on the transactions, and thus, making the application slow down during phases like login or publish. The names are:
• dbo.SP_CLEAN_MEGA_DATABASE
• dbo.SP_CONSOLIDATE_MEGA_DATABASE