Installing the Offline Application
Prerequisite Conditions
Before installing the HOPEX Offline application, you must have:
• a stand-alone installation of HOPEX Windows Front-End
• A stand-alone license for the product HOPEX Internal Control
To authorize exchange of data between the
HOPEX Internal Control Web application and the Offline application, you must modify certain Web application parameters. See
"Configuring HOPEX Web Front-End".
Checking Installation of HOPEX Windows Front-End
Check that the x installation that you want to use is defined as the current installation in the registry.
To check this, you can:
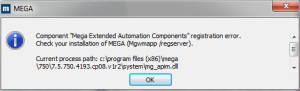
• double-click on the installation administration.exe file.
If this message appears, the installation is not current:
• run a TEST.VB file with the following VBscript code:
Set oMegaApp = CreateObject("Mega.Application")
MsgBox "current installation in registry: " & oMegaApp.Path
A window appears with the current installation path. Check that this is the installation path that you want to use.
In case of a correction
In case of a correction, two files must be integrated in the Offline installation:
• File "mj_audit.jar" to be copied in <Installation file>/Java/lib
• File "Hotfix.zip" to be copied in the MEGA_USR folder of the HOPEX site.
In case of extensions
When a Product Engineer performs extensions for a client, he/she provides customizations in a file named "Extension.zip".
A user granted administration rights and in charge of installing the offline application on a workstation must copy the .zip file to the MEGA_USR folder of the HOPEX site.
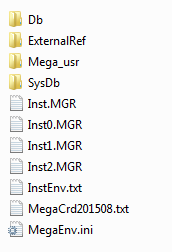
The .zip file contains:
• .MG* files containing extensions to be imported to the modeling repository (in alphabetical order).
• Other files to be copied in the MEGA_USR folder of the environment.
Starting Installation
To install the Offline Application:
1. In the HOPEX 1.2\Utilities\Solution Pack installation folder, double-click MEGA_Audit.exe.
The test environment installation window appears: at a first connection to the Offline application, you must create an environment and a repository.
2. Indicate the location of the environment to be created and click OK.
Several windows appear during update of the environment and compilation of the metamodel. When the environment and repository have been created, a window invites you to open the application.
When you run the Mega_Audit.exe file, the local "AuditOffline" (GBMS) environment is created. This environment is listed in the HOPEX local installation directory.
At installation, a specific folder is created to save exchange files. A shortcut to this folder is available on the desktop.
A shortcut to the Mega_Audit.exe file is also created.
Configuring HOPEX Windows Front-End
From HOPEX Windows Front-End, you must specify the Web application connection path.
To indicate the Web application connection path:
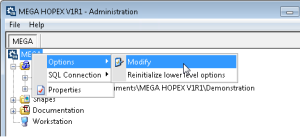
1. In the HOPEX Windows Front-End installation folder, double-click the "Administration.exe" file.
2. Right-click the HOPEX site and select Options > Modify.
The options window appears.
3. In the left pane, click Installation > Web Application.
4. In the right pane, in the Web Application Path field, enter the URL address of HOPEX Web Front-End.
5. Click OK.
6. Close the administration dialog box.
Configuring HOPEX Web Front-End
To log data and enable data exchanges between Web and offline applications, the administrator must configure installation of HOPEX Web Front-End:
• Enabling the repository log
• Enabling the system repository logfile
• At environment level, select the option "Log all data ignoring MetaModel".

In the
HOPEX Windows Front-End installation, this configuration is automatic when creating the environment.
To activate the work repository and system repository logfiles:
1. In the HOPEX Web Front-End installation folder, double-click the "Administration.exe" file.
2. Open the environment that contains the test repository. To do this, connect with a user that has data administration authorization rights.
The "System" identifier enables connection with the "Administrator" user. This user is created by default, with repository administration rights. It has no profile (it has all rights) and no password is assigned at installation.
3. Right-click the test repository and select Properties.
4. In the Repository Logfile field, select the "Enabled" value.
5. Enable the environment "SystemDb" repository in the same way.
To select the "Log all data ignoring MetaModel" option:
1. Right-click the desired environment and select Options > Modify.
The options window appears.
2. In the left pane of the window, select Repository.
3. In the right pane, in the Behavior of Log Activation field, select "Log all data ignoring metamodel".
4. Click OK and close the administration console.