Securing the access to the application
Activating SSL on the website
In order to encrypt the information sent between the users’ workstation and the web server, the first step is to activate the SSL on the Hopex website.
The minimum level of certificate that is recommended is a certificate signed by a trusted third party. If internally, a root certificate exists and allows the applications to generate their own certificate, it is also a possibility.
When you obtained that certificate, the steps to import it on your website are multiple. You will find hereafter one way to do it, and make sure that your website will be attainable only through HTTPS.
The following step-by-step procedure was done on a Windows Server 2012, with IIS 8.0. You need to adapt it based on your OS version.
1. The first step is to copy the certificate on your server.
2. Next, open the “Internet Information Services (IIS) Manager” through the Administrative Tools of the server.
3. Go to the root of IIS :
4. Double-click on « Server Certificates ».
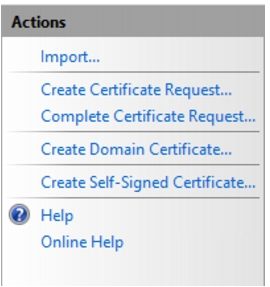
5. Once this feature is opened, on the right pane, click on the « Import » link :
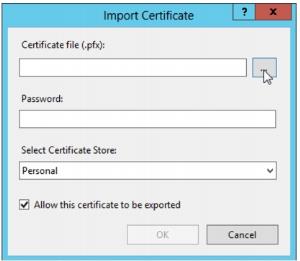
6. Click the button where the cursor is located, in order to look for the certificate :
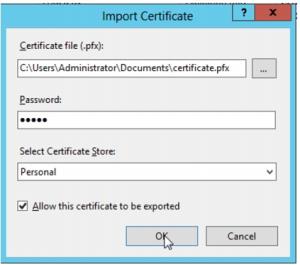
7. Select the certificate. Provide a password if necessary, and click « OK » to import the certificate :
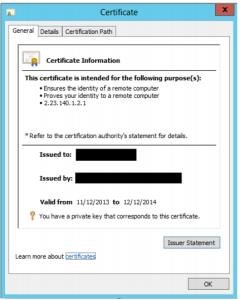
A new line will appear in the “Server Certificates” window. You can have a look at the imported certificate by double-clicking on the certificate :
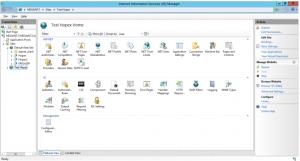
8. Locate the website where you want to create an HTTPS binding with the newly imported certificate. In this example, it is done on the “Test Hopex” website. Click the website to see its features.
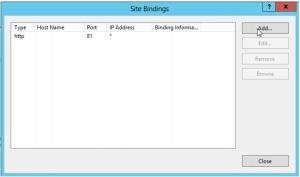
9. Right-click the website and select Edit Bindings.
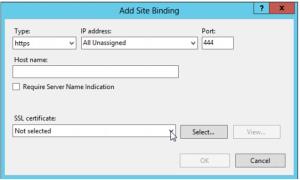
10. Add a new binding, for HTTPS, on a specific port (in this example, as the port 443 is already used, we will choose 444). Use the default port 443 whenever possible, as it permits you quite easily to make the URL of the website user-friendly :
11. Use the dropdown list to select your certificate and click OK.
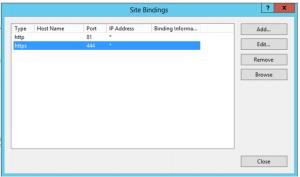
12. You see that a new binding exists. You can click Close.
13. Install the application. Choose the appropriate website (here “test hopex”), and let the installation completes.
14. Whenever a URL is requested in the installation steps, make sure that you provide the HTTPS link, with possibly the port number, and that the address is relevant with the “Issued To” parameter when you open the certificate. Otherwise, you will receive some error messages in the application :
15. Once this is done, go back to IIS to force the use of SSL for your website. To do that, start by going back to the previous window to edit the bindings.
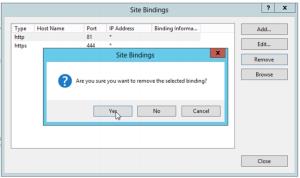
16. Select the “http” binding, and click Remove.
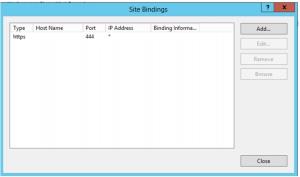
17. Check that only the https binding remains, and click Close.
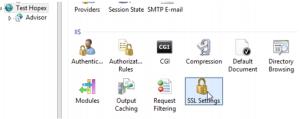
18. Select your website, and open the « SSL Settings » feature :
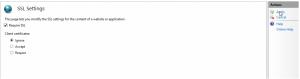
19. Click « Require SSL » and apply :
20. Install the Hopex Web front-end application on your server.
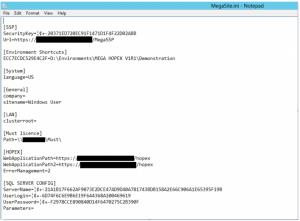
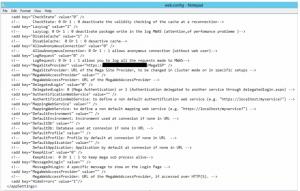
21. Last step, after the installation, is to check that the configuration files of the application all contain the proper URL. You can also install the application without SSL, and then decide to activate it. In that second scenario, you need to update the following files. If you installed with SSL activated, you just need to check the configuration with the next steps. Two locations contain such strings: the web.config file of the “Hopex” web application, and the MegaSite.ini in the “Cfg” folder of the installation folder of the application :
a. In the MegaSite.ini file, the URL, WebApplicationPath, and WebApplicationPath2 parameters need to reflect that use :
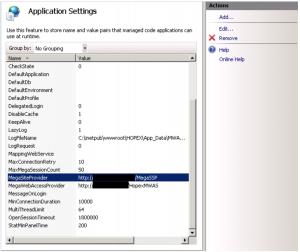
b. Application settings of the Hopex web application (two techniques), the parameters MegaSiteProvider, and MegaWebAccessProvider, also need to be switched to HTTPS with the proper port :
i. In the web.congif file :
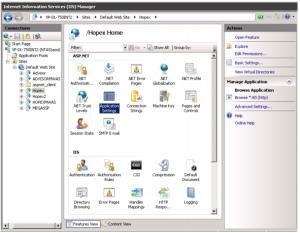
ii. Through the « Application settings » feature in IIS :
You can select a line and click the Edit link on the right pane to update a URL :
Disabling SSL v2
On Windows Server 2008 R2 and Windows Server 2012, the SSL V2 and V3 are activated by default. As there are known vulnerabilities with SSL V2, and since we use it when securing the access to the website, an additional task would be to disable that V2 protocol, to keep only SSL V3 active.
The steps are :
1. Through the Startup menu, go to “Run” and type :
regedit.exe
2. Browse through the registry until you reach the following key :
HKey_Local_Machine\System\CurrentControlSet\Control\SecurityProviders\SCHANNEL\Protocols\SSL 2.0
3. In the “SSL 2.0” key, create a new one, of type DWORD (32 bit) with the following details :
a. Name : Enabled
b. Value : 0
4. Close the registry and restart the server to take it into account.
Remove the default install page in IIS
After the application is installed, you can disable the “Default Document” feature for the website on which the application is deployed.
To do that :
1. Open the IIS Manager console.
2. Locate the website where the Hopex and/or Advisor web application is installed.
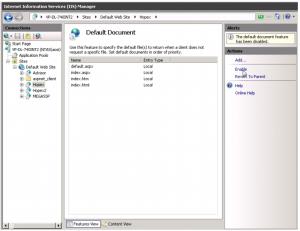
3. On the website, double-click Default Document to open this feature.
4. In the “Actions” pane on the right, click Disable. You should have this kind of screen after it is done :
5. Make sure that the « Default Document » feature is enabled for the Hopex/Hopex2/Advisor web applications. Since it was disabled at the root level, you will have to :
a. Select each web application (here Hopex), and open the “Default Document” feature :
b. Click Enable.
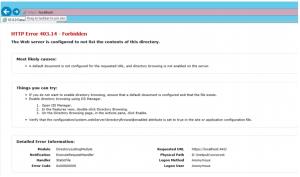
c. This way, the URL
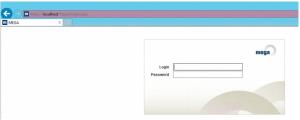
https://servername won’t reply, whereas the URL
https://servername/hopex will redirect the users to the login page of Mega :
Securing the RDP access (Terminal Services)
On a server hosted on a Windows 2008 R2 Operating System, you can secure the RDP layer by changing the security layer and the encryption layer of the Remote Desktop Protocol.
To do that:
1. Firstly, you have to open Remote Desktop Session Host Configuration the by clicking on “Start”, point to “Administrative Tools”, point to “Remote Desktop Services”, and then click “Remote Desktop Session Host Configuration”.
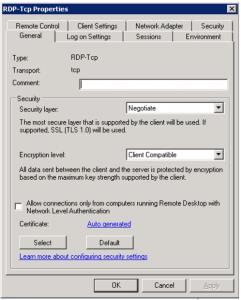
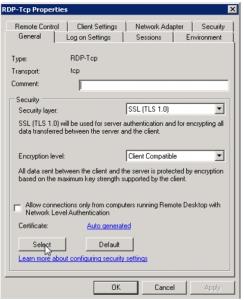
2. In the “Connections” section, do a right-lick on the “RDP-tcp” entry, and select “Properties” :
3. In the “General tab”, as shown above, you can see the two security parameters that can be modified.
4. Change the “Security Layer” option to “SSL (TLS 1.0)”. Be aware that you will need to have a specific certificate installed on your server to switch to that level. The “Select” button allows you to browse your installe certificates and choose the proper one:
5. Then, modify the « Encryption level » option and upgrade it to at least “High”, and possibly “FIPS Compliant” :
6. Click OK to validate this modification and exit the configuration tool.
There are also numerous ways of securing the RDP protocol, whether it is using the Remote Desktop Gateway, filtering by IP address and user, etc.
Configuring the firewall
To avoid letting some unwanted users connect to the server or retrieve information from the server, some actions can/need to be taken on the firewall:
- If possible, restrict the access to port 3389 (RDP) to only the valid IP addresses of the System Administration, Application Administrators, and maybe the users that need to launch the Desktop client of Mega through Terminal Services.
- Restrict external access to all SMB services and ports, including TCP and UDP 135, TCP and UDP 139, and TCP and UDP 445.
- Regarding the ICMP protocol, block the following type of requests: ICMP timestamp requests (13), and ICMP timestamp replies (14).
- Limit the number of opened ports on the server to the least amount possible. Globally the server needs to be accessed through RDP, the SSL port needs to be opened, the SMB port also, and the communication port to the database server. All other ports need to be assessed in order to check that those are relevant.