7. Creating custom schema (SDL/JSON) / custom endpoint
The GraphQL REST API exposes in standard a subset of the full Hopex Metamodel. This subset is organized into several endpoint represented by a schema (SDL). The split is mainly done by solution scope or technical grouping (e.g.: ITPM, BPA, Audit)
It is possible to extend the delivered schema or to create new schema. The result of this customization will end up with a new endpoint to call by HTTP request.
7.1. How it works?
7.1.1. General principle
To create a schema you need to convert the Hopex Metamodel into a GraphQL syntax compatible. This mapping is done through a JSON file that maps the Hopex ID with a naming convention compatible with GraphQL. From this file the system generates a GraphQL syntax. The default JSON mapping schemas are installed in the CONFIG folder of the Hopex installation:
C:\ProgramData\MEGA\Hopex Application Server\<Has instance name>\.shadowFiles\Macros\hopex.graphql\<GraphQL module version>\CONFIG\V6.2\Standard
Example:
C:\ProgramData\MEGA\Hopex Application Server\5000\.shadowFiles\Macros\hopex.graphql\62.3.17+6\CONFIG\V6.2\Standard
Moreover, in the web part a key in the web.config exposes the list of available schemas.
<add key="GraphQLSchemas" value="ITPM, Assessment, Audit, BPA, Data, DataPrivacy, MetaModel, Reporting, Risk, Workflow"/>
<!-- GraphQLSchema-->
In this example there are several schemas about: ITPM, Assessment, Audit…
Within this JSON file the metamodel in terms of MetaClass, MetaAttribute, MetaAttributeValue, MetaAssociation.
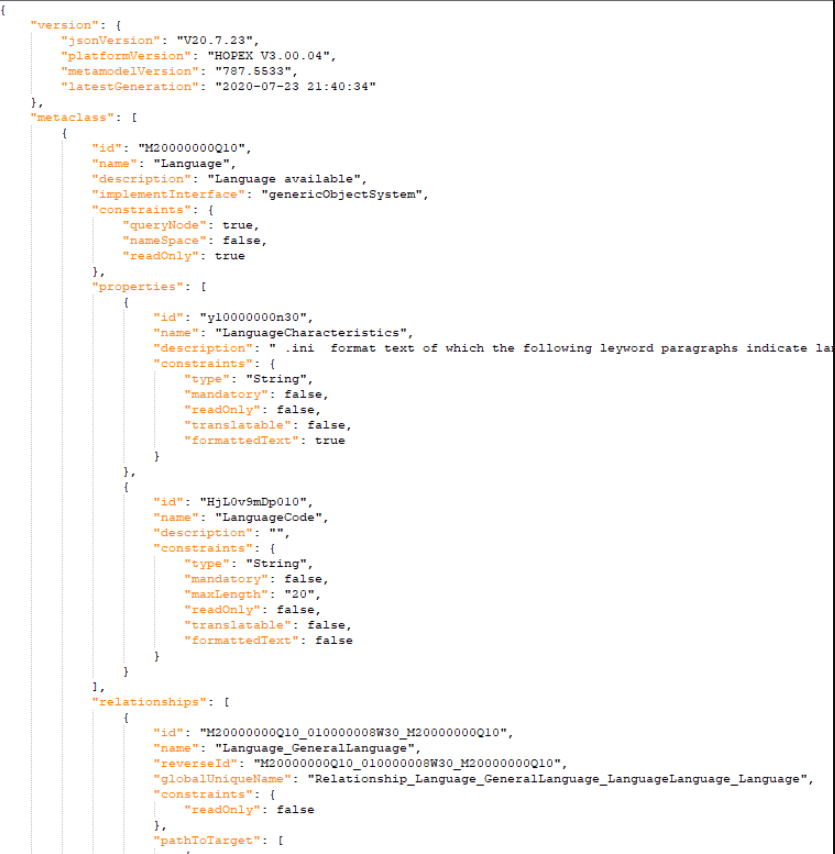
Here is an extract of a JSON mapping schema for ITPM:
...
"metaclass": [{
"id": "MrUiM9B5iyM0",
"name": "Application",
"description": "An application is a software component that can be deployed and provides users with a set of functionalities.",
...
"properties": [{
"id": "Z20000000D60",
"name": "Name",
"description": "Short Name of the object ...",
"constraints": {
"type": "String",
"mandatory": true,
"maxLength": "1024",
"readOnly": false,
"translatable": true,
"formattedText": false
}}],
"relationships": [
{
"id": "7ChrtiDo4vb0_YChrYpDo4ri0_MrUiM9B5iyM0",
"name": "TimePeriod",
...
"pathToTarget": [
{
"id": "VChrYpDo4fi0",
"name": "TimeDependentObjectTimePeriod",
"maeName": "PeriodOfValidity",
"maeID": "YChrYpDo4ri0",
"metaClassName": "TimePeriod",
"metaClassID": "7ChrtiDo4vb0",
"multiplicity": "*"
}]}]
...
See ITPM file for full JSON:
7.1.2. Creating/Updating a schema
To create your own schema you can:
• Create a totally new schema
In this case you are free to define what is exposed and you will not be impacted by future updates of the API.
• Extend an existing schema.
This limits the customization to be performed but you will benefit from future updates of the default delivered schema.
In both cases the principle is the same. You need to create a custom JSON file that you will put in the custom folder:
C:\...\HOPEX Application Server\<HAS instance name>\.shadowFiles\has.custom\<Module version>\hopex.graphql\<GraphQL module version>\CONFIG\V6.2\Standard
e.g.: C:\ProgramData\MEGA\HOPEX Application Server\5000\.shadowFiles\has.custom\<Module version>\hopex.graphql\HOPEX GraphQL-7.87.507+6623\CONFIG\V6.2\Standard
In case of a new JSON the name of the schema must be added to the web.config.
7.2. Creation of your metamodel to expose in the REST API
The JSON delivered out of the box have been generated by a java program that reads a diagram of metamodel. To generate a JSON schema you can use the same tool on existing metamodel diagram or with your new metamodel diagram.
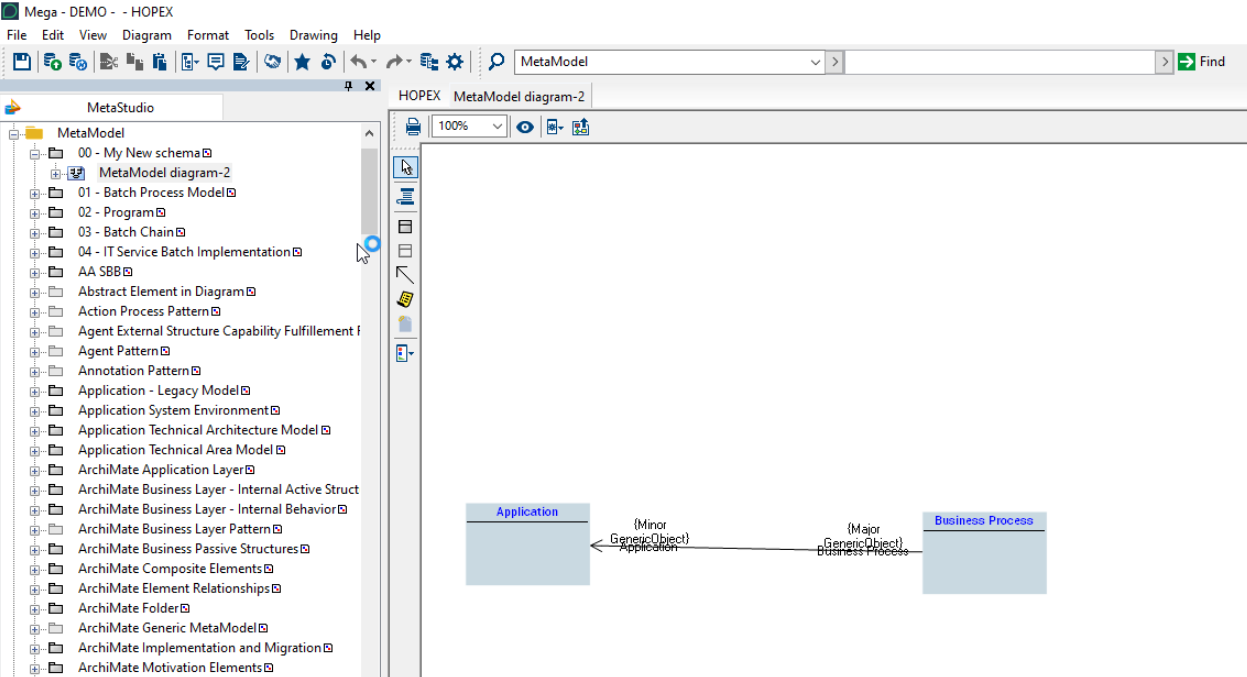
7.2.1. Creating Custom Metamodel
1. Connect to Hopex (Windows Front-End).
2. In the MetaStudio tab create a new Metamodel.
3. Add a new diagram to this metamodel.
4. Add the elements of metamodel you want.
5. Copy and keep for later the absolute identifier of the metamodel object.
7.2.2. Completing default metamodel
Should you want to complete the default schema with additional MetaClass, MetaAttribute:
1. Import the MGL file located in "MGL" folder.
2. Duplicate the standard Metamodel and diagram you want to complete.
3. Add the elements of metamodel you want.
4. Copy and keep for later the absolute identifier of the metamodel object.
7.2.3. Important rules
This generator applies the following rules:
• Only concrete metamodel is generated
• MetaAssociation must be in the diagram to be generated, including the abstract version of the MetaAssociation.