3. HOPEX Application Server (HAS) installation
The following installation instructions are to be applied for the First server of the farm that will behave as an “HAS Server”.
Should you have several “HAS Server” you need to add each additional HAS Server to the cluster, see the cluster section.
3.1. Prerequisite software
If not already installed, the following prerequisite software is automatically installed as part of the HAS installation (no action is required on your side):
• .Net 10 Hosting Bundle x64
• Visual C++ Redistributable 2015-2022 x64 (vc_redist.x64.exe)
• ODBC Driver 18 for SQL Server x64
Download and install:
• a supported web browser: Chrome, Firefox, or Edge
• .Net 10 SDK x64 (Development server only)
3.2. Configuring the file server
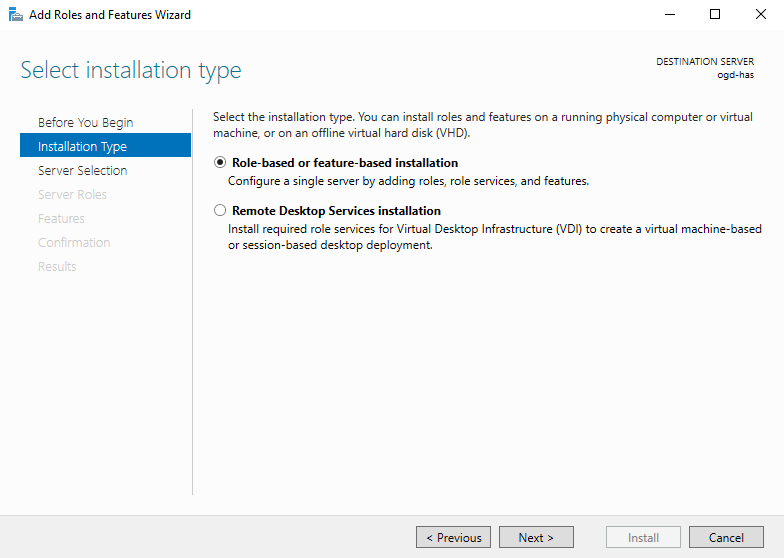
1. In Windows Operating System turn on File Server and SMB:
With Windows 10: from Control Panel: “Turn Windows features on or off”
Or
With Windows Server: from Server Manager: Add Roles and features
2. Click Manage and select Add Roles and features.
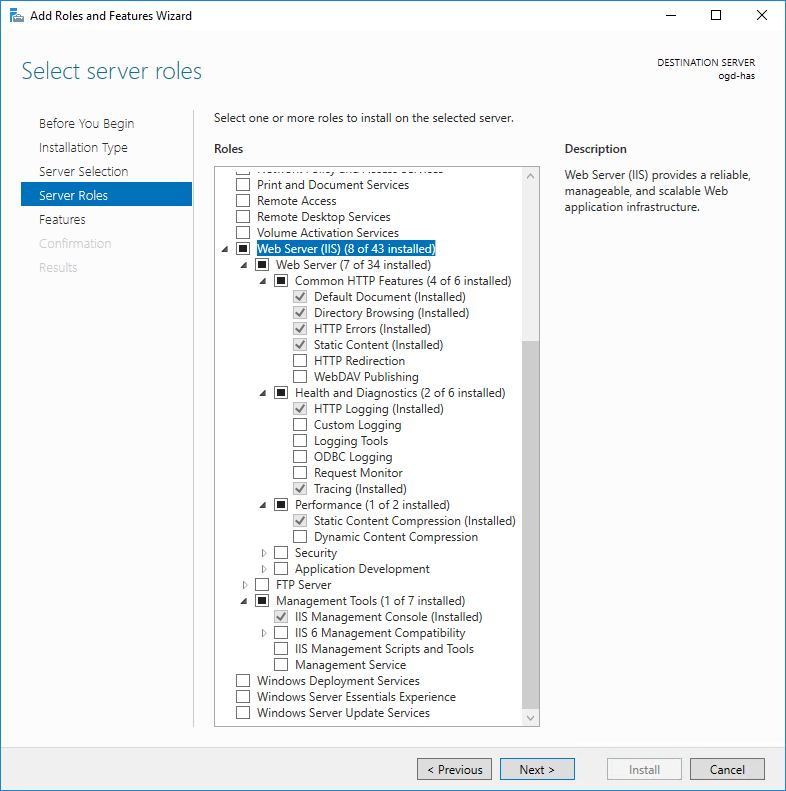
3. In the pop-up Wizard, click Next.
The Server Roles page is displayed.
The Server Roles page is displayed.
4. Select: File Server.
5. If prompted click Add Features.
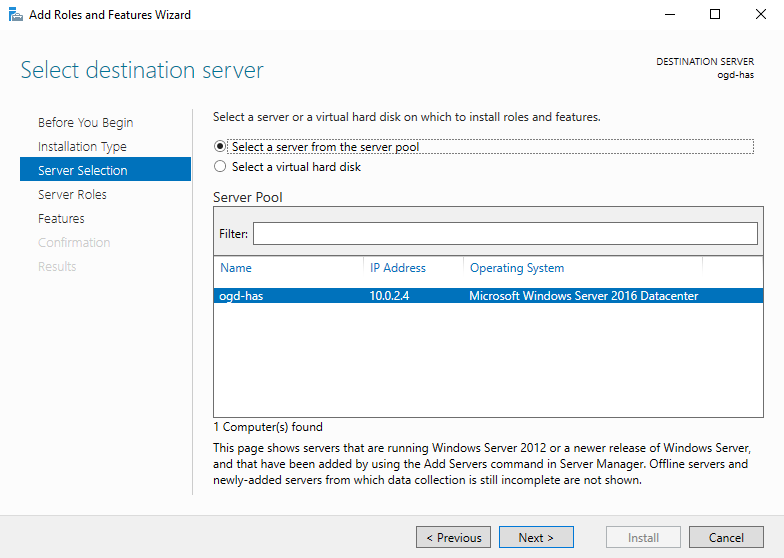
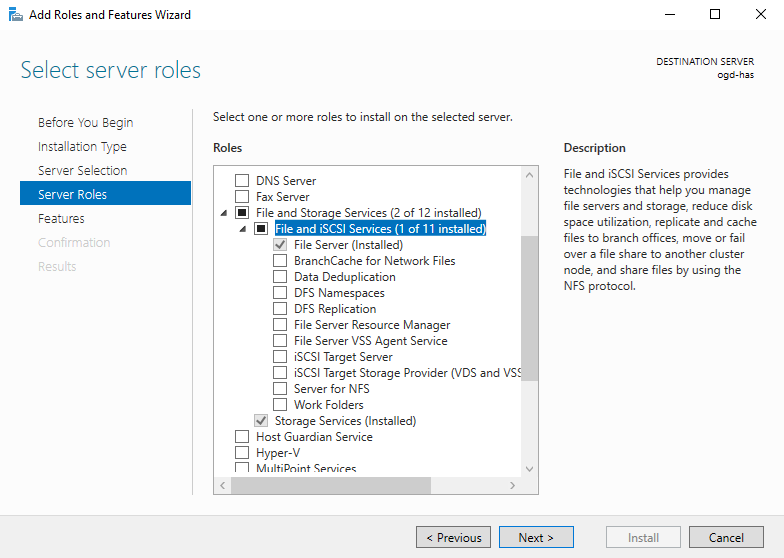
6. Click Next up to install.
3.3. Downloading HAS Server installer
To download the latest installer from a server/laptop that has access to internet:
2. Click Sign in.
3. If you have never connected to any Hopex website (Bizzdesign Community, Hopex Store, Bizzdesign e-learning platform).
• Click “Don't have an account? Sign up”
• Create an Account.
• Set a new password.
• Confirm your account by clicking the email received.
If you have already an account on Hopex website:
• Connect with your professional e-mail and password.
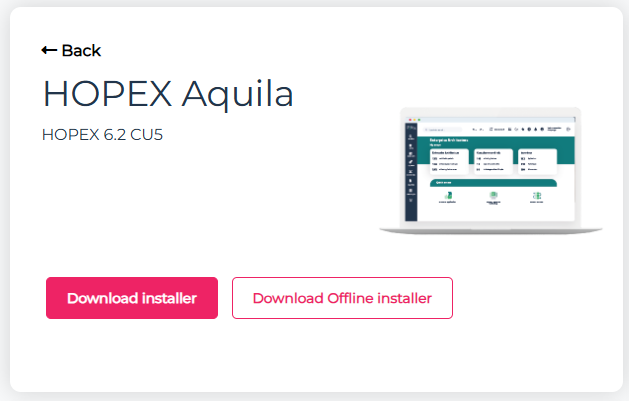
4. In the HOPEX Releases page, click HOPEX Aquila.

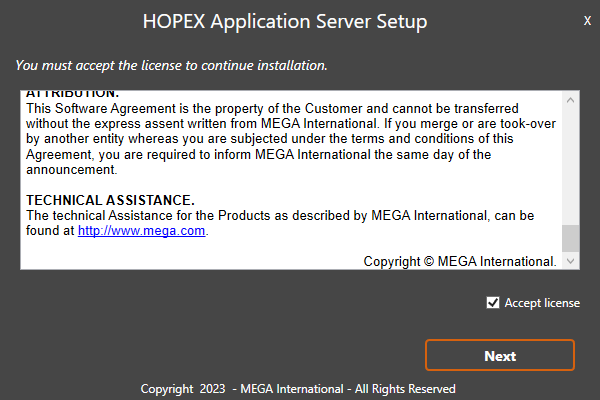
5. Click Download installer.
The Setup file is downloaded.
3.4. Getting your installation key
To get your “personal” installation key:
1. Go to https://store.mega.com/.
2. Click Sign in and connect with your professional e-mail and password.
3. Click your Avatar > My Profile to get your own personal installation key.
4. Copy the Installation Key.
If you fail in this process and encounter an “Access Denied”, contact your sales representative.
DO NOT SHARE this installation key. It is private for your organization.
3.5. Installing HAS Instance Manager with the setup
3.5.1. First steps “online”
Caution: you must perform these actions from a server that has online internet access to https://store.mega.com/ You can go offline later.
|
Step 1
|
|
Launch the installer:
double-click the “Hopex.Application.Server-<Version number>.Setup.exe”
|
|
Step 2
|
|
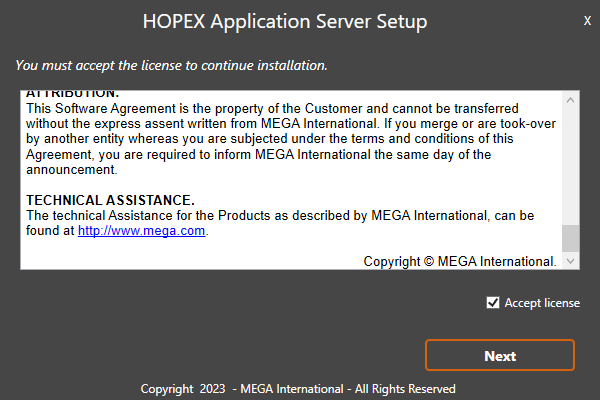
• Select Accept license.
• Click Next
 |
|
Step 3
|
|
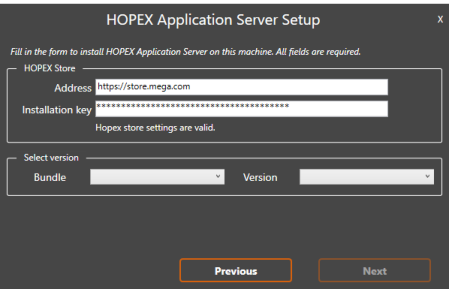
• Enter your Installation key obtained from the Hopex Store
The message “HOPEX Store settings are valid” appears if the key is correct.
 |
|
Step 4
|
|
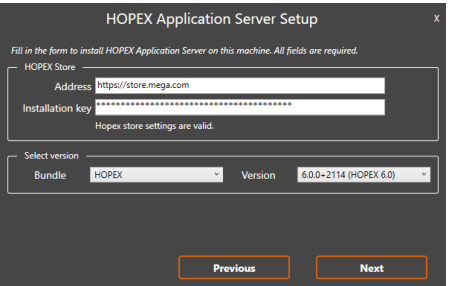
• Select Bundle “HOPEX”
• Select required Version: 6.0
• Click Next
 |
|
Step 5
|
|
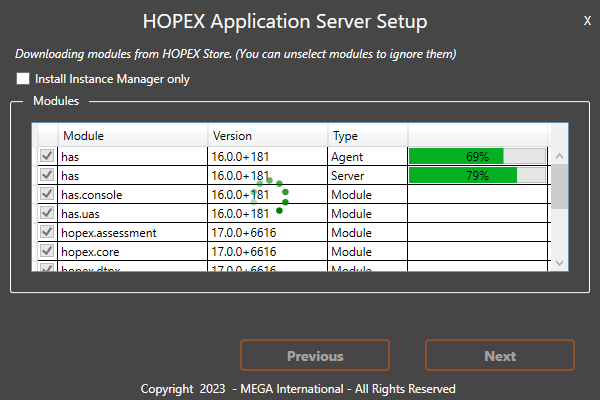
• Select the module you want to download. By default, “All”
• Click Start download
This may take a while. The total of all modules can go up to 2Gb.
 |
|
Step 6
|
|
When all downloads are successful click Next
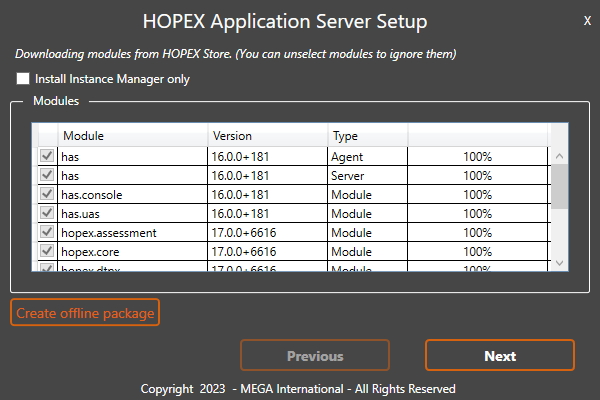 |
At this stage, nothing is installed on the server. Files are only downloaded to start deployment.
You can decide to:
• go offline (step 7 to 10) if the server you want to install does not have internet access or if you want to keep the package for later use.
• continue the setup (go directly to step 11).
3.5.2. Go “offline”
|
Step 7
|
Step 8
|
|
• Click Create offline package
• Unfold the folder where you want to put the packages
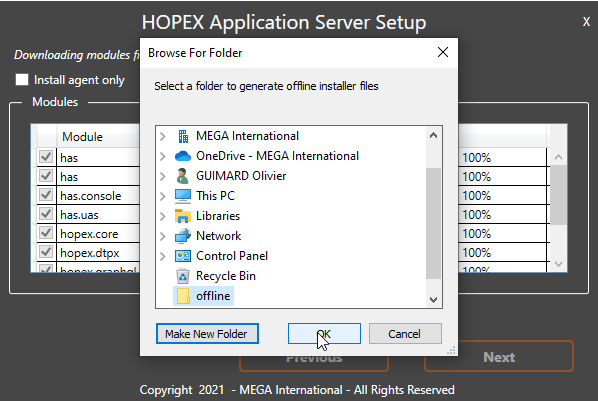 |
• Prefer a C:\ location. You will be able to move the files later.
• Create a new folder or select an existing one for which you have the rights to write.
 |
|
Step 9
|
Step 10
|
|
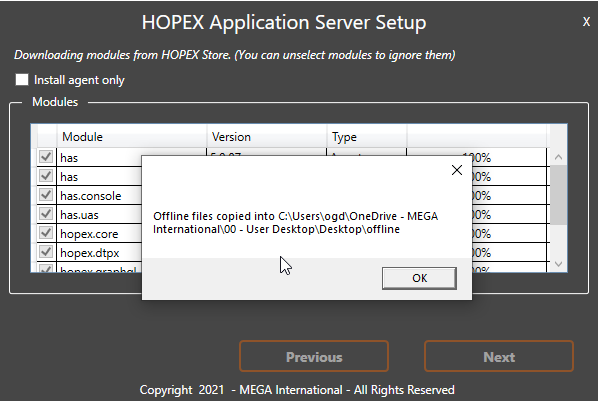
• When successful a pop-up appears Offline files ready
• Click OK
• The setup is closed
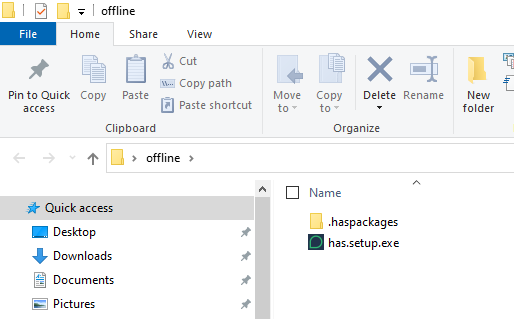 |
• Search for the folder you have just created
It contains:
- an has.setup.exe file - an haspackages folder with *.haspkg file 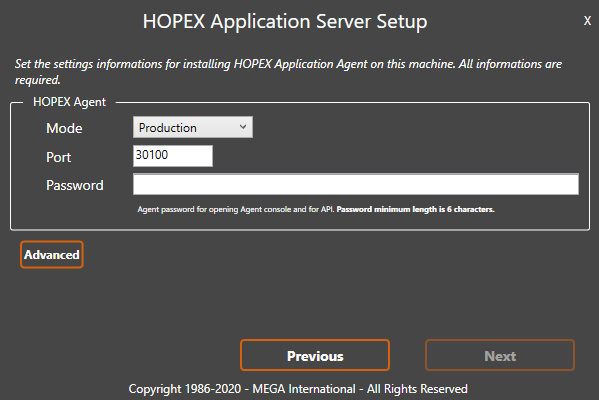 |
Caution: naming of folders and files should not be changed
1. Copy this folder on the server where you want to continue the installation.
2. Double-click has.setup.exe.
3. Perform step 1 and step 2 again. You should arrive directly to step 11.
3.5.3. Continue setup
|
Step 11
|
Step 12
|
|
You need to specify which server you are deploying:
• Production: for production server
• Staging: for UAT and pre-production
• Training: for training only
• Development: for customization development
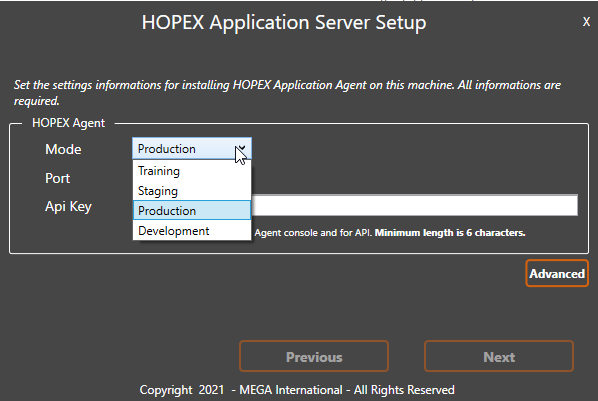 |
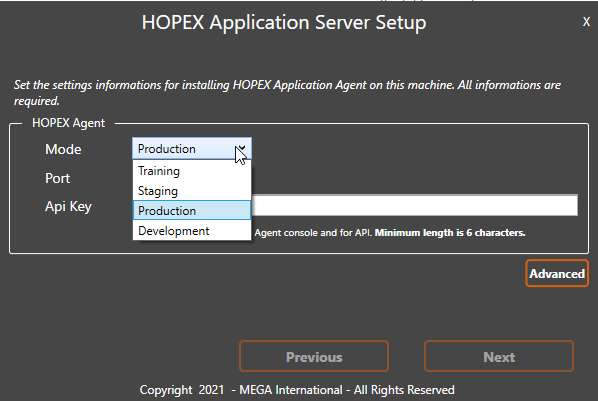
• In the Mode drop-down menu select “Production” (or the other choice depending on what you are installing)
• In port adjust port number.
Default 30100
Caution: do not use 80 or 443
 |
The Mode as an impact on modules you can deploy, features you can enable and default logs details
|
Step 13
|
Step 14 (optional)
|
|
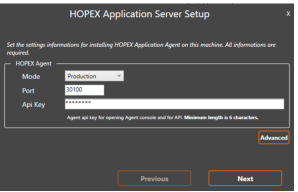
• Give an API Key value for the HAS Instance Manager REST API and Web portal.
• This API Key is for server administrator only.
Minimum 6 characters with capital letters and special characters
You can change this API Key later if you forget it.
 |
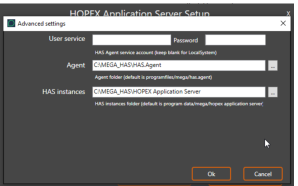
• Should you want to change:
• folder locations
Default: “C:\Program Files\MEGA” for HAS Instance Manager
and “C:\ProgramData\MEGA” HAS for Instance
• user to launch the windows service.
Required to access the Must License path or if there is more than 1 HAS Server
In that case:
• Click Advanced
• Adjust User service & Password (if blank Local System is the default)
• Adjust folder locations
• Click OK then click Next
 |
|
Step 15
|
Step 16
|
|
The HAS Instance Manager is being installed and related packaged unzipped.
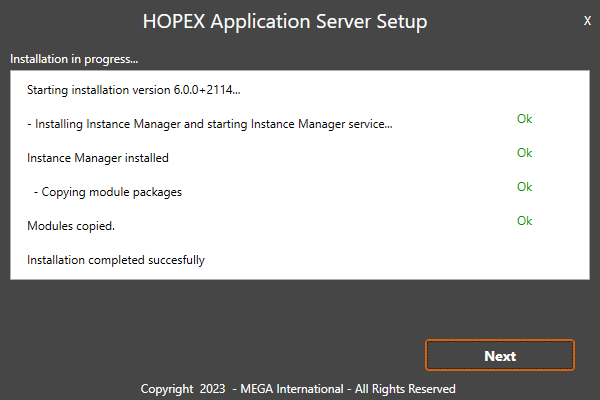 |
• When all successful (OK appears), click Next
 |
|
Step 17
|
Step 18
|
|
At that step, the process is being launched by Windows.
A process called HAS.Instance.Manager.exe should be visible in Windows Task Manager.
|
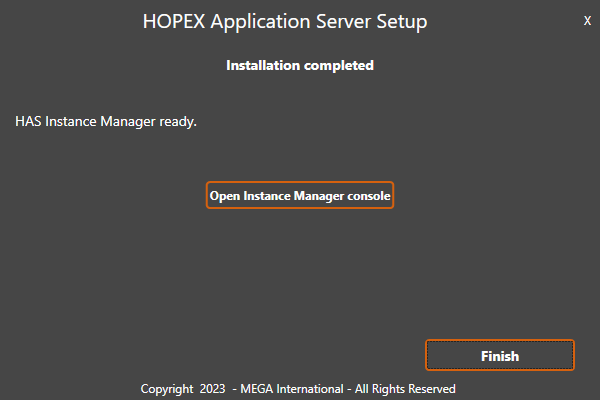
• When ready, the Open Instance Manager console message appears.
• Click it: it will open your web browser.
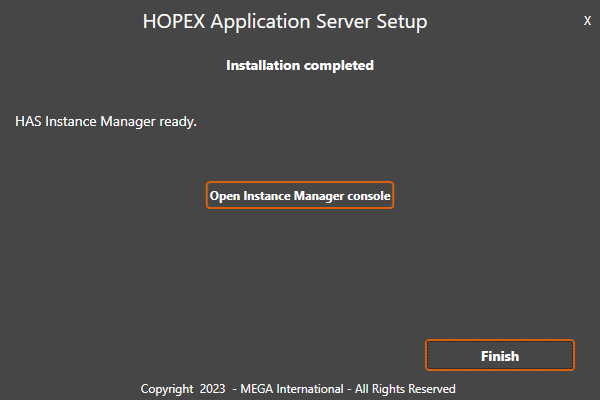 |
The installation process with the setup is finished.
• Click Finish.
If you forgot to open the HAS Instance Manager console you can access it on: http://localhost:30100/ (adjust port number if you have changed the default value)
Continue, to next step, to create the HAS Instance.
3.6. Creating HAS Instance
The HAS Instance Manager is now running. No HAS Server instance has been created by the setup.
• A minimum of one HAS Instance is required. Start from Step 20
• For cluster: see appropriate section.
|
Step 20
|
|
• In the login page of the HAS Instance Manager console enter the API Key created at installation.
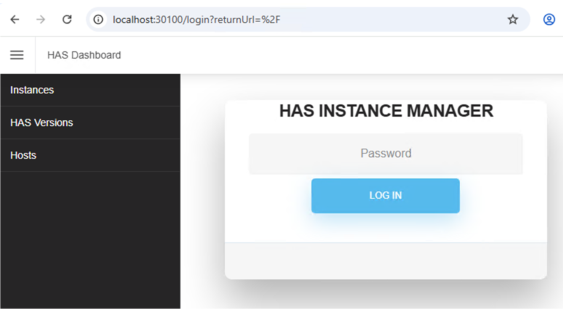 |
|
Step 21
|
|
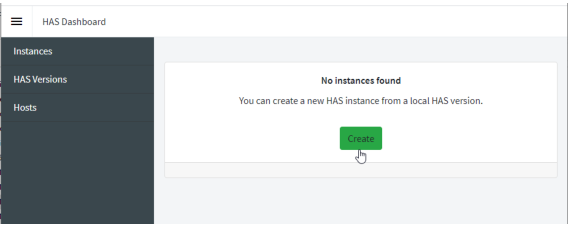
• Click New instance to create an instance
 |
|
Step 22
|
|
• Give a name to the cluster.
For instance, “HAS_PRODUCTION”
Caution: If you keep default value ensure there is no existing cluster name with same name.
• Set the public URL. (Enter HTTP or HTTPS according to your case)
Example: https://vp-iis1-v6.fr.mega.com
• Keep Enable https selected.
CAUTION: Do not leave the default value with the server name if you are not installing a standalone laptop.
 |
The name given to the instance will be the name of the database for HAS.
|
Step 23
|
|
|
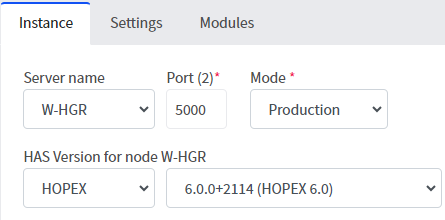
In the tab Instance fill in the following information:
• Select the Server Name.
Default: the server on which you are performing the installation.
• Set HAS Instance Port.
Default: 5000
• Select an HAS Bundle.
Default: HOPEX
• Select an HAS Instance Version.
Default: the one selected at setup
|
 |
|
Step 24
|
|
|
• Define the Database connection. Should you make an error in database connection an error message appears.
• SQL Server instance
<<machine network name>>\<<SQL instance name>>
• SQL Server User Account
User enabled to access/update SQL Server
• SQL Server User Password
Password of the SQL server user
• Optional parameter
If you want to use the trusted connection mode put: Trusted_Connection=True
In that case login and password should be empty.
Make sure you have set the user service for HAS Instance Manager see below 3.12 Windows User and access rights
|
 In case of Database connection error:
 |
|
Step 25
|
|
|
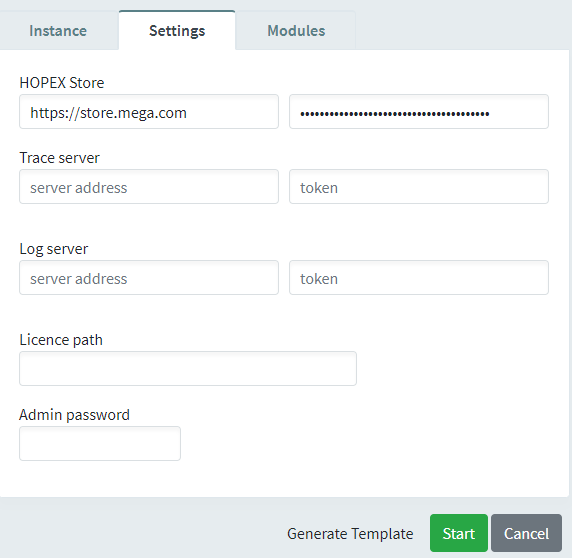
In the Settings tab enter the following information:
• HOPEX Store installation Key.
Default: it is prefilled with the information given at setup. Except if you went offline.
Optional actions (that you can perform later if needed):
• Log server: if you want to use SEQ add the URL and token to connect to the log server.
• Tracer server: if you want to use Zipkin add the URL and token to connect to the log server.
• License path: path of the UNC for the Must license
Example: \\W-OGD\Must
• Admin password: change the default password for admin user on the console.
Example: Has2k21!
Note: password must comply with complexity rules.
|
 |
|
Step 26 (optional)
|
|
|
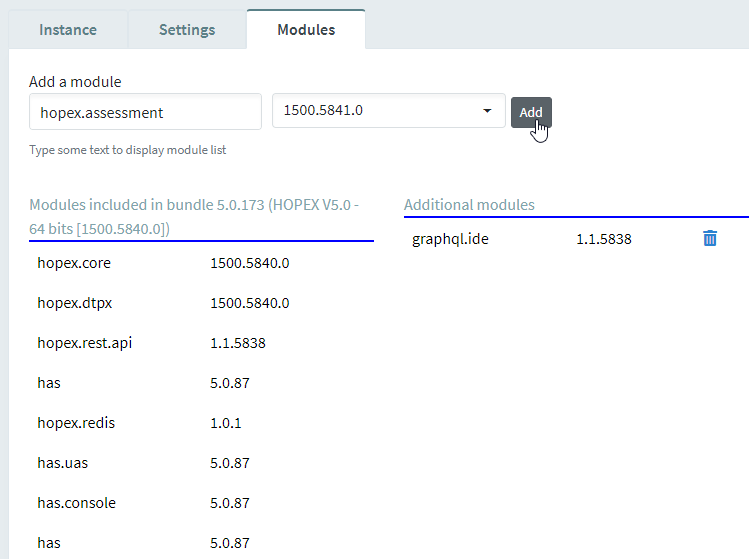
The Modules tab displays the modules available by default in the bundle.
If your server has internet access to the https://store.mega.com you can add complementary module at this step.
Otherwise skip this step.
• Select the module to add. The selection is done by the module ID
• Select the required version.
• Click Add.
|
 |
|
Step 27 (optional)
|
Step 28
|
|
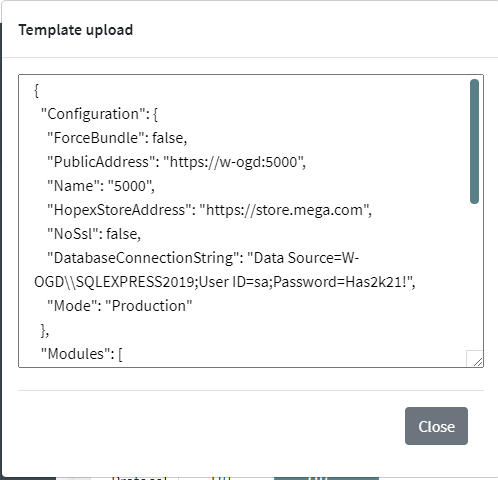
When your settings are correct you can save same as a template for scripting installation purposes.
• click Generate template.
• Copy and save the generate JSON in a text file
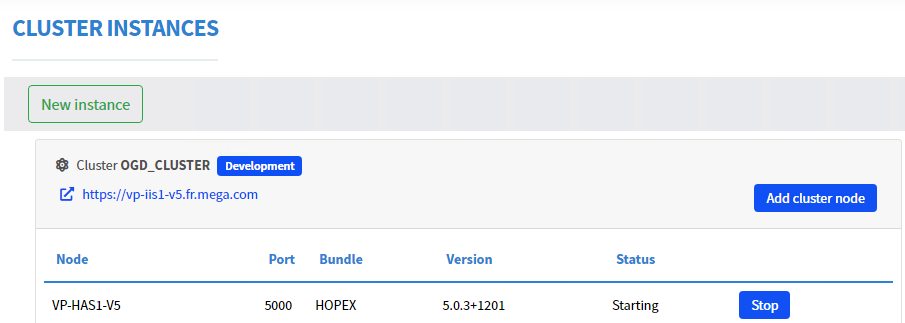 |
• Click Start
• When ready the status changes to “Running”
• Click the URL Public address to access the HAS Instance created
 |
The URL visible at that stage should be the public URL. Should you see an URL such as https://localhost:5000 or https://servername:5000 your installation is not correct
|
Step 29
|
|
|
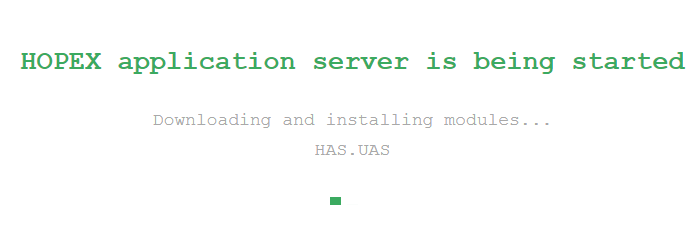
• While loading you will see a message HAS is starting with the list of modules being deployed
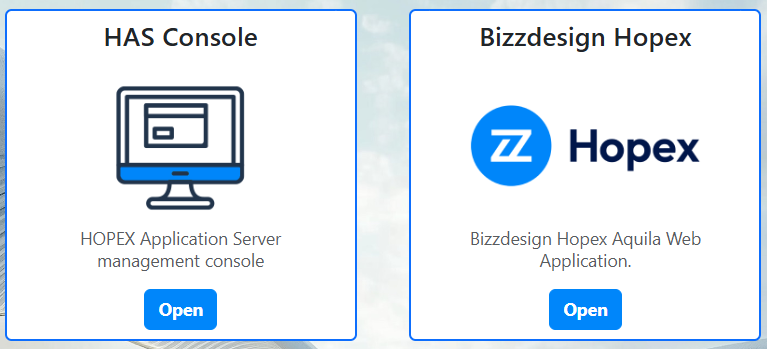
When ready you get redirected to the HAS portal
• Click the HAS console tile to enter the console.
|
  |
3.7. First connection to HAS Console
|
Step 30
|
Step 31 (optional)
|
|
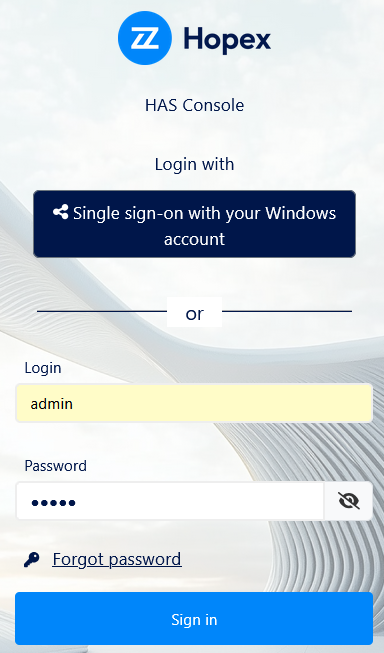
• At first login (creation of the HAS database) on the HAS Console the default login and password are:
- Login: admin
- Password: Hopex (except if you did set it up on step 25) • Enter the values in the fields
• Click Sign in.
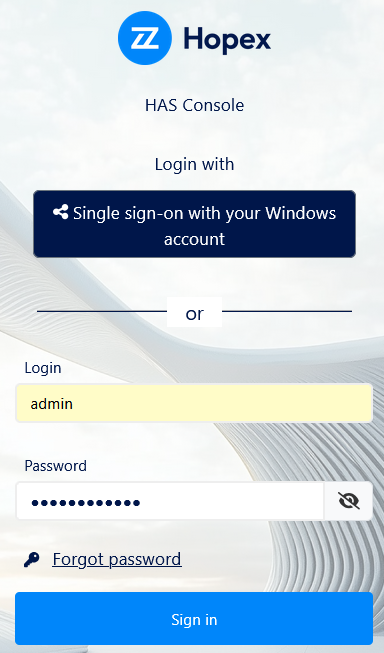 |
• Change the password as requested.
• Click Change password
The password must:
• include at least 8 characters, one uppercase, one lowercase, one digit, and one special character
• not use any sequence of characters (e.g.: 12345, qwert) nor contextual words (e.g.: hopex, mega)
• be complex enough to meet your enterprise security requirements
|
|
Step 32 (optional)
|
Step 33 (optional)
|
|
• When successful a message informs you that: “Password has been changed successfully”.
• Click Sign in with new password.
|
• Login with the new password with user “Admin”.
 |
|
Step 34
|
|
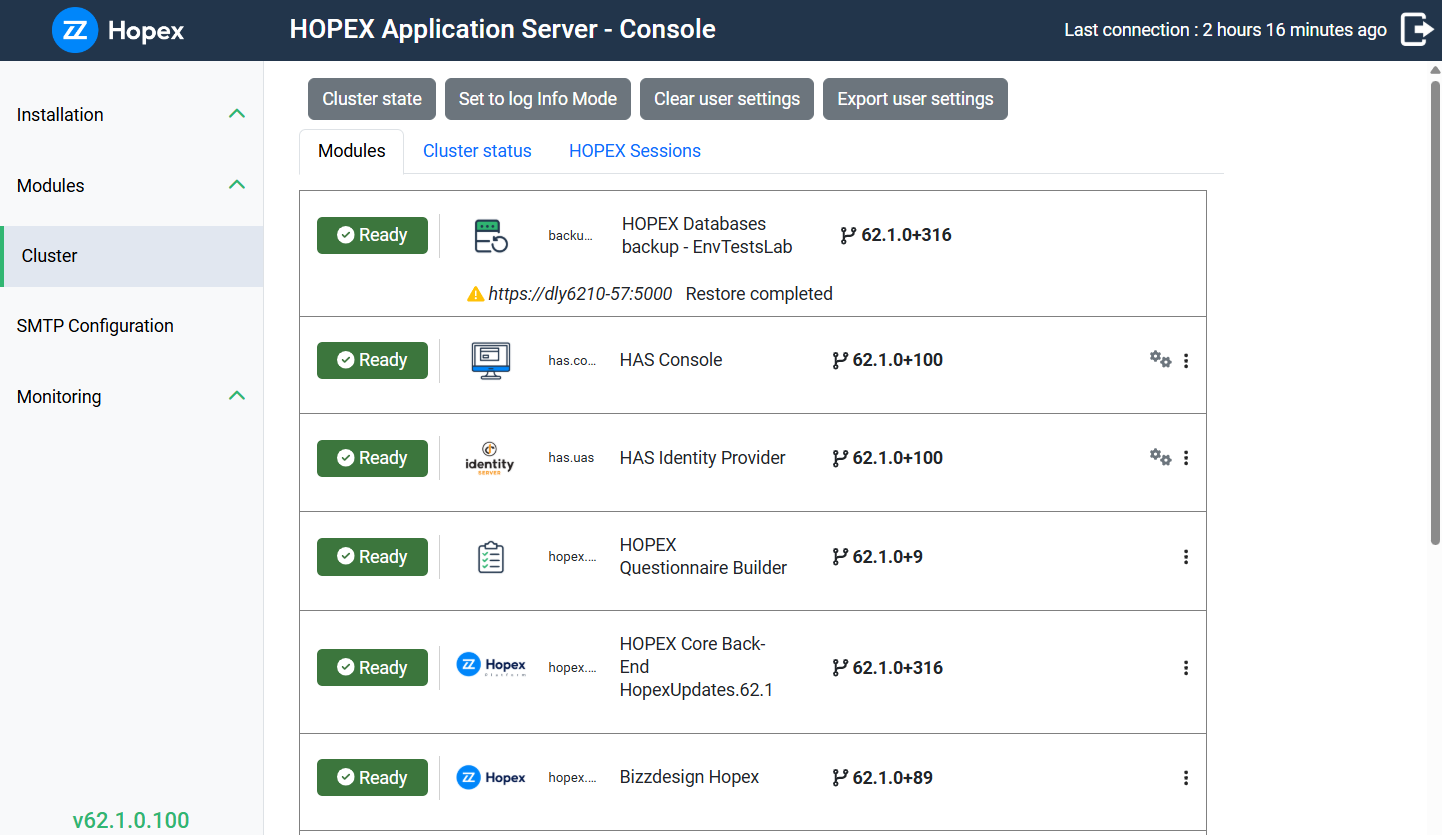
The Console shows the modules that are installed and running.
HOPEX Core is not running because it needs:
- the Must license
- One environment (SystemDB)
|
 |
3.8. Adding Must license to MegaSite.ini setting
If you have already set the Must license path with the Instance Manager on Step 25, you can skip the following steps and go to step 50.
|
Step 40
|
|
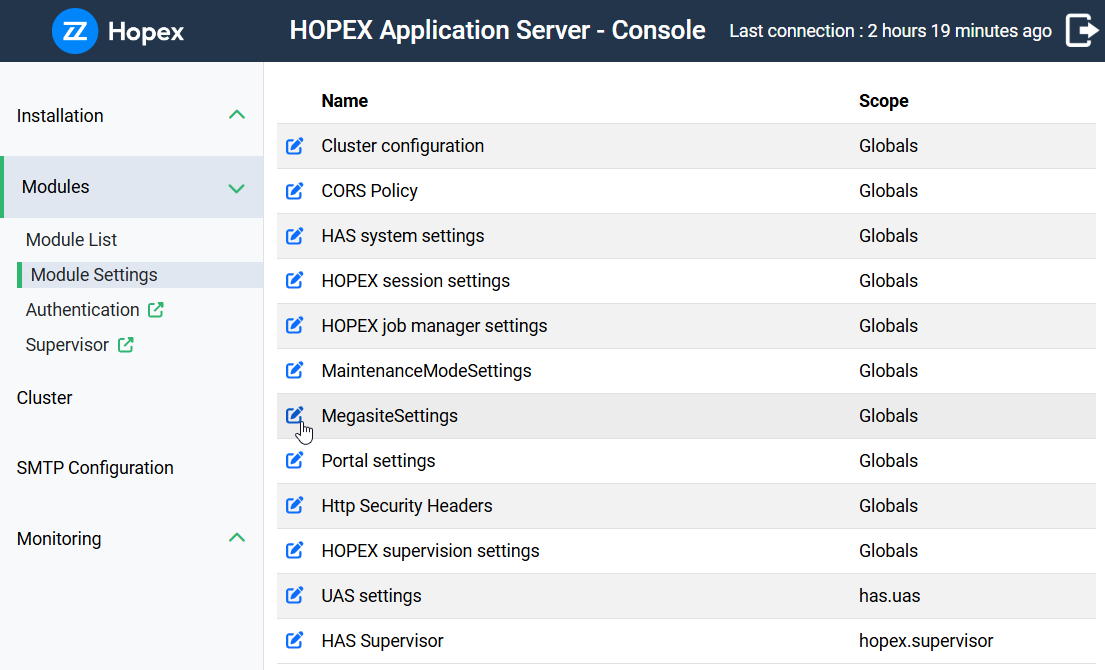
Edit MegaSite.ini:
• Select Modules > Module Settings menu
• In the right pane, click the MegasiteSettings icon to edit “Megasite.ini”
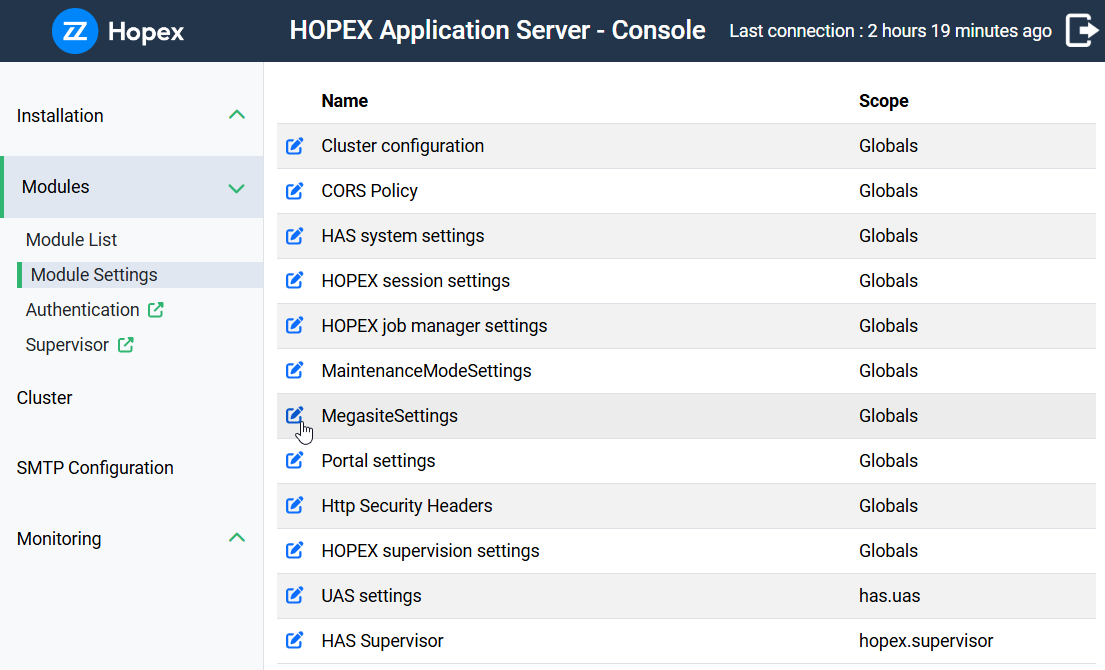 |
|
Step 41
|
|
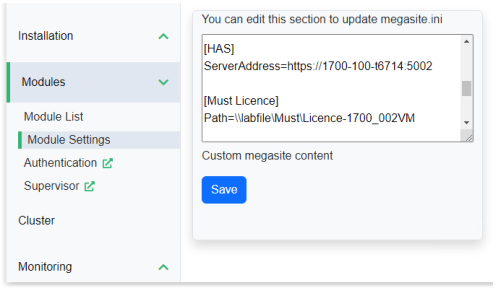
Add Must settings in the text area:
• Add the following section:
[Must licence]
Path=<< UNC server>>
Where <<UNC server>> is the path given to sales administration when you requested your Must license file.
• Click Save
 |
If the license is not correct all next steps will fail. Moreover, HOPEX Core cannot start if there is no environment with a valid SystemDb.
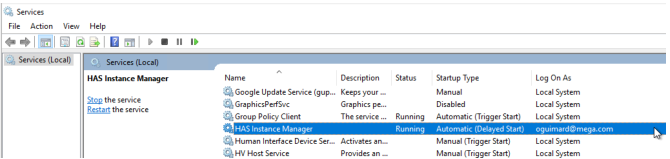
If you did not set yet a domain user, HOPEX will not be able to access the shared drive for the license.
To verify the user used to launch HAS Instance manager go to windows services and search for HAS Instance Manager.
3.9. Creating or referencing HOPEX environment
Now you have 3 possibilities:
• Creating a totally new HOPEX environment: at first installation (new SQL Server databases)
• Restoring existing HOPEX environments (recommended choice)
o To leverage “backup” provided in the Hopex Store at first installation (restore)
o To leverage existing databases (migration)
• Referencing: To leverage existing environment when you migrate from previous version.
For:
• Creating: start at step 50
• Restoring: start at step 60 recommended choice
• Referencing start at step 70
3.9.1. Creating a New “HOPEX environment”
This solution may take a while as it creates all the database structure and technical content. The system will:
- create a SystemDB (~2h)
- create a repository (~10min)
For a faster approach go to the recommended choice.
First you must download the HOPEX Environment Installation Package HOPEX Aquila from the store and import it in HAS Console module https://store.mega.com/modules/details/hopex.core.install
|
Step 50
|
Step 51
|
|
• Go to HOPEX installation folder
Default: C:\ProgramData\MEGA\Hopex Application Server\5000
• Launch Administration.exe
If it doesn't launch, you have:
• a license issues,
• a HAS web access issue.
|
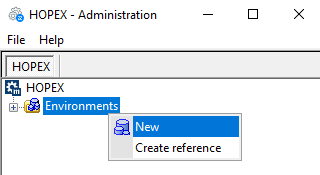
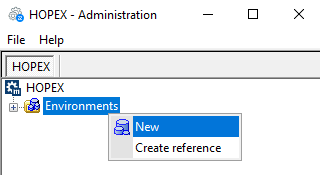
• Right-click Environments > New
|
 |
 |
|
Step 52
|
Step 53
|
|
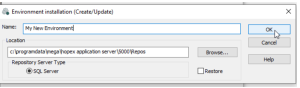
• Give a name to your environment.
It will create a database with the name: <<Name>>_SystemDb
• Adjust location of the folder. A set of files will be created. In case of Cluster/Farms deployment the Location should be a shared folder
Example: \\Environments\SharedEnvFolder
• Click OK.
|
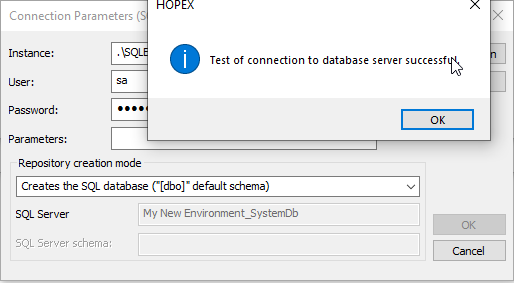
• Enter SQL instance parameter
• Set the SQL user password
• Set the password for the SQL password
• Set the parameter Encrypt=no; or “yes” if you use SSL communication
For other SQL instance connection string please read the appropriate database setting documentation. Used Trusted Connection if you rely on domain user to authenticate to SQL Server. Leave login/password blank in that case.
|
 |
 |
CAUTION: for ODBC Driver 18 ensure to put Encrypt=no; in parameter if you do not leverage SSL communication with SQL Server
|
Step 54
|
||
|
• Click Test Connection
Ensure the message says “Successful” else adjust the configuration in previous step
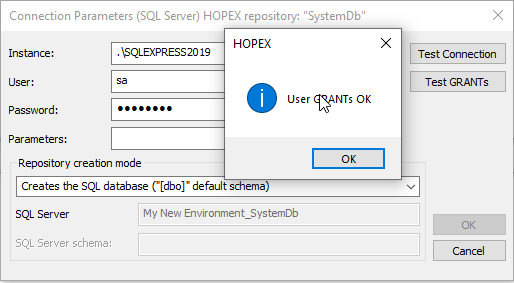
• Click Test GRANTs
Ensure the message says “User GRANTs OK” else adjust the configuration in previous step
|
  |
|
|
Step 55
|
Step 56
|
|
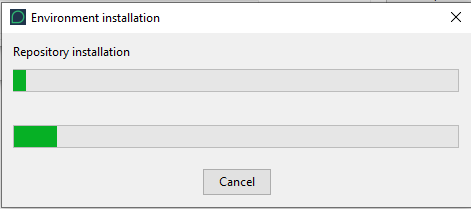
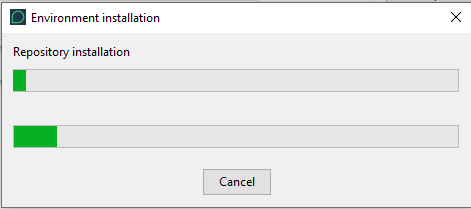
• The process is in progress. It may take a while (From 2 to 6 hours)
|
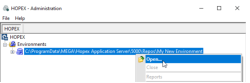
Once the environment is created:
• Right-click the environment and select Open
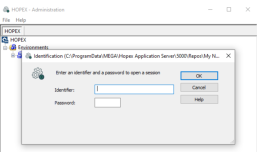
• Default Identifier: “System” with Hopex as password (or empty for previous version)
• Click OK
|
 |
  |
This documentation is done for an English Environment and Repositories. If you want a repository in French/Spanish/German/Italian…Ensure to compile the Metamodel in the appropriate language before creating the repository.
|
Step 57
|
Step 58
|
|
• Expand the environment
• Right-click Repositories and select New
• Give a name to the repository “DATA”
• Click OK
|
• If prompted Test Connection and Test Grants
• The creation is in progress. some file will be imported automatically.
CAUTION: do not click Cancel or Pause
For information: the repository language at creation is the same as the SystemDB one.
|
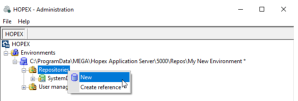 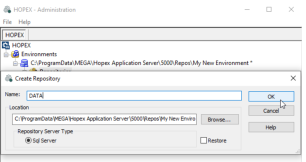 |
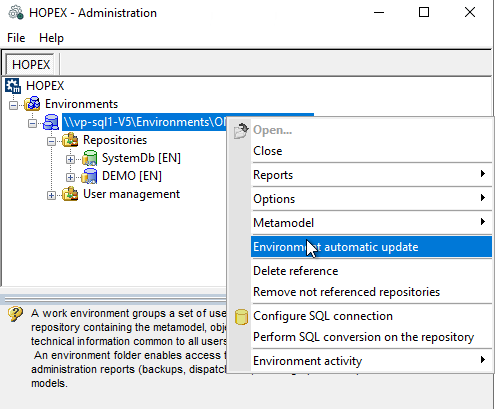 |
|
Step 59
|
|
Once the repository is created:
• Right-click the environment and select Environment automatic update
You may need to stop the module HOPEX Core Back-End from HAS Console and restart Administration.exe
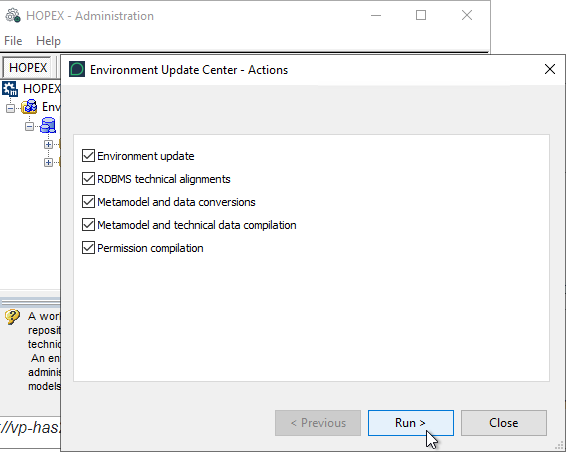
• Follow the step of the wizard by clicking Next up to Run.
For PRODUCTION environment:
• Select Permission compilation
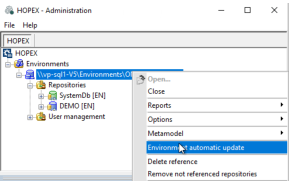   |
3.9.2. Restoring an existing database
Restore an existing database if you did not just create a totally new environment in previous chapter.
Two scenarios:
• You are a totally new customer:
You can leverage “backup” provided by Hopex Store
• You are an existing customer:
You have existing database (SystemDb and repositories) that you want to add to this new installation. This is common in case of migration to a newer version.
3.9.2.1. Get Hopex Store backup
You may skip this part if you already have backup.
|
Step 60
|
|
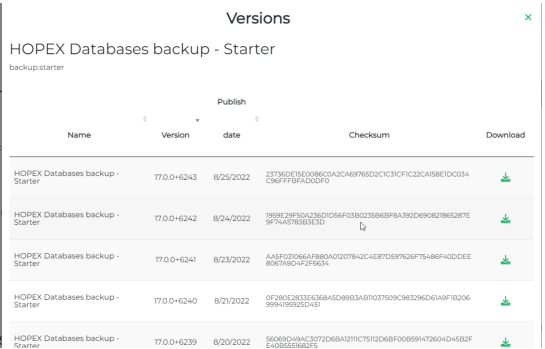
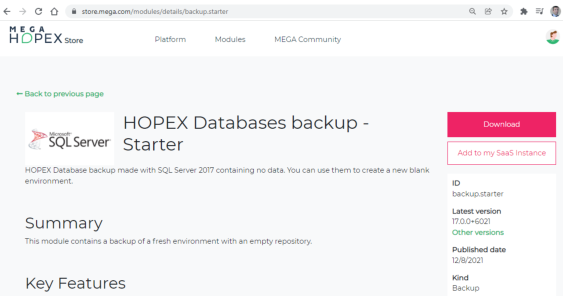
• Go to Hopex Store to get the HOPEX Databases backup -Starter
• Download the backup related to your version*. Click “Other version” to access all versions.
  |
|
*To know your version:
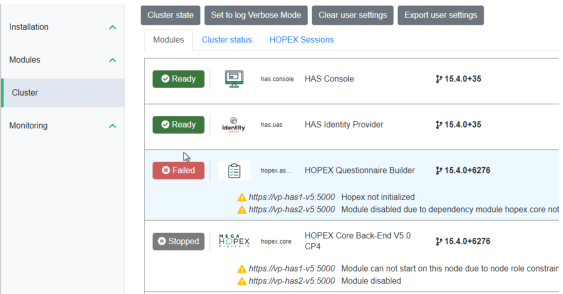
• In HAS Console, select Cluster menu
• Check the version number for HOPEX Core Back-end module
• Take the same version and build x.x.x+xxxx
 |
|
Step 61
|
Step 62
|
|
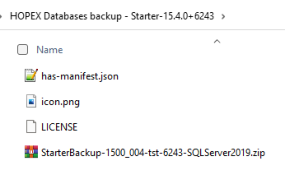
• Rename extension haspk to zip or open directly with your preferred tool to extract.
• Unzip the downloaded file
• Unzip the zipped contained inside
 |
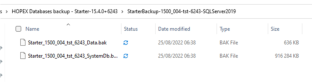
• You should have 2 files with the extension “.bak” named:
“Starter…_Data.bak”
“Starter…_SystemDb.bak”
 |
You now need to import those .bak in SQL Server. Many options are possible and many tools exist to perform this action. Use your preferred tool.
The following step uses SQL Management Studio as an example. You can download it here: https://docs.microsoft.com/en-us/sql/ssms/download-sql-server-management-studio-ssms?view=sql-server-ver16
|
Step 63
|
Step 64
|
|
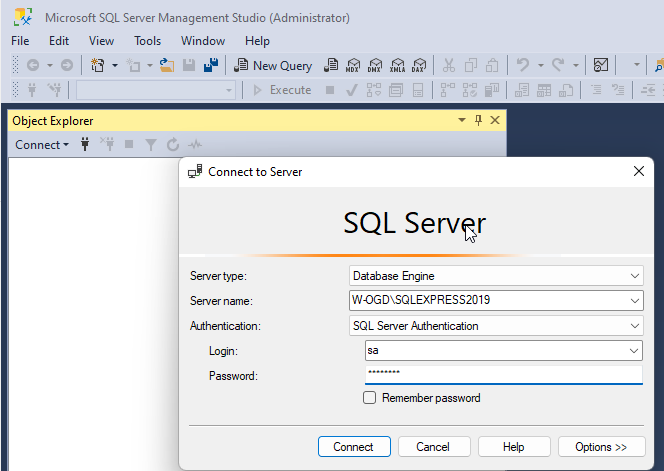
• Launch SQL Management Studio and connect to your SQL Server
• Use the user account that has enough privilege. In that example “sa”
 |
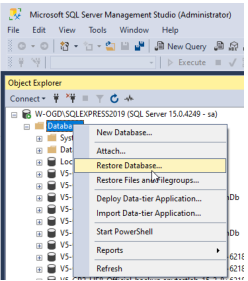
• Right-click Databases and select Restore Database
 |
|
Step 65
|
Step 66
|
|
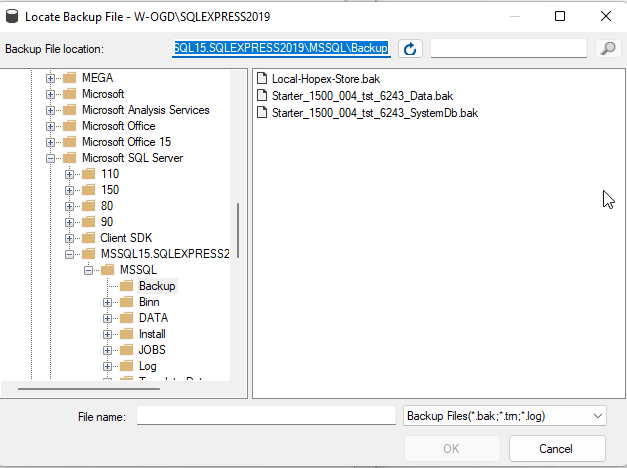
• Select device
• Click Add
 |
• Browser for the backup you want to restore
 |
|
Step 67 (optional)
|
Step 68
|
|
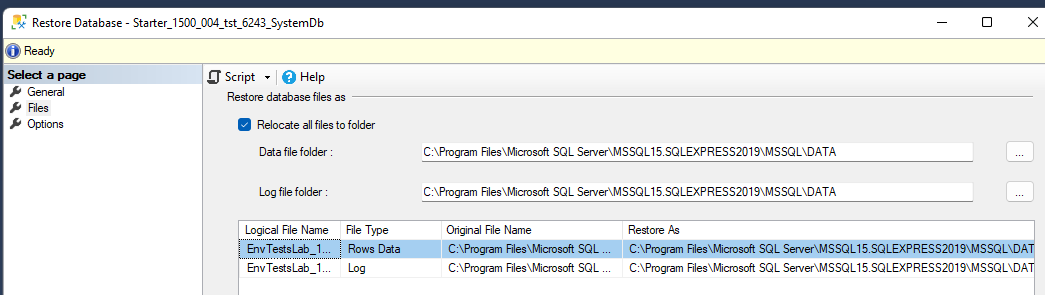
• Click Files
• Click Relocate all files to folder
• Adjust file location and name
• Click OK
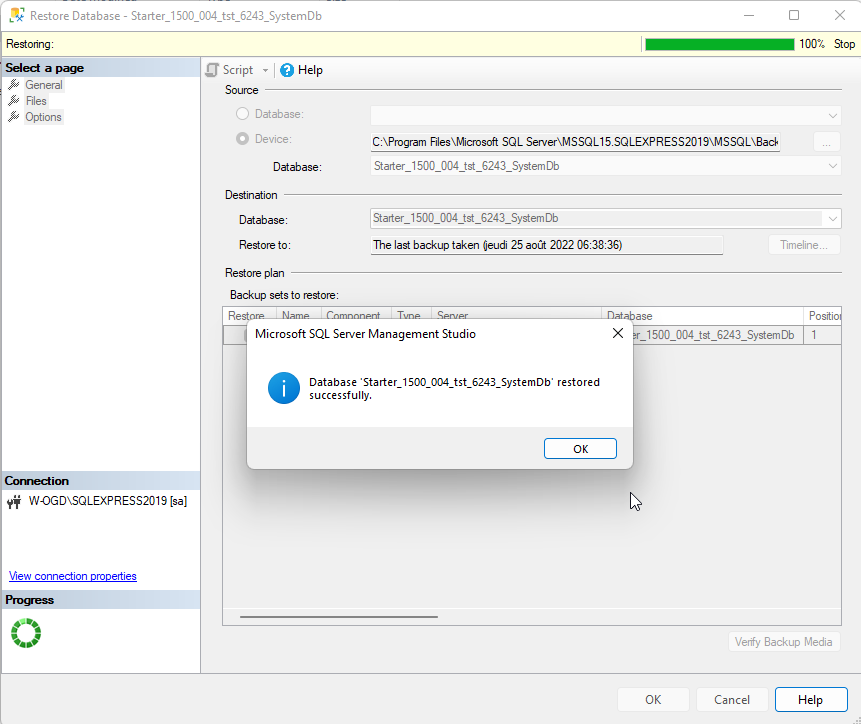 |
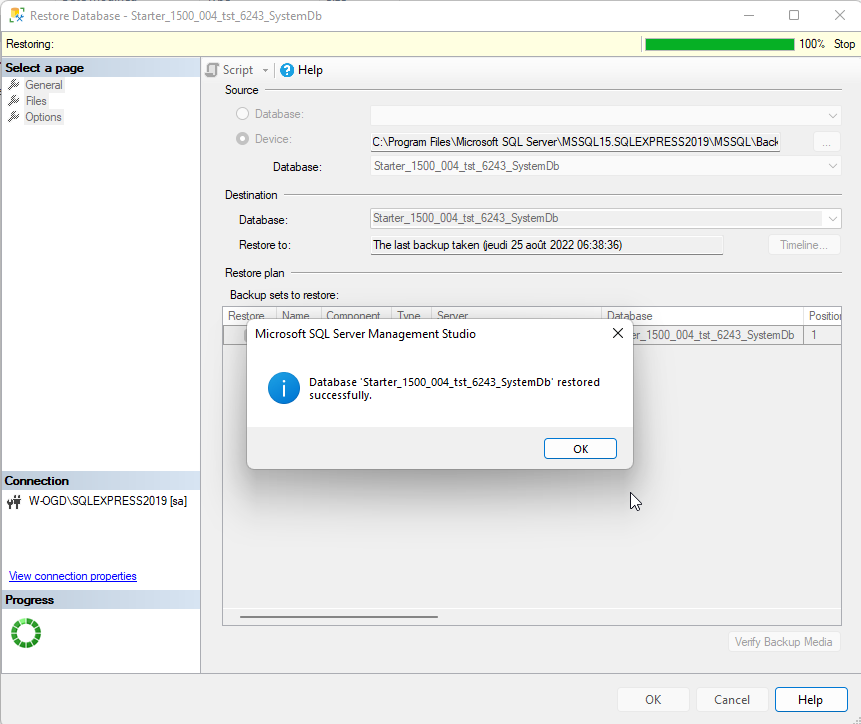
• The import is in progress.
• Click OK when done
• Repeat step 64 to 68.
 |
|
Step 69
|
|
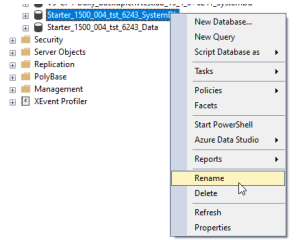
You should now find 2 databases
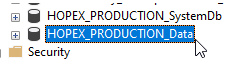
• Rename to your need while keeping naming convention
E.g.: replace “Starter***” by “HOPEX_PRODUCTION”
_SystemDB cannot be changed.
_Data can be changed by “_***” where *** is your new name
   |
Go to 3.9.3 Referencing existing environment section.
3.9.2.1. Use Customer backup
First you must download the HOPEX Environment Migration Package HOPEX Aquila from the store and import it in HAS Console module https://store.mega.com/modules/details/hopex.core.migrate
Perform the same steps with your backup as described in Get Hopex Store backup above.
Go to 3.9.3 Referencing existing environment section.
3.9.3. Referencing existing environment
|
|
Step 70
|
 |
• Go to HOPEX installation folder
Default: C:\ProgramData\MEGA\Hopex Application Server\5000
• Launch Administration.exe
If it doesn't launch, you have:
• A license issues,
• A HAS web access issue.
|
If you are coming from 3.9.2 Restoring an existing database you most likely need to go to Step 73 in section “3.9.3.2 From restore step”
3.9.3.1. From existing folder
Follow this step if you have already a folder of environment and a database in SQL. You are in this situation if you are migrating from previous version. Otherwise go to the next section 3.9.3.2 From restore step
|
Step 71
|
Step 72
|
|
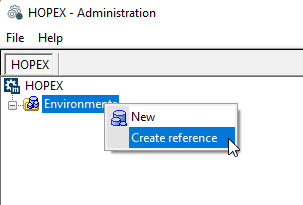
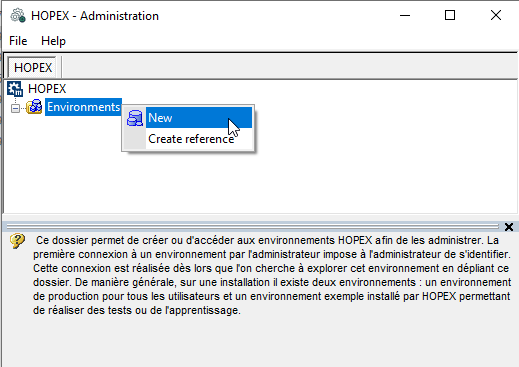
• Right-click Environments and select Create Reference
|
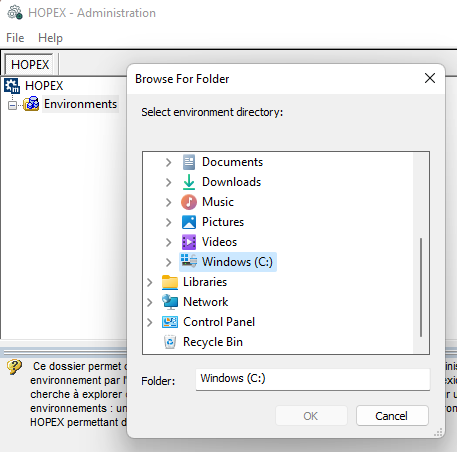
• Select the folder that contains your environment.
Once you have selected a valid folder, the OK button is enabled
|
 |
 |
If you succeeded this step, you can now continue to 3.10 Configuring the non-interactive desktop heap
3.9.3.2. From restore step
Perform Step 70 then continue to Step 73
|
Step 73
|
Step 74
|
|
• Right-click Environments and select New
|
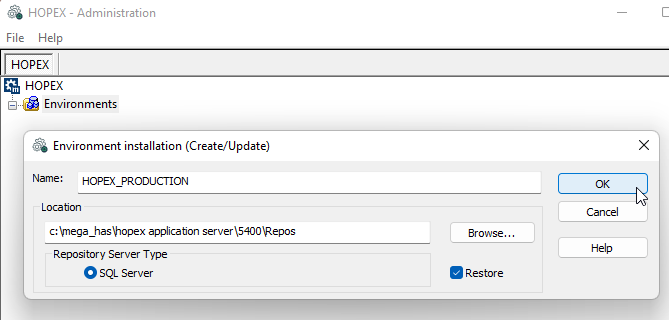
• Enter the name of your environment, the one you chose on “Step 69”.
For Example, “HOPEX_PRODUCTION”
• Adjust location of the folder. A set of files will be created. In case of Cluster/Farms deployment the Location should be a shared folder
Example: \\Environments\SharedEnvFolder
• Check Restore
• Click OK
|
 |
 |
|
Step 75
|
Step 76
|
|
• Enter SQL instance parameter
• Set the SQL user password
• Set the password for the SQL password
• Set the parameter Encrypt=no; or “yes” if you use SSL communication.
For other SQL instance connection string please read the appropriate database setting documentation.
Use Trusted Connection if you rely on domain user to authenticate to SQL Server.
|
• Click Test Connection
• Ensure the message says “Successful” else adjust the configuration in previous step
• Click Test GRANTs
Ensure the message says “User GRANTs OK” else adjust the configuration in previous step
• Click OK
|
|
|
|
|
Step 77
|
Step 78
|
|
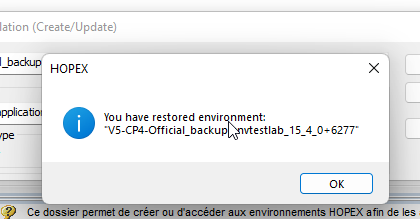
• When successful you get a message.
• Click OK
|
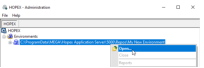
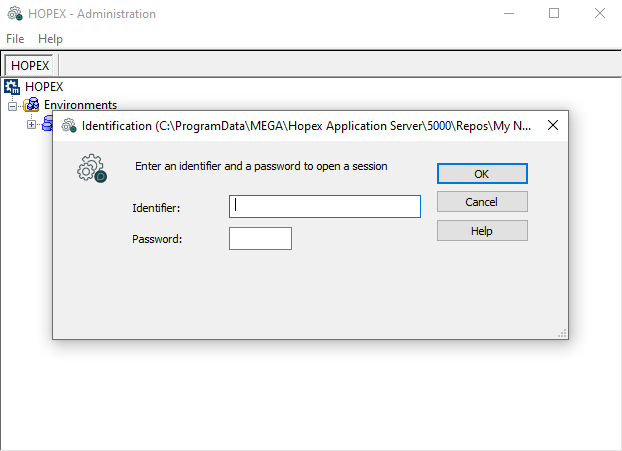
• Once the environment is restored, right-click the environment and select Open
• Default Identifier: “System” with the appropriate password (default is Hopex)
• Click OK
|
 |
  |
|
Step 79
|
Step 80
|
|
• Expand Environments
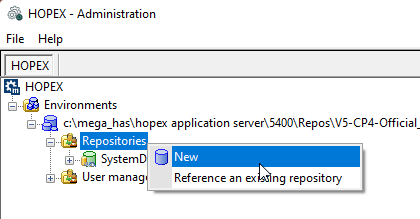
• Right-click Repositories, and select New
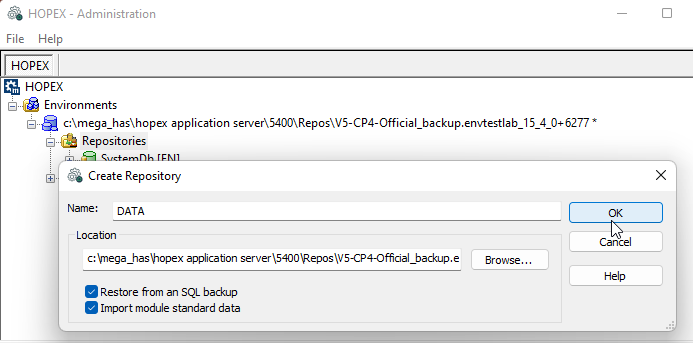
|
• Select Restore from an SQL Setup
• Enter a Name for the repository
|
 |
 |
|
Step 81
|
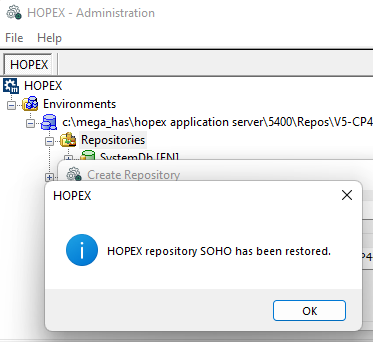
Step 82
|
|
• Repeat Step 75 and 76
• Click OK when successful.
|
• Once the repository is restored, right-click the environment and select Environment automatic update
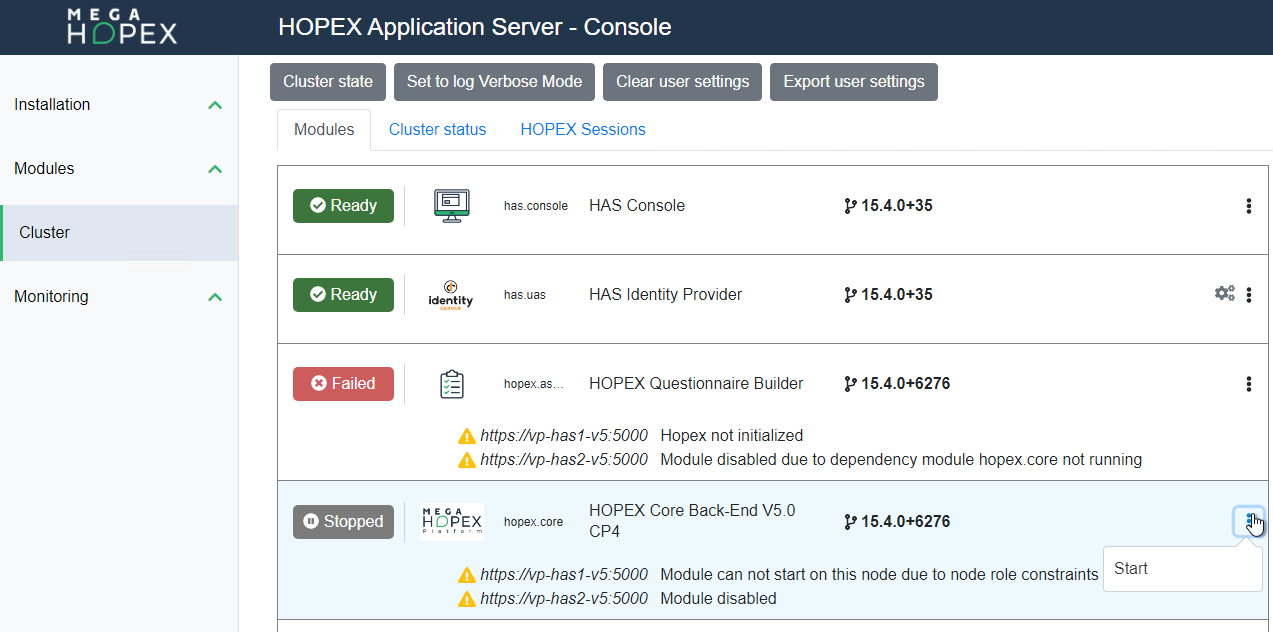
You may need to stop the module HOPEX Core Back-End from HAS Console and restart Administration.exe
• Follow the step of the wizard by clicking Next up to Run.
For PRODUCTION environment:
• Check “Permission compilation”
|
 |
 |
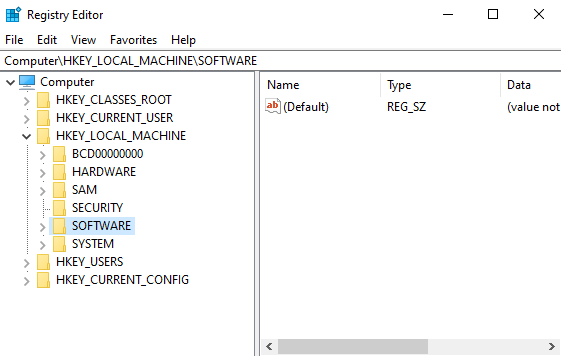
3.10. Configuring the non-interactive desktop heap
The Desktop Heap is an internal memory of Windows. It is used by HOPEX. It is thus mandatory to update this value.
For more information about desktop heap, see official Microsoft documentation: https://docs.microsoft.com/en-us/troubleshoot/windows-server/performance/desktop-heap-limitation-out-of-memory.
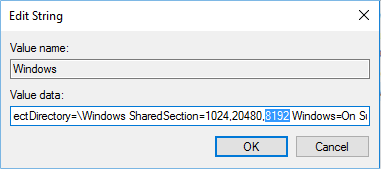
A minimum value of 8192 is required for optimal usage. This modification is performed in the Windows Registry.
To configure the non-interactive desktop heap:
1. Open Windows registry: “regedit.exe”.
2. Search for value name in:
HKEY_LOCAL_MACHINE\SYSTEM\CurrentControlSet\Control\Session Manager\SubSystems.
3. Edit the value data: there is a long string for this value that looks similar to:
%SystemRoot%system32csrss.exe ObjectDirectory=Windows SharedSection=1024,20480,8192 Windows
In the Shared Section part, the three values are, in order:
• the shared heap,
• the interactive desktop heap, and
• the non-interactive desktop heap.
They are expressed in KB. Default values vary significantly between Windows versions.
4. You might need to modify the non-interactive desktop heap.
Be careful of not using excessive values, as this could stop you from logging into your server.
It is therefore recommended to change this value using small increments. The recommended value is: 8192.
3.11. Configuring Java Heap size (optional)
HOPEX Platform embeds an internal JVM. When running HOPEX some reports might generate huge consumption of JAVA object and therefore consume a lot of memory.
Change this option only if you have hit the limit of memory consumption of JAVA.
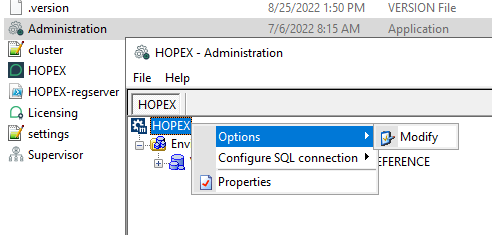
1. Launch Administration.exe
2. At the root level, right-click HOPEX, and select Options > Modify.
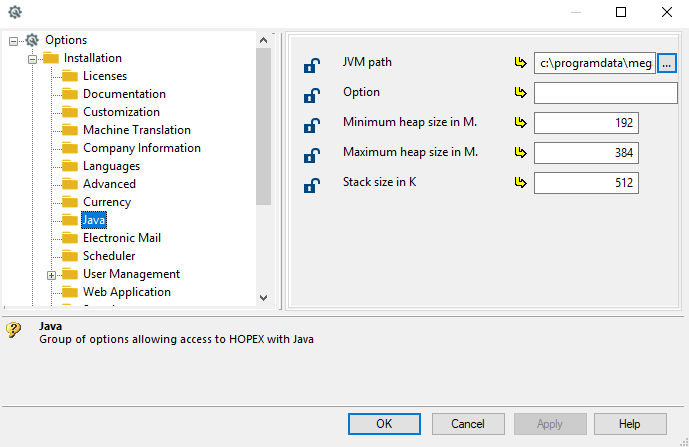
3. Select Installation > Java.
4. Edit Maximum heap size or Stack size.
Recommendation increase by a factor 2: 192, 384, 768… or 512, 1024…
3.12. Windows User and access rights
You can skip this step if you are a developer, consultant or partner doing a standalone.
When installing Hopex, a domain user is required to manage access to:
• Must license file and folder
• Shared environment UNC
It is recommended not to execute the HAS Instance manager with the default Local System account. You will therefore need a domain user with sufficient privilege.
Please note that a domain user is required for cluster deployment.
The minimum required privilege of this domain user:
• Read/Write access on the shared folder of the Must license
• Read/Write access on the shared folder of the HOPEX environment folder
• Execute/Read/Write access on all the installation folders
Additional requirements:
• This domain user can be used to access the database in case you use the connection trusted configuration for SQL Server. It should be properly configured in SQL Server.
• This domain user must have reading access rights on: HKEY_LOCAL_MACHINE\SOFTWARE\Microsoft\Windows NT\CurrentVersion\Perflib
• You should enable Read/Write in the certificate store to import HAS self-signed certificate. If you don't allow it a complementary step to import manually the root.pfx located in C:\...\HOPEX Application Server\...\.certificates
Ideally this domain user is Administrator of the server.
3.12.1. Changing the user domain
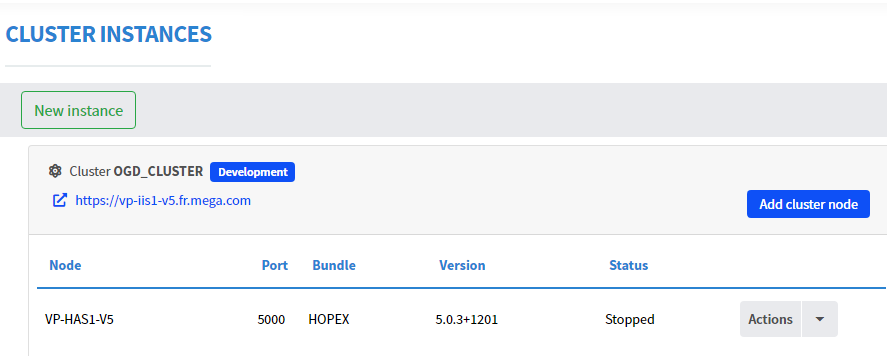
To change the user please ensure to:
• Stop running instance
• Stop HAS Instance
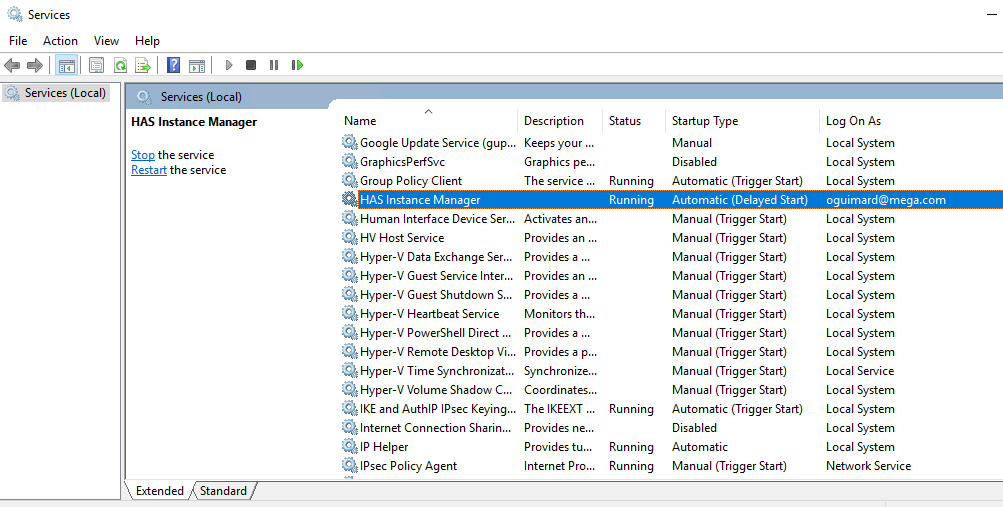
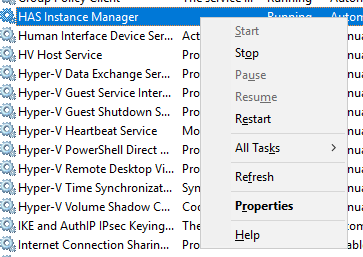
1. Go to windows Services.exe
2. Right-click HAS Instance Manager and select Properties.
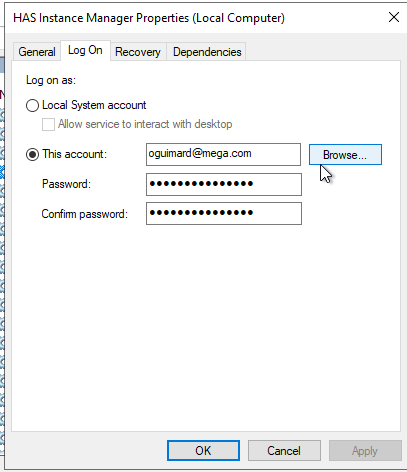
3. Click Log on tab.
4. Select This account and click Browse.
5. Enter the domain user and password.
3.12.2. Keeping Local system
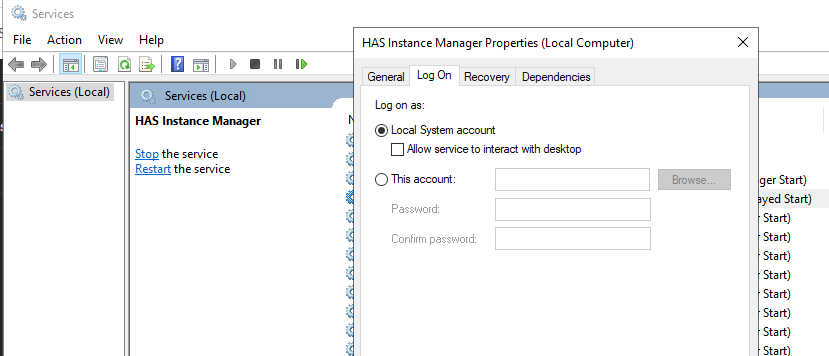
What is the impact of keeping local system?
In that case:
• The Must license shared folder must be shared to “Everyone” with full control
• The environment folder should be on C:\ drive or shared with “Everyone”
• You cannot configure “Trusted Connection” with SQL server
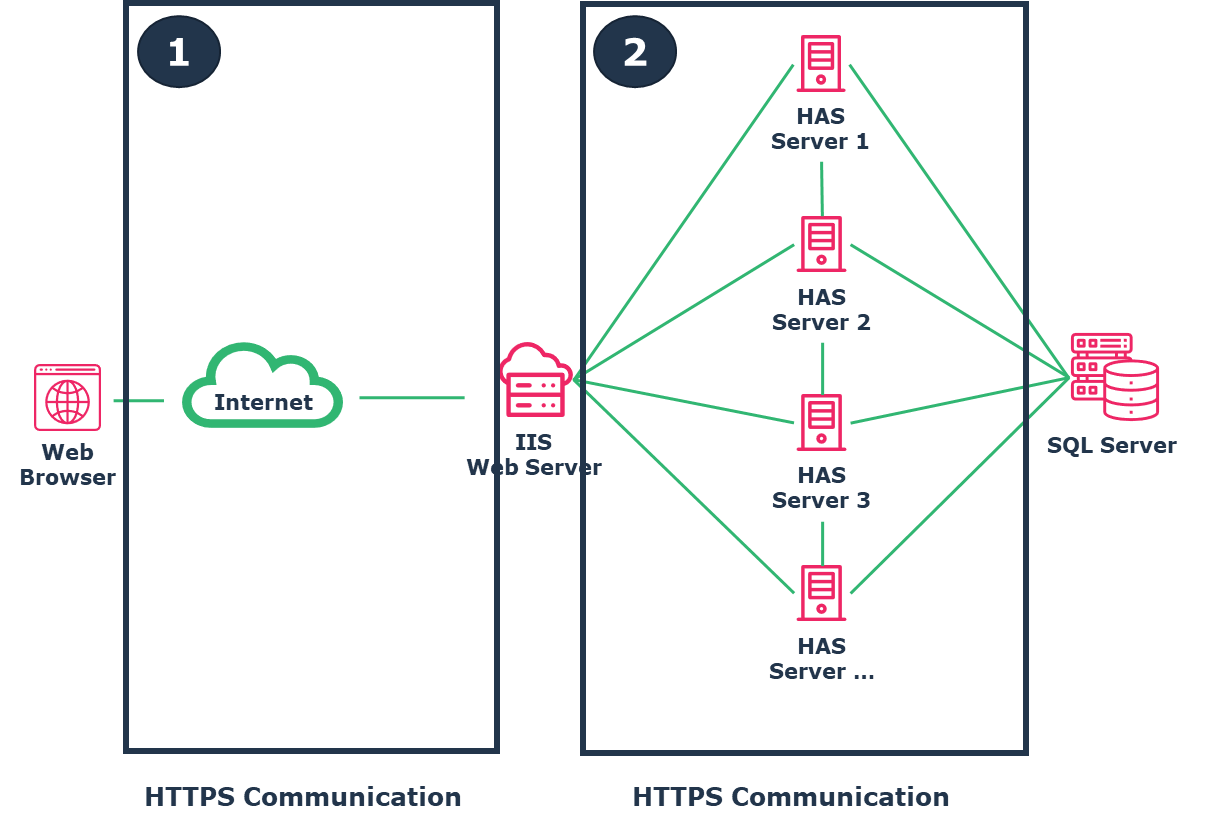
• You cannot run in cluster
3.13. Installing a DEV server
When installing a server for “Development” purposes it is mandatory to:
• install .NET 10 SDK
• download “HOPEX Application Server Customization” module and import it in HAS Instance
• install HAS nuget package on the server as explained in the module custom. Please README.MD and HOW-TO.MD file the custom module
• ensure you have the right to execute powershell script:
Set-ExecutionPolicy -ExecutionPolicy RemoteSigne