Creating an ArchiMate Element in a diagram view
ArchiMate® Standalone Elements have a plain creation wizard where only the Name is requested.
ArchiMate® EA Elements are based on shared inventory objects. Those elements have a specific creation behavior with a dedicated wizard enabling the reuse or the creation of shared object.
Creating ArchiMate® Standalone Elements
ArchiMate® Application Functions are Standalone Elements.
Creating an ArchiMate® Standalone Element
To create an Application Function, for example:
1. In the insert toolbar, click the Application Function button.
2. Click in the diagram.
The Creation of Application Function dialog box appears.
3. Enter the Name of the Application Function.
4. Click OK.
The Application Function appears in the diagram.
Creating several ArchiMate® Standalone Elements
To create the other Application Functions:
1. Double-click the Application Function button and then click in the diagram
The new Application Function appears in the diagram.
2. Press key <Esc> to stop the Application Functions creation.
3. To rename the Application Functions, click the name of the Application Function, press key <F2> and enter a new name.
Reusing an ArchiMate® Standalone Element
To reuse an existing ArchiMate® Standalone Element, you must use the navigation tree.
For example, to reuse an existing Business Service:
1. In the navigation pane Models, expand your ArchiMate® Model folder.
2. Expand the Elements folder and the Business Service folder.
3. Click the Business Service that interest you and, holding down the mouse button, drag the cursor to the in the diagram and release the mouse button.
The corresponding Business Service appears in the diagram.
Creating an ArchiMate® EA Element
ArchiMate EA Elements have a specific creation behavior with a dedicated wizard enabling the reuse or the creation of shared inventory objects.
With HOPEX for the ArchiMate Framework, two categories of mapping are considered:
• Simple mapping: the existing inventory objects are proposed in a drop-down list with autocompletion.
• Complex mapping: several inventory object subtypes are possible and must be chosen when creating a new object. For example, creating a new Device will request to choose whether the new device is an IT Server, an IT Device or an IoT Devices, in order to be consistent with the HOPEX IT Architecture solution infrastructure MetaModel.
Creating a shared inventory object
To create a Device, for example:
1. In the insert toolbar, click the Device button.
2. Click in the diagram.
The Creation of Device dialog box appears.
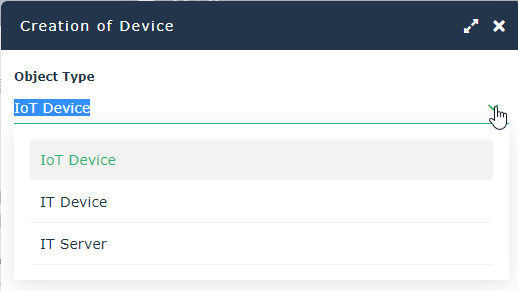
3. Select the type of the Device.
4. Enter the Name of the New Device.
5. Click OK.
The device appears in the diagram.
Depending on the type of the created ArchiMate EA Element, more information may be requested in a specific wizard. For example:
• Business Object is mapped to the Concept inventory, so creation of a new concept will display the concept creation wizard, suggesting existing terms, for instance.
• Work Package is mapped to the Enterprise Project inventory, so creation of a new Work Package will display the Enterprise Project creation wizard, requesting the following additional information:
• The current project state: demand, candidate or ongoing,
• The Project Domain in which the project is defined, for example Business, IT or R&D projects,
• The project planned dates.
Creating a shared inventory object using the navigation tree
You can also create ArchiMate® Elements from the navigation tree.
For example, to create a Device from the navigation tree:
1. In the navigation pane Models, expand your ArchiMate® Model folder.
2. Expand the Elements folder.
3. Right-click on the Device folder and select New.
The Creation of Device dialog box appears.
Reusing a shared inventory object using the insertion toolbar
To reuse a Business Actor, for example:
1. In the insert toolbar, click the Business Actor button.
2. Click in the diagram.
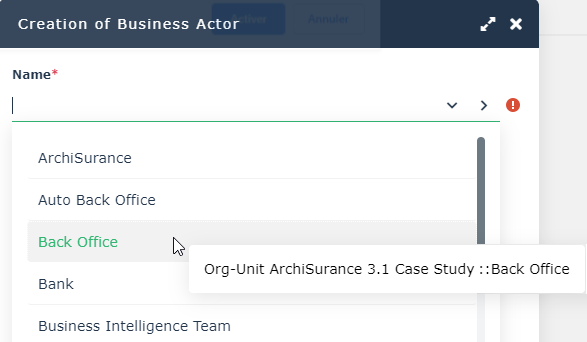
The Creation of Business Actor dialog box appears.
3. Click the Name down arrow.
Several inventory object subtypes are possible: Org-Unit or Position Type elements must be chosen.
Reusing an element based on a shared inventory object using the navigation tree
You can also use the navigation tree to reuse an existing Org Unit, for example:
1. In the navigation pane Models, expand your ArchiMate® Model folder.
2. Expand the Elements folder and the Business Actor folder.
3. Click the Business Actor that interests you and, holding down the mouse button, drag the cursor to the in the diagram and release the mouse button.
The corresponding Business Actor appears in the diagram.
Duplicating an element from another ArchiMate® Model
You can use the navigation tree to duplicate any existing element, Application Component, for example, from another ArchiMate® Model:
1. In the navigation pane Models, expand the origin ArchiMate® Model folder.
2. Expand the Elements folder and the Application > Application Component folder.
3. Click the Application Component that interests you and, holding down the mouse button, drag the cursor to the in the diagram and release the mouse button.
The duplicated Application Component appears in the diagram.
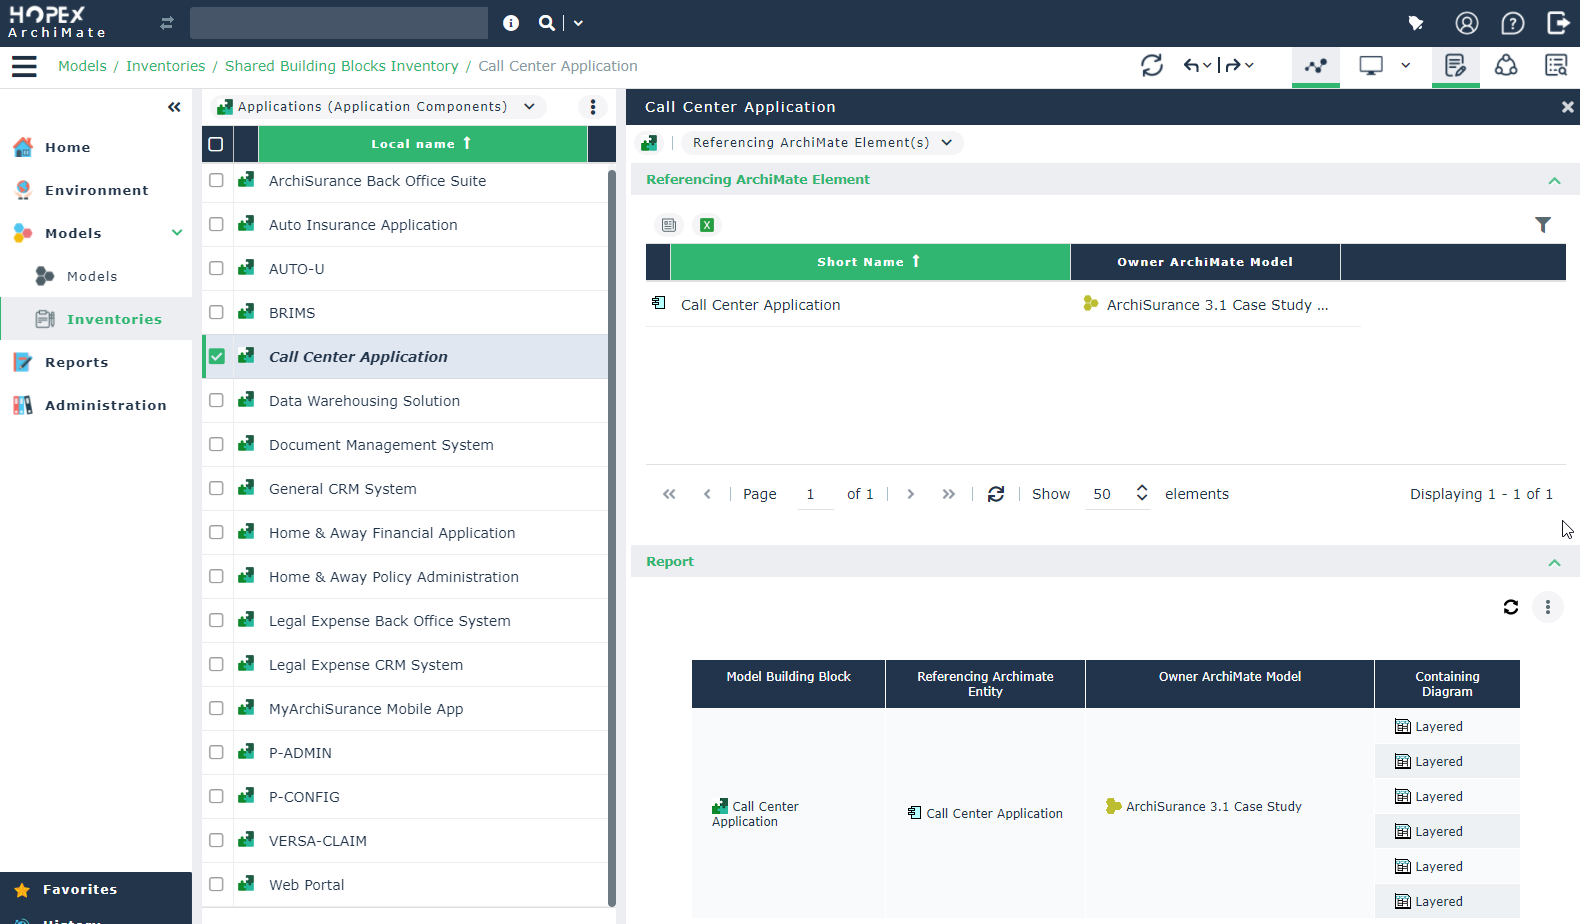
Access to Referencing ArchiMate® Element(s) Report
The Referencing ArchiMate Element(s) report, enabling a view of the use of a component across the various ArchiMate® models.
To access to this report:
1. Select the navigation pane Models > Inventories.
2. Click the Shared Building Blocks Inventory tile.
3. The list of objects that can be shared across ArchiMate® Models with other HOPEX products is displayed.
4. Select a type of objects.
Application (Application Component), for example.
5. Select an object and open the Referencing ArchiMate Element(s) property page.
The report is computed and displayed.