3. HOPEX Configuration
To be able to use HOPEX in Microsoft Teams you need to install the module and configure HOPEX as described below.
3.1. Installing Teams Module
To install Teams module:
1. Connect to HOPEX Application Server – Console.
2. Select Modules > Module List.
3. In Add new tab, search for “Teams”.
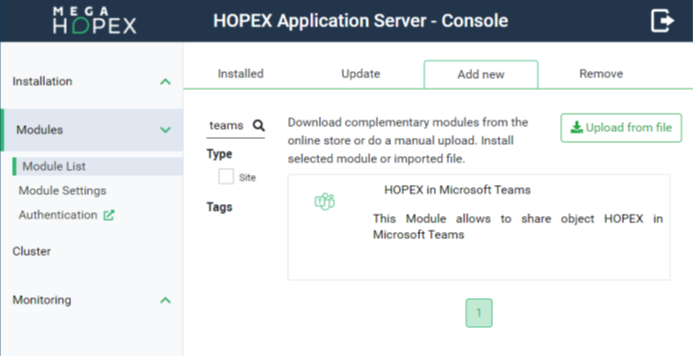
4. Install Teams Module.
5. In the Administration application (administration.exe), run the “Environment Automatic Update” (right-click the environment and select Environment automatic update).

3.2. Configuring Http Security
To configure http security:
1. Connect to HOPEX Application Server – Console.
2. Select Modules > Module Settings.
3. Edit Http Security Headers and ensure Enable Security Header is selected.
4. In the Content Security Policy field, copy-paste the following content:
block-all-mixed-content; default-src 'self'; script-src 'self' 'unsafe-eval' 'unsafe-inline'; style-src 'self' 'unsafe-inline'; img-src 'self' *.mega.com data: ; frame-ancestors 'self' teams.microsoft.com *.teams.microsoft.com *.skype.com *.mega.com
5. Set the Frame-option as displayed below:
Your settings should look like the following:

3.3. Setting SameSite cookie
You must set SameSite cookie attribute to none, secure (SameSite cookie attribute - Teams | Microsoft Docs).
To set SameSite cookie:
1. Connect to HOPEX Application Server - Console.
2. Select Installation > HAS Settings.
3. In the Web settings tab, set Cookies SameSite option to “None”.

3.4. Configuring the authentication
Create an API Key or, alternatively, a user Account for sharing diagrams in read only mode.
This will be used to open a session in read only mode on the repository that contains the diagrams to share.
3.4.1. User accounts
Create a user account and communicate its username and password to all of the users who need to share diagrams in Teams.
1. Connect to HOPEX Application Server - Console.
2. Select Modules > Authentication.
3. Select User accounts menu and click Create.
4. Set the User Name and Password.
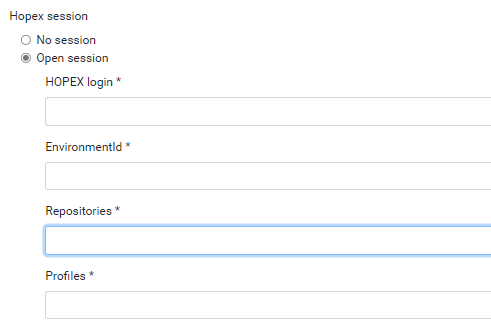
5. Configure Hopex session:
• Select Open session
• Enter a valid HOPEX login
• Select the EnvironmentId
• Select the Repository
• Select the Profile with which you want to connect
6. Click Submit.
3.4.2. API Key
Create the API Key and communicate it to all of the users who need to share diagrams in Teams:
|
1. Connect to HOPEX Application Server – Console.
2. Select Modules > Authentication.
|
 |
|
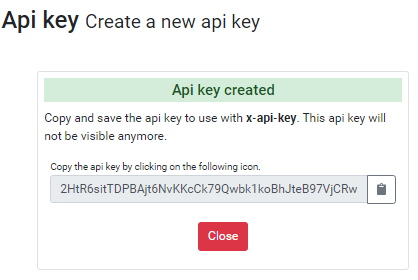
3. Select API keys menu and click Create.
• Enter a key a Name.
4. Configure Hopex session:
• Select Open session
• Enter a valid HOPEX login
• Select the EnvironmentId
• Select the Repository
• Select the Profile with which you want to connect
|
 |
|
5. In Connection Mode, keep “Read/Write”.
6. Click Submit.
|
 |
|
7. Copy the Key.
|
 |
3.4.3. Authorizing HOPEX connection from Teams
To allow to share HOPEX objects in Microsoft Teams:
|
1. Connect to HOPEX Application Server – Console.
2. Select Modules > Authentication > Authorized clients.
|
 |
|
3. In team.auth row, click Edit
 |
|
|
5. Click Save.
|
 |