Texts in a Diagram
In diagrams, texts enable informal documentation of diagrams.
Inserting a Text in a Diagram
A text box is created under the shape of the element, containing the cursor for text entry.
Creating a text
To insert a text in a diagram:
1. In the diagram object inserting bar, click Graphical object  > Text.
> Text.2. Click in the diagram.
The text frame is displayed.
3. Enter the text you want to insert in the diagram.
4. Click in the diagram, outside the text frame.
The text is inserted in the diagram.
Modifying a Text
To modify a text:
1. Select the text.
2. Press the <F2> key.
The text edition frame pops up.
3. Click in the frame, or in the text where you want to position the cursor.
4. You can:
• enter text: the characters are inserted where the cursor is positioned.
• use the <Backspace> and <Delete> keys to delete characters.
• use Copy, Cut and Paste after selecting text.
• press <Enter> key to insert a line break.
Modifying the text style
You can modify the style of a text using the diagram lateral page Aspect. To display this page, click the brackets  on the right of the edit zone.
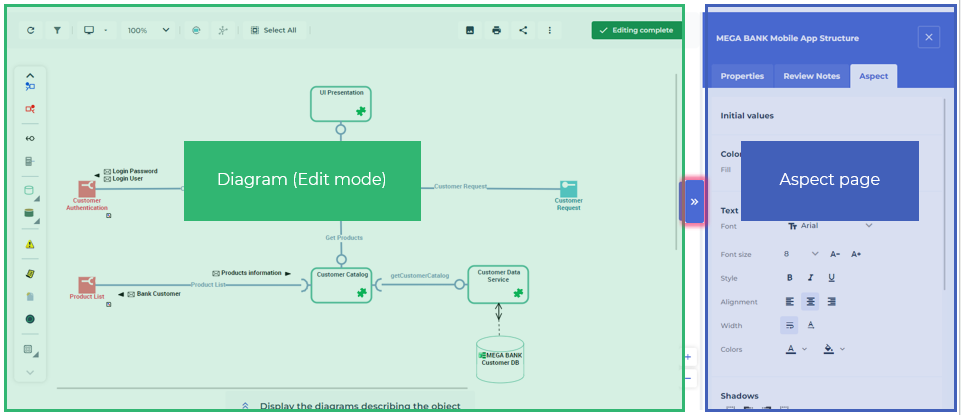
You can modify the text style:
• the character font and size
By default: Arial 8.
• the text alignment
By default: Center.
• the font color
By default: Black.
• the text background color
By default: none.
You can also select the options:
• Word-wrap text to automatically wrap the text to a new line if it does not fit on one line.
Option selected by default.
• Automatic width adjustment to resize the text frame according to the actual size of the text.
Option selected by default.
To modify the text style:
1. In the diagram, open the Aspect page.
2. Select the text.
3. Use the Aspect page features to modify the style of the text.
Displaying a text vertically
To display a text vertically:
1. Select the text.
2. In the Aspect page, click Rotation left 90°  or Rotation right 90°
  .
.
or Rotation right 90° .Inserting a Field in a Diagram
Fields enable to easily insert date, title, and page number in a diagram. Fields are updated automatically: when printing your diagram, you do not need not manually update it to view the updated printing date.
To insert a field in a diagram:
1. In the diagram inserting bar, click Graphical object > Field.
> Field.The Insert Field dialog box appears.
2. Select the desired field in the Field Type box.
The contents of the Format box are determined by the type of field you selected.
3. Select the Format.
4. Click OK.
5. Click in the diagram.
The field is inserted into the diagram where you click.
Field formats
Formats appear as follows:
Date and time | |
|---|---|
DD | Day |
MM | Month number (1-12). |
MMMM | Month name (fully spelled) |
YY | Year in two numbers (93 for 1993). |
YYYY | Year in 4 numbers (1993) |
hh:mn | Hours and minutes on a 24-hour basis (14:45) |
hh:mn AM/PM | Hours and minutes on a 12-hour basis (02:45) |
Title/short title | |
|---|---|
AAAAA AAAAA AAAAA | Uppercase |
Aaaaa Aaaaa Aaaaa | Uppercase at the beginning of each word |
aaaaa aaaaa aaaaa | Diagram name with no character change |
Page number | |
|---|---|
1 2 3 | Arabic numerals |
A B C | Letters |
I II III | Roman numerals |
1/x 2/x 3/x | Page number in Arabic numerals followed by total number of pages |
1A 1B 1C 2A 2B 2C | Numbering in rows and columns. |
• Diagram creator
• Diagram modifier
• Diagram creation date / time
• Diagram modification date / time
• Diagram nature
• Short name of object described
• Long name of object described