Drawing a Sketch with HOPEX
Creating a new sketch
To create a sketch with HOPEX:
1. From the Inventories navigation menu, select All sketches.
2. Click New.
A sketch creation dialog box opens.
3. Specify the name and click OK.
The sketch appears in the list.
Creating a sketching diagram from an Enterprise Architecture object
Depending on its type, you can create a sketching diagram from an object of your repository.
To create a sketching diagram from an application, for example:
1. From Applications navigation menu available in the HOPEX IT Architecture solution, select All applications.
The list of applications appears.
2. Select the Application that interests you and click Create Diagram.
3. Select Sketching diagram and click Create a sketching diagram.
The diagram appears and the sketch is created with the name of the application.
Inserting an image in a sketching diagram
You can insert an image in jpg or png format in a sketching diagram created from an object of your repository.
To insert an image in a new sketching new diagram from an application, for example:
1. From Applications navigation menu available in the HOPEX IT Architecture solution, select All applications.
The list of applications appears.
2. Select the Application that interests you and click Create Diagram.
3. Select Sketching diagram and click Upload image.
4. Select the repository of the image that you want to import and click Create Sketch.
The diagram appears and the sketch is created with the name of the application.
Modifying the position of a sketching item name
In a sketch, a shape may be associated with an explanatory text rather than a name. In the case, it may be interesting to move the name of the shape in its center.
To center the name of a shape:
1. Select the shape that interests you and open its contextual menu.
2. In the Graphical Element section, select Position > Center.
The name appears in the center of the shape.

Modifying the shape of a sketching item
A sketching item shape depends on the initial item choice (rectangle or circle, for example) and on a choice proposed in the View and Details contextual menu of the item.
Connecting a sketching item with a repository object
If a sketching item represents an object already created in the repository, you can connect the sketching item to the architecture element.
To do this:
1. Open the Characteristics property page of the sketching item.
2. Click the arrow at the far right of the Represented Objectfield and select Connect.
3. In the connecting information window, select the type of object you want to connect, then select the adequate object from the referential.
The sketching item appears in the form of the object type selected.
4. (Optional) In the Appearance section, untick the box Use represented object representation.
The sketching item reappears in the form of the object type selected.
Importing diagrams in a Sketching diagram
If you need to work freely on a set of objects referencing, in diagrams, a specific repository object, you can import several diagrams in a sketching diagram. The components of the imported diagrams become sketching items. So you can move or connect those elements without any consequence on your repository components and diagrams.
To import application diagrams, for example, in a sketching diagram:
1. Open the sketching diagram.
2. Click the Import diagrams button.
3. In the wizard window, indicate:
• Search Mode specifies if you are interested in diagrams describing the object or diagrams containing the object,
• Object type to select the type of the object that interests you,
• Object, the select the object whose diagrams will be imported.
4. Click the Search button.
The list of diagrams corresponding to the specified Search Mode is displayed in the Results window.
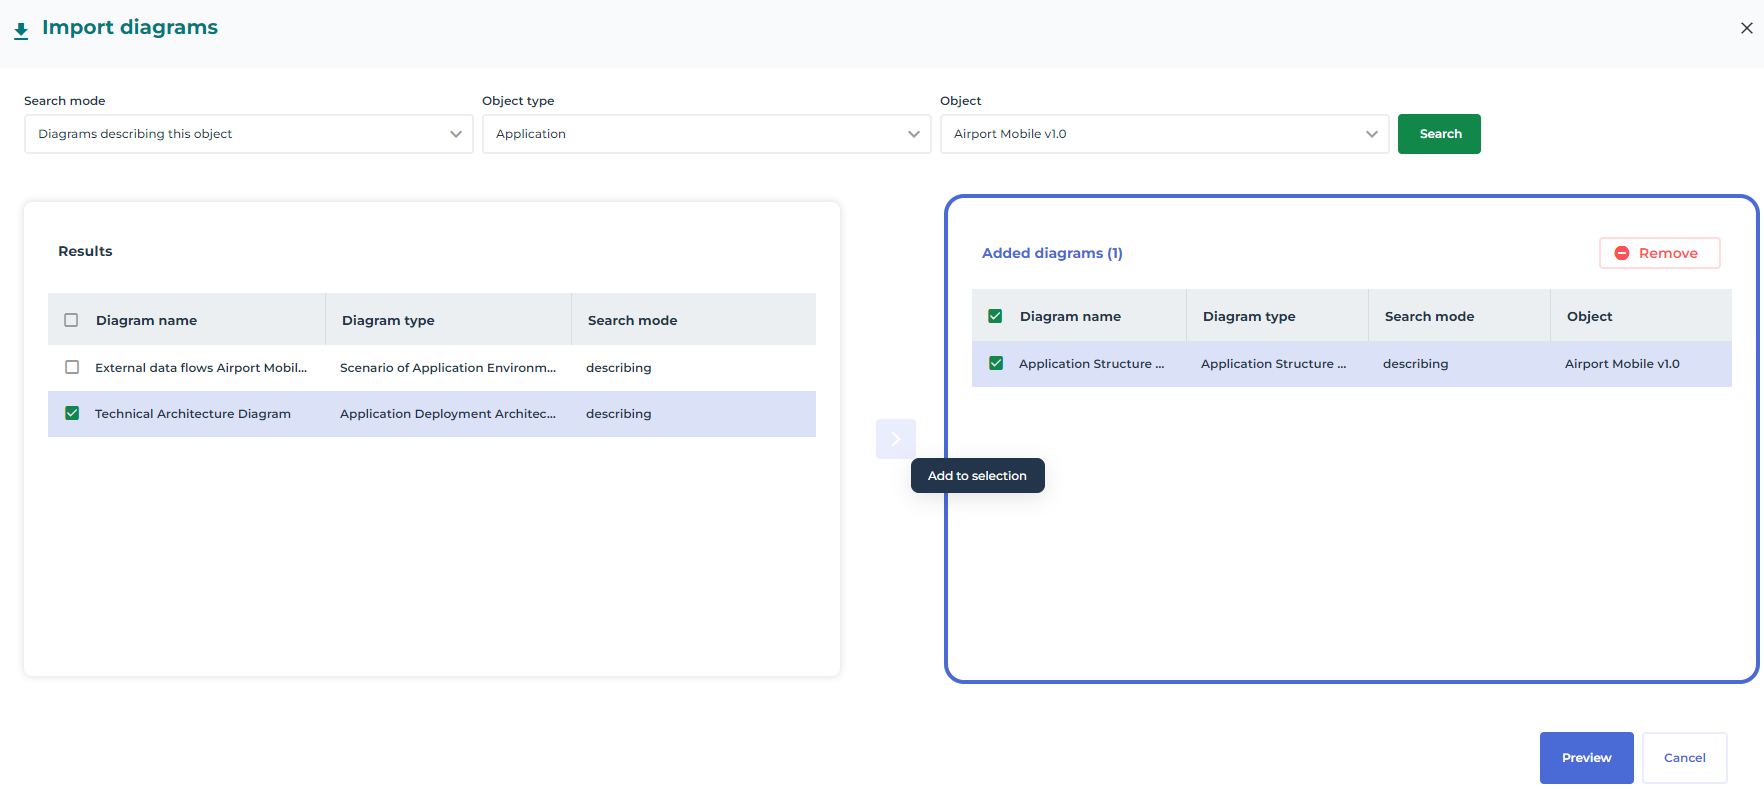
5. In the Results window, select the diagrams that interest you and click the Add select button.
The selected diagrams are displayed in the Added diagrams window.
6. Click the Preview button to view the organization of the imported diagrams in the sketching diagram.
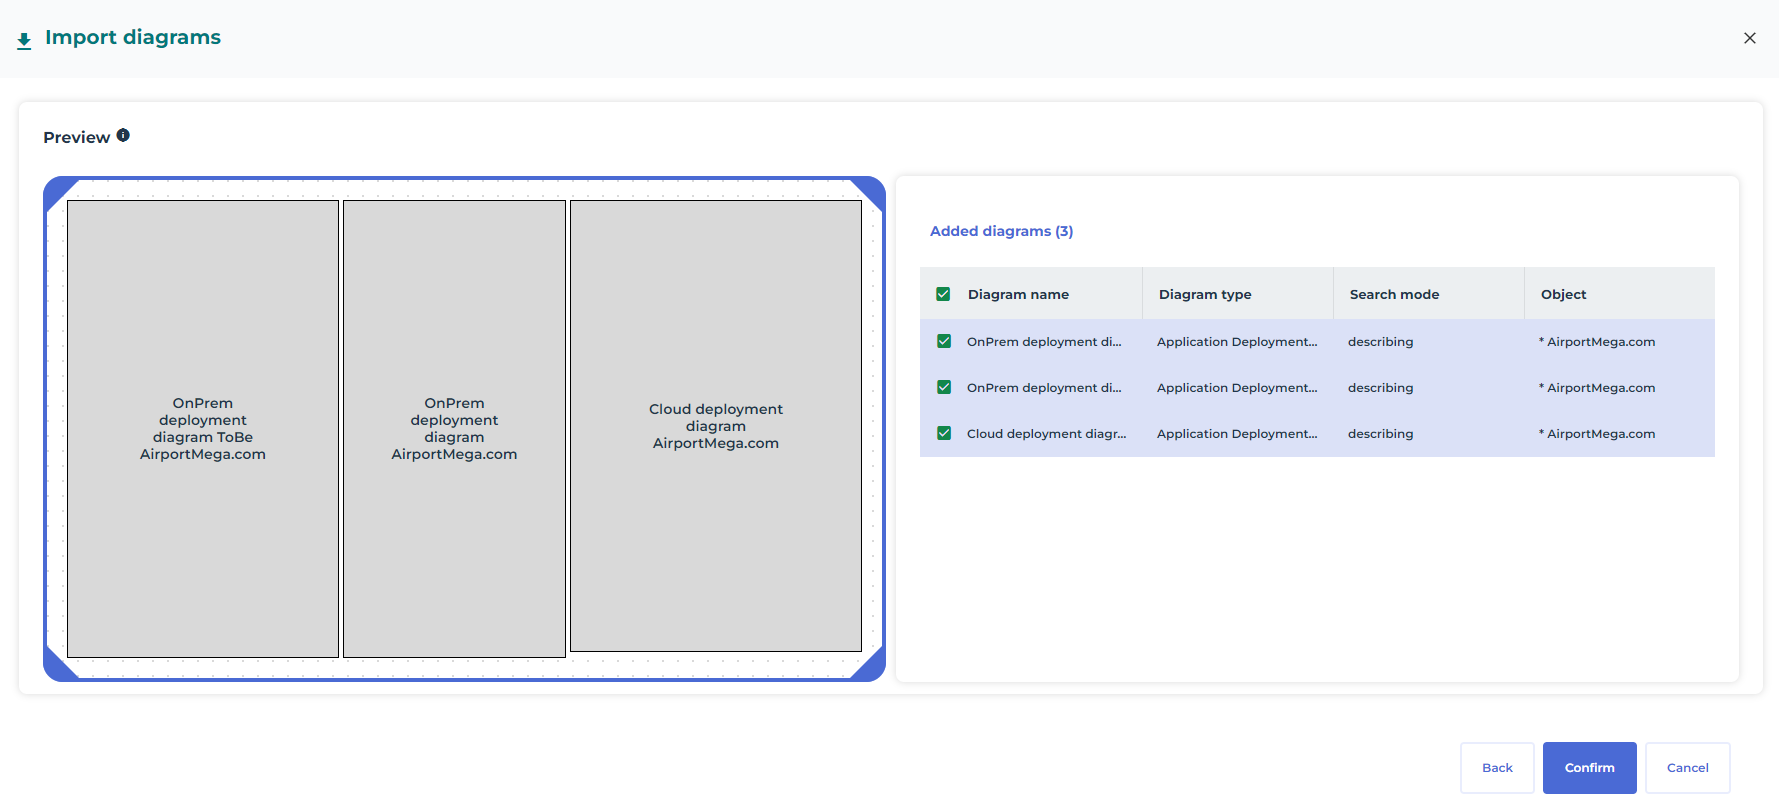
7. Click the Confirm button to import the diagrams are imported in the sketching diagram.
The selected diagrams are imported in the sketching diagram.