Customizing your Dashboard
The Dashboard of your desktop is made up of widgets, which use formatters in the form of reports or other HTML pages. They enable fast access to repository information.
Example: your reports.
Accessing the dashboard
To access your dashboard and widgets:
Adding a widget to your dashboard
To follow the reports you are interested in, you can add them as widgets in your dashboard.
To add a widget to your dashboard:
1. In your HOPEX desktop, click the navigation menu > Dashboard.
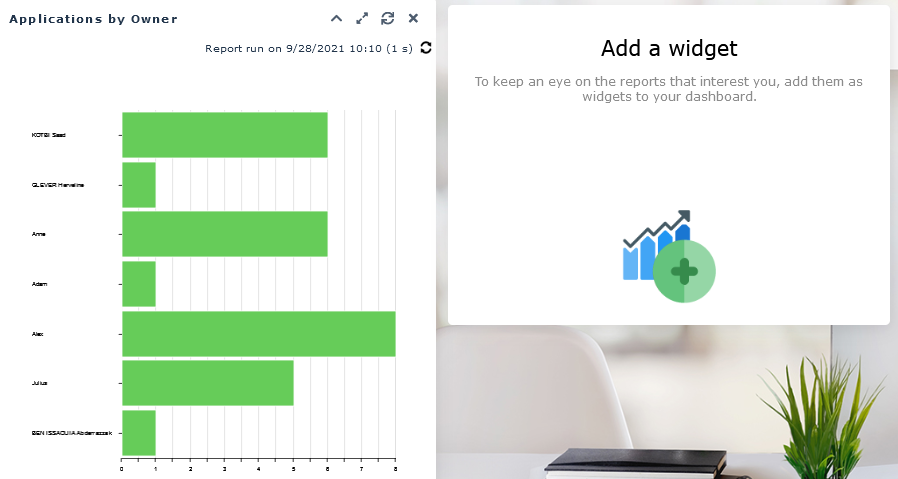
2. In your dashboard, click Add a widget  .
.
.A window displays the tree of the elements you can add. These elements are classified according to their category.
3. Expand the folder of the category concerned.
Example: IT Portfolio Management, then the Reports sub-folder.
4. Click the report concerned.
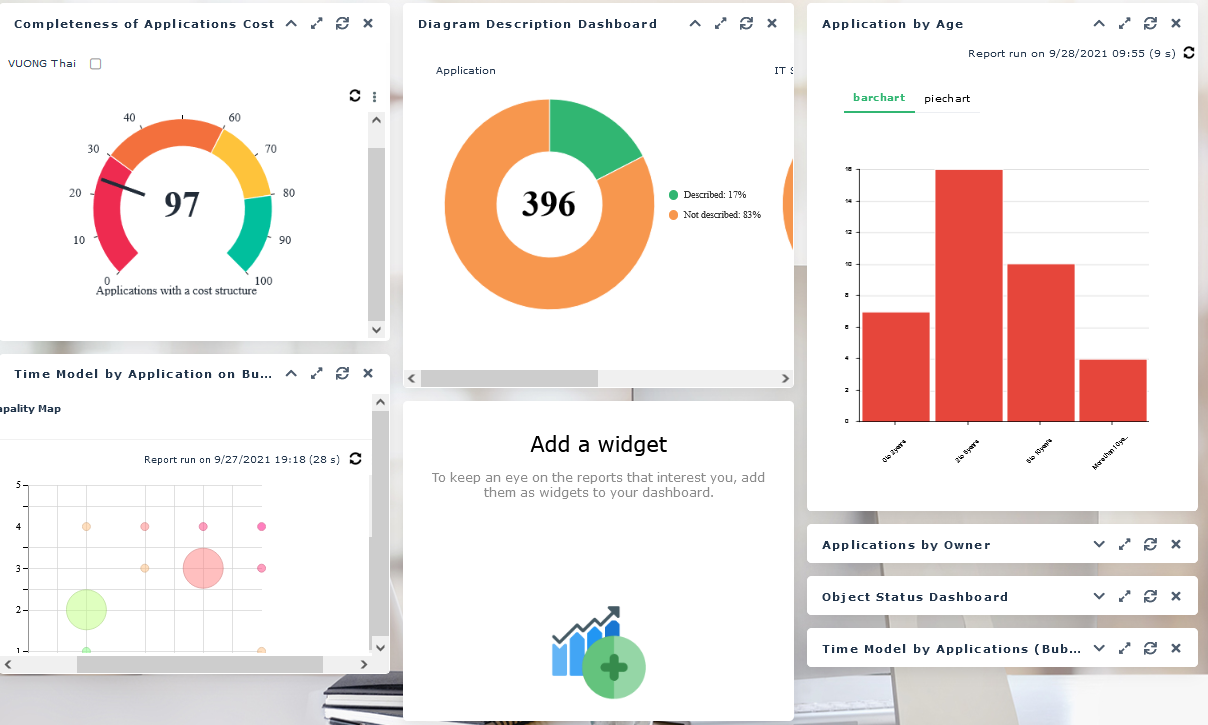
The report is displayed as a widget in your dashboard.
You can add several widgets to your dashboard.
Displaying a widget in full page
Some widgets include reports with a lot of information. They may need to be displayed in full page for a better readability.
To display a widget content in full page:
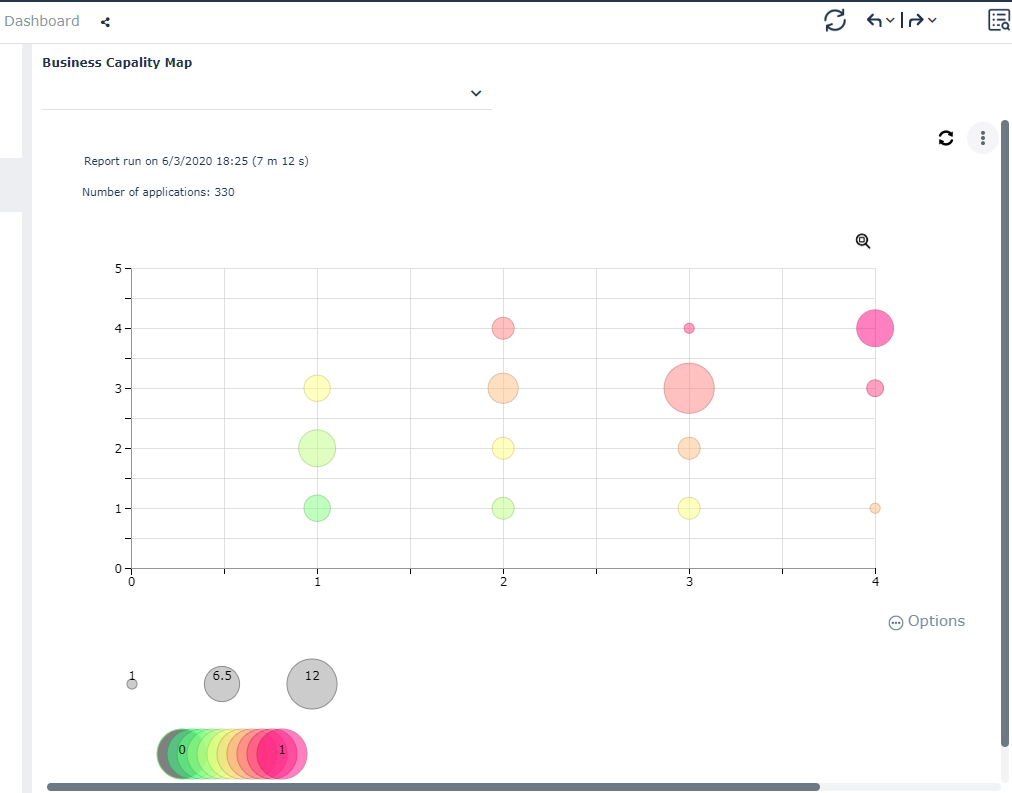
 .
.The widget content is displayed in full page.
Expanding/Collapsing a widget window
If you added a large number of widgets to your dashboard, in the widget title bar click Collapse window  to reduce the widget and save space in your dashboard.
to reduce the widget and save space in your dashboard.  to expand the widget.
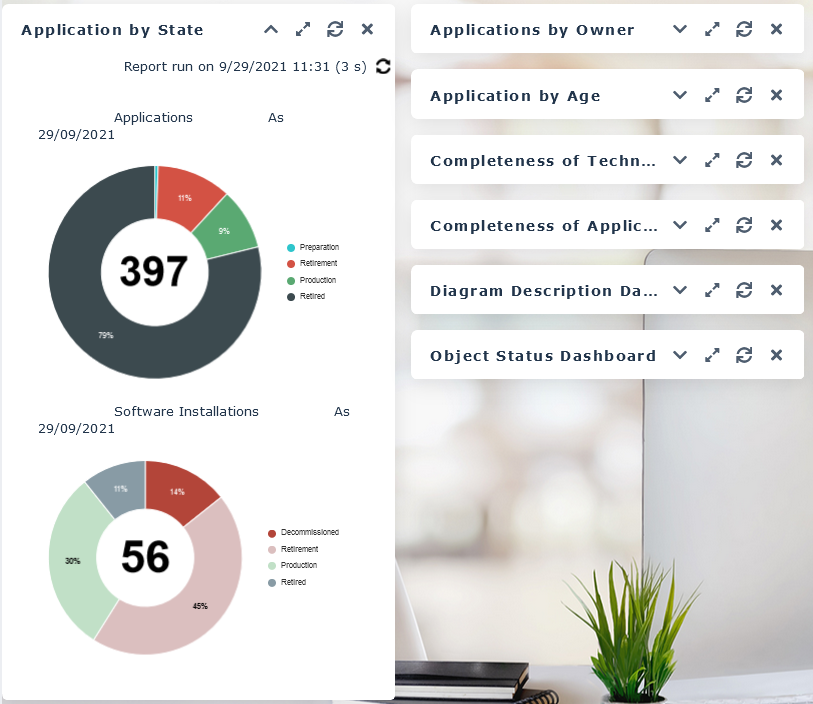
Updating the widget content
A widget shows a report content.
To update this report with the repository data:
 .
.Removing a widget
To remove a widget from your dashboard:
 .
.The widget is removed from your dashboard. It is not displayed at your next connection.