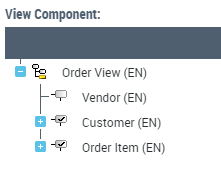
Logical Data View
A data view enables representation of the scope covered by a data model element. A data view is based on a selection of classes connected to the specific context of the view.
Creating a logical data view
Creating a logical data view consists of:
• defining source objects concerning the view (a class or a data view)
• defining more precisely the properties of source objects to be taken into account in the view (attributes, parts)
For example, for order management, you must retrieve the delivery address available for each client. To take into account this information only, you will create a view on the Client class that takes the "Address" attribute only, without taking into account other attributes that can contain the Client class.
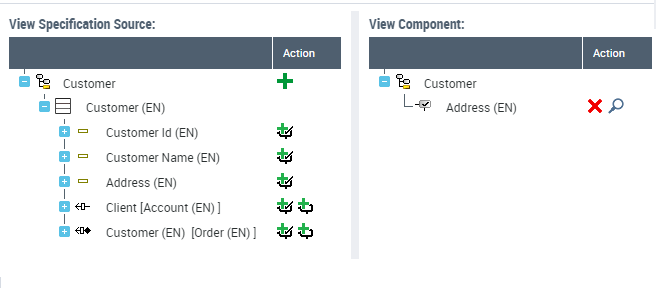
Using the source objects (left tree), you can define embedded components and referenced components in the view.
An embedded component specifies that all the information that comprises the source object is to be taken into account when using the view (for example, the parts and the attributes associated with a class). A referenced component references only the object in the view.
Creating a data view (from a list of views)
To create a data view in HOPEX Data Governance:
1. Click the navigation menu then Architecture > Hierarchy View.
2. In the edit area, expand the Data Dictionaries folder.
3. Right-click the data dictionary and click New > Data view.
The data view creation dialog box opens.
4. To specify the source object in the data view, click New.
5. In the dialog box that appears, enter:
• the Type of object concerned by the view.
• The Source object for the data view.
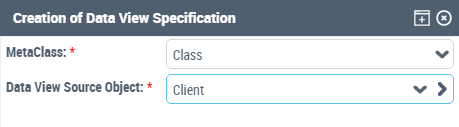
6. Click Add.
7. Repeat the procedure to add other source object if necessary.
8. Click OK.
The new view appears in the list of data views.
Creating a data view directly from an object
You can define the source object of a view by creating the view directly on the object in question.
To create a data view on an object:
1. Right-click the object concerned and select New > Data view.
The data view creation wizard opens.
2. Enter the name of the view.
3. If appropriate, enter the name of the owner.
4. Click OK.
The editor view appears.
Displaying source objects in the data view
 | Class |
 | Attribute |
 | Part |
 | Part (composing class) |
 | Part (composed class) |
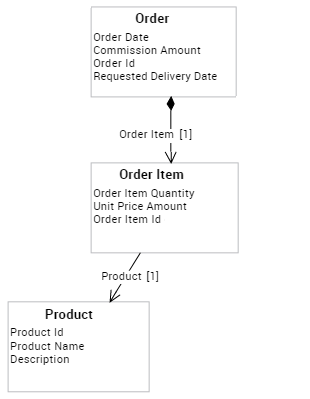
Example
Logical model | Logical data view |
 |  |
Defining the Data View Components.
Embedded component
An embedded component brings all the information that makes up the object into the view (for example, the parts and the attributes associated with a class).
To add an embedded component to the view:
1. Open the data view.
2. On the source object side , select the element to add to the data view.
3. Under the Action column, click  Add a View Inclusion Component.
Add a View Inclusion Component. The object appears to the right of the view editor.
Referenced component
By referencing a component in the view, you can display the object in the view, without embedding all its properties.
You can reference the objects that contain a certain amount of information, such as classes, in the view. For attributes, only the inclusion button is available.
To reference an object in the view:
1. Open the data view.
2. On the source object side , select the element to add to the data view.
3. Under the Action column, click  Add a View Referencing Component.
Add a View Referencing Component. The object appears to the right of the view editor.
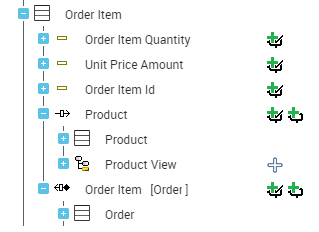
Using a view in another view
When you embed a class in a data view, all the attributes of the class are added by default to the view. You can limit the list of attributes to those already defined in a view.
Below, only the attributes defined in the "Customer" view (Account Id and Address) are added to the "Order" view.
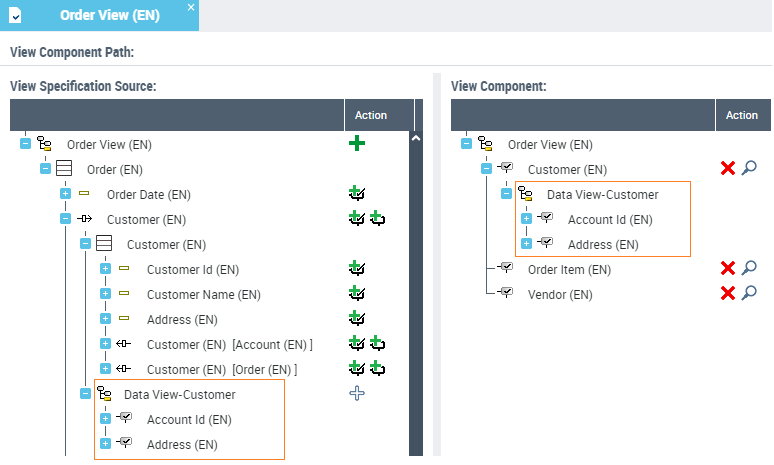
To add a data view (source) to a data view (target) :
1. Open the target data.
2. On the left part, expand the class concerned by the source view to be added.
3. Select the source view and under the Action column, click  Add a View.
Add a View.The view associated with the class appears in the right part of the view editor, under the name of the class in question.