Running HOPEX Data Discovery
The HOPEX Data Discovery tool allows you to browse different data sources and define the metadata to import into your data catalogs.
Data Discovery is available in Online mode in the HOPEX desktop. It allows you to connect to data sources and import metadata directly into HOPEX.
If you cannot connect to the data source from the HOPEX Data Governance desktop, for example for security reasons, you can download the standalone version of Data Discovery to connect to the data sources. In this mode, the metadata description is exported to a Json file that you can then import into HOPEX. In this mode, the metadata description is exported in a Json file. that you can then import into HOPEX.
Access conditions
The Metadata Discovery Tool is available to users with the profile “IA Functional Administrator” and “Data Architect.”
See also: The HOPEX Data Discovery Module.
Online mode
To run the Online Data Discovery:
1. In the navigation menu, click Catalogs > Inventory.
2. In the edit area, click the Data Discovery button.
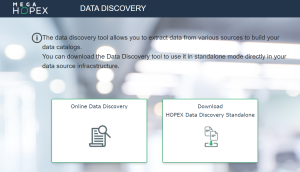
The HOPEX Data Discovery tool opens in a new browser tab.
3. Click Online Data Discovery.
The list of data sources appears.
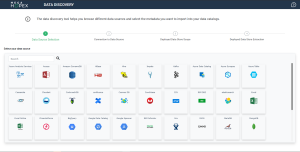
4. Select the data source. Click the Connect button on the source.
The connection settings appear. They depend on the chosen data source. You can view the associated information.
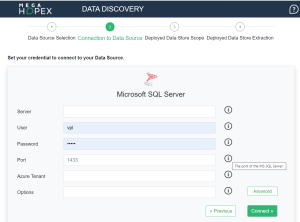
Some parameters are optional, you can display them with the Advanced button.
5. Once connected, in the left tree, select the objects to import into HOPEX.
6. On the right, select the repository data center that will hold the metadata and the catalog that references it.
7. Using the first arrow, add the desired items to the catalog tree.
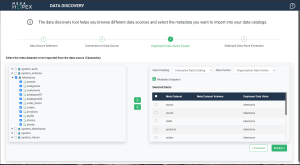
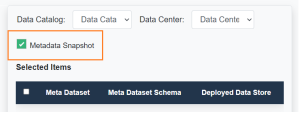
You can create a snapshot of the selected metadata set by checking the MetaData Snapshot box. See Snapshot of a Data Catalog.
8. Click Extract.
To view the objects imported in HOPEX:
1. In the navigation menu, click Catalogs > Inventory.
2. In the edit area, select the catalog.
3. Expand the Deployed Data Stores folder.
Stand-alone mode
Prerequisite
The workstation on which the module is installed in standalone mode must have .Net Core 6 and Microsoft Edge WebView2 installed.
Running the import in standalone mode
To run the import in standalone mode:
1. In the navigation menu, click Catalogs > Inventory.
2. In the edit area, click the Data Discovery button.
The HOPEX Data Discovery tool opens in a new browser tab.
3. Click Download HOPEX Data Discovery Standalone to download the module.
A zip file with the extension *.haspkg is downloaded.
4. Unzip the file.
A folder with the same name is created.
5. Click on has.desktop to deploy and launch the module.
6. Once the module is launched, select the data source.
The list of parameters depends on the chosen data source. You can view the associated information.
7. Once connected, in the left tree, select the objects to import into HOPEX.
8. Using the first arrow, add the desired items to the catalog tree.
9. Click Extract.
10. When the extraction is complete, import the Json file.
Importing the JSON file
To import metadata using the .json file:
1. In the navigation menu, click Catalogs > Inventory.
2. In the edit area, click the Metadata Import button.
3. In the dialog box that appears, select:
• the data catalog to which to import data
• the holding data center
• the .json file
4. Click Next.
The wizard presents the result of the import.
5. Click OK.
See also: Connection Options to Data Sources.
Incremental import
After a first initialization of metadata in HOPEX, it is possible to make other imports from the same source. In this case, only new objects and property updates are taken into account (example: creation of a new meta dataset, new meta field).
Metadata in HOPEX is identified by its name + the name of the deployed datastore (from the source database) + the name of the datacenter. As soon as a component of the name is modified, the correspondence is broken and new objects are created. So, for example, if you change the deployed data store of a table in HOPEX, when you import it again from the same source, this table is recreated in the original data store.