Building a customer journey
A customer journey is associated with a persona. Therefore, a customer journey can be created in three different ways:
• From a persona or a persona group,
• From a customer journey group,
• Directly from the Customer Journey navigation pane.
Creating a customer journey
To create a Customer Journey from the Customer Journey navigation pane:
1. Select Customer Journeys > Customer Journeys.
A list of customer journeys is displayed in the edit area.
2. Click the New button.
The Creation of a Customer Journey window appears.
3. Enter the Name.
4. Click OK to close this dialog box.
The customer journey appears in the customer journey tree.
Connecting a customer journey to a persona
To connect a persona to a customer journey:
1. Display the customer journeys list.
2. Select the Customer Journey line that interests you.
3. Click in the Persona column.
4. Select the persona (or the business partner) that interests you.
Connecting a customer journey to a business line
To connect a business line to a customer journey:
1. Open the Characteristics property page of the customer journey that interests you and expand the Business Line section.
2. Click Connect.
Select the business line that interests you.
Creating a customer journey group
To create a customer journey group:
1. Open the Customer journey navigation window.
2. Select Customer Journey > Customer Journey Groups.
A list of customer journey groups is displayed in the edit area.
3. Click on the tree root to display its pop-up menu and select New > Customer Journey group.
The Creation of a Customer Journey Group window appears.
4. Enter the name of the group.
“Sports holidays” and “cruises”, for example.
5. Click OK to close this dialog box.
The Customer Journey group that you have just created appears in the tree of the Customer Journey Group.
Using the Characteristics properties page of the customer journey, you can then connect the customer journey to the group.
Creating a mapping of the customer journey in tabular entry mode
Mapping of the customer journey can be created and updated using tabular entry mode.
To create a mapping of the customer journey:

The UI of the table input mode opens in the edit area. The tabs available are Phases and Steps.
Defining the customer journey phases in tabular input mode
A customer journey is described by several sequenced phases.

Diagram of a customer journey connected to a persona and a business line with phases
Creating a customer journey phase in tabular input mode
To create a phase in tabular input mode for a customer journey:
1. Click the Phases tab.
2. Click New.
The Add Phase wizard allows you to create a new phase or connect an existing phase.
3. Click on the name of the phase to update it.
If you are in Auto Refresh mode, the diagram is automatically updated, otherwise click Refresh Diagram to display the new phase in the diagram.
Ordering the customer journey phases in tabular input mode
By default, the phases are ordered in the order of creation.
To modify the order of a customer journey using its diagram:
1. Click the Phases tab to access the list of diagram phases.
2. Select the phase whose order you want to modify and click in the Order column.
3. Modify the value of the order of the phase.
Create several customer journey phases simultaneously
To simultaneously create several ordered phase for a customer journey:
1. Click the Multiple Add button.
A creation window appears.
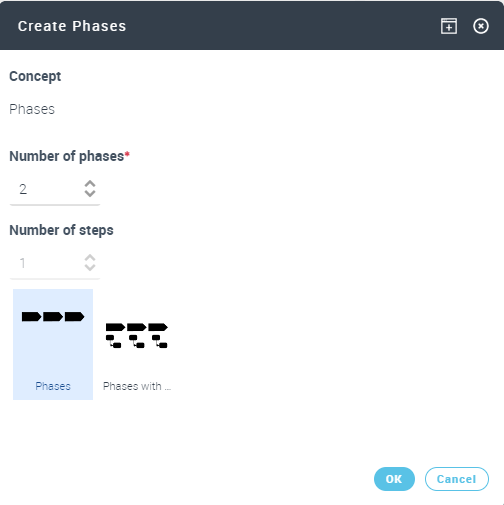
2. Enter the Number of phases you wish to create.
3. If you wish to create phases with steps, specify the Number of Steps that you wish to create for each phase.
4. Click OK.