3. Upgrade data to HOPEX V5.0
Data upgrade is made using Windows Administration Console (Administration.exe).
Check that Administration.exe can run.
For each HOPEX environment, several steps are required:
• Perform technical conversion of the system database for SQL Server.
• Upgrade of both the system database and data repositories using an environment update wizard. It is no longer required to convert explicitly each data repository. Of course, if a data repository is referenced after environment upgrade, the environment update wizard needs to be run again so that it is converted.
Note that environment upgrade consists in running:
• Technical conversions. They update SQL tables and indexes to the expected format. They apply for each data repository and for the system database.
• System database upgrade. It upgrades the metamodel and templates stored in the system database to the format expected for the target version.
• Functional conversions. They update the system objects stored in system database and the data objects stored in the data repositories to the expected format.
3.1. Check that migration module is installed
From HOPEX V5.0 CP3, a specific module HOPEX Environment Migration Package V5 (hopex.core.migrate) needs to be installed to migrate environments from previous version (HOPEX V4.0 and lower). If this module is not installed a warning will be displayed when running the menu Automatic environment update.
3.2. Check that customizations are deployed
Customizations must be deployed BEFORE upgrade of data.
There are two situations
|
Situation
|
Recommendation
|
|
Upgrade of data is run from a HAS instance in 'development' mode when customization module was developped
|
Customizations are already deployed.
Check that they are available.
|
|
Upgrade of data is run from another HAS instance in 'staging' (test) or 'production' mode
|
Deploy customization module build previously in this HAS instance.
Check that they are available.
|
Deploy customization module build previously in a HAS instance
In the HAS instance, for customization module, install the corresponding module (Module List, tab 'Update', button 'Upload from file'). Then run Environment Automatic Update in Administration.exe and restart HAS instance to check consistency in module dependencies.
Section HOPEX Administration > Administrator Guide > Managing objects > Importing a Module in HOPEX.
Check that customizations are available
In both situations, customizations must be present in the HAS instance where environment update in performend.
C:\ProgramData\MEGA\Hopex Application Server\<instance port>\.shadowFiles\has.custom\<module version>.
3.3. Import modules related to solutions packs
If you did not use solution packs, skip this section.
Solutions packs (identified before migration) are replaced with modules available on HOPEX Store (https://store.mega.com/).
Here is a mapping table for mostly used solution packs.
|
Solution Pack
|
Module
|
|
Archimate V3
|
Archimate V3.1 (1)
|
|
HOPEX360
|
HOPEX360
|
|
NAF
|
NAF Framework
|
|
Privacy Management
|
Privacy Management Content
|
|
SGBD SQL Type - DB2 OS 390 Version 10
|
Database Design DB2 OS 390 V10
|
|
SGBD SQL Type - DB2 OS 390 Version 11
|
Database Design DB2 OS 390 V11
|
|
SGBD SQL Type - DB2 UDB Version 10.5
|
Database Design Postgres SQL 9.3
|
|
SGBD SQL Type - DB2 UDB Version 10.5
|
Database Design DB2 UDB V10.5
|
|
SGBD SQL Type - DB2 UDB Version 9
|
Database Design DB2 UDB V9
|
|
SGBD SQL Type - MySQL Version 4.1
|
Database Design MYSQL V4.1
|
|
SGBD SQL Type - MySQL Version 5
|
Database Design MYSQL V5
|
|
SGBD SQL Type - Oracle 11
|
Database Design Oracle 11
|
|
SGBD SQL Type - SQL Ansi ISO 9075.1992
|
Database Design SQL Ansi ISO 9075 1992
|
|
SGBD SQL Type - SQL Server 2008
|
Database Design SQL Server 2008
|
|
SGBD SQL Type - TeraData Version 14
|
Database Design TeraData V14
|
In the HAS instance, for each Solution Pack used previously, install the corresponding module ('Module List, tab 'Add new'). Then run Environment Automatic Update in Administration.exe and restart HAS instance to check consistency in module dependencies.
(1) From HOPEX V5.0, Archimate V3.1 is mandatory.
3.4. Check that Hopex.Core is stopped
Unlike previous versions, Administration.exe cannot run if all processes and services are stopped.
To enable environment upgrade, it is required that:
• HAS Instance manager is started.
• An HAS instance is created (with licence configured) and started.
• Module Hopex.Core si stopped.
Procedure to stop module HOPEX Core Back-end V5.0 (hopex.core):
• Select HAS instance, ex https://mymachine:5000.
• Open HAS Console and login.
• In HAS console, display tab Cluster.
• For module HOPEX Core Back-end V5.0 (hopex.core), select action Stop on the right.
• Wait until module is Stopped.
3.5. Upgrade environment (SQL Server storage)
In the procedure, various warning messages will be displayed. Most of them will be ignored.
If a message is displayed that is not quoted in the procedure, see the FAQs section of this document.
Note that only data repositories already referenced when the environment is upgraded will be migrated.
With HAS deployment, Administration.exe is installed in the folder of the HAS instance:
%programdata%\MEGA\Hopex Application Server\<instance port number>\.shadowFiles\hopex.core\<build number of module HOPEX core>
Example:
C:\ProgramData\MEGA\Hopex Application Server\5000\.shadowFiles\hopex.core\15.0.0+XXX
Procedure in version HOPEX V5.0:
|
Step 1
|
Step 2
|
|
• Start the Windows Administration Console (administration.exe)
• Click menu Help > about HOPEX
• Check that version is HOPEX V5.0 (15.0.X.XXXX)
• Create a reference for the environment to be converted
|
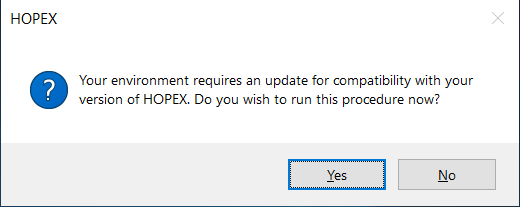
• Select and open the environment to be upgraded with the login System.
• Click Yes to the question displayed (Do you wish to run this procedure now?)
|
|
|
 |
|
Step 3
|
Step 4
|
|
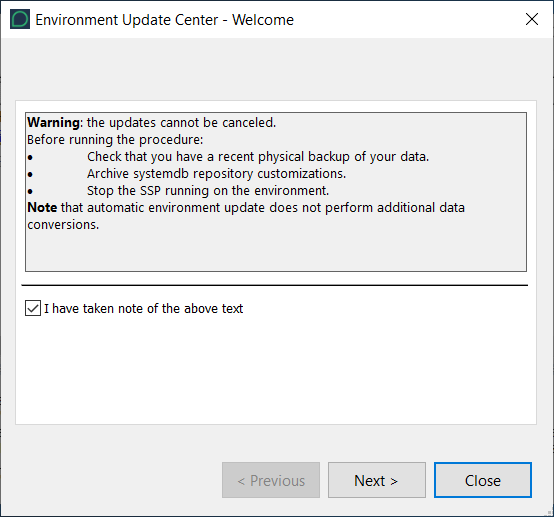
• A wizard Environment updating center - Welcome is displayed
• Read the text, check the option I have taken note of the above text and click Next
|
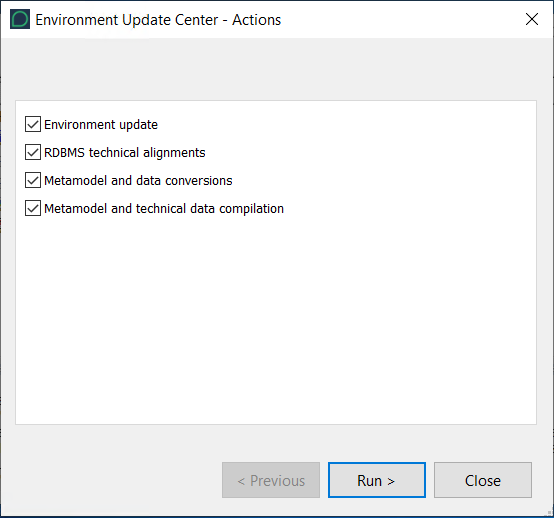
• A list of actions is displayed. Keep them checked
|
 |
 |
|
Step 5
|
Step 6
|
|
• Click Run to start the update. Duration can vary according to various parameters (source and target versions, infrastructure performances, size, and number of repositories). It usually takes a few hours.
|
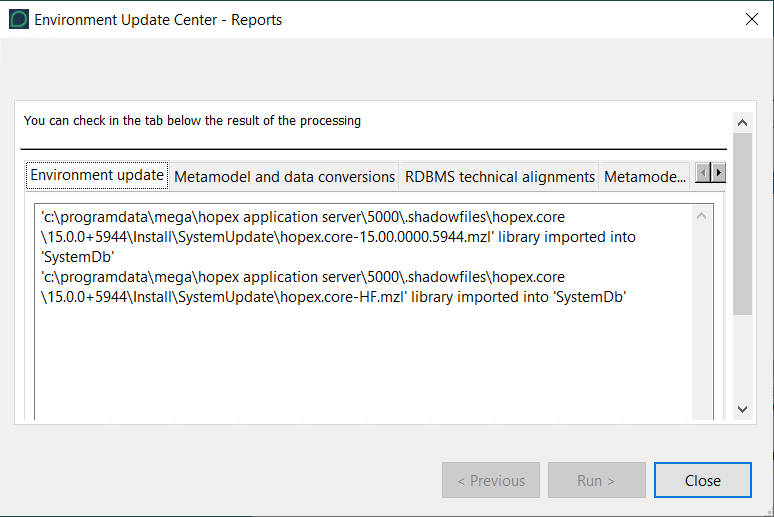
• A list of reports is displayed (one tab for each action)
• Review reports and click Close to exit the wizard.
|
|
|
 |
|
Step 7
|
Step 8
|
|
• A warning can be displayed: The indexing format changed. Re-index your repositories to be able to use the full-text search.
• Click OK to hide it.
|
• A message should be displayed: Your environment has been successfully updated.
• Click OK to hide it.
• Close the environment.
• Exit the Administration Console.
|
Write down the date and time where environment was upgraded.
This can help focus on this time later when reading the conversion log.
3.6. Update stored procedures with SQL Server storage
This step is mandatory for each data repository or system database. The code of existing stored procedures (created in a previous version) needs to be initialized with the HOPEX V5.0.
Pre-requisite:
• SQL Server Service account for HOPEX has permissions to delete and create stored procedures
Procedure:
1. Start Administration.exe.
2. Select and open the environment with the login System.
3. For each data repository:
a. Select the data repository.
b. R click RDBMS Administration > Remove private workspace temporary data.
c. Click Clean Up and wait until the conversion is over.
d. R click RDBMS Administration > Shrink unused repository historical data.
e. Click Consolidate and wait until the conversion is over.
4. Close the environment.
5. Exit Administration.exe.
Duration can vary according to various parameters (source and target versions, infrastructure performances, size, and number of repositories).
Note that it is important that the execution of stored procedures is scheduled (batched) via a maintenance plan. Refer to the administration documentation.