Using Data Discovery in Online mode
To run the Online Data Discovery:
1. In the navigation bar, click Tools.
2. Click Online Data Discovery.
The Hopex Data Discovery tool opens in a new browser tab.
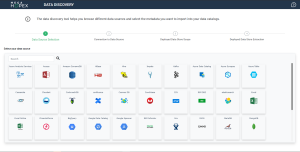
3. Select the data source. Click the Connect button on the source.
The connection settings appear. They depend on the chosen data source. You can view the associated information.
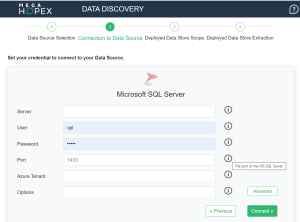
The Advanced button enables access to advanced parameters.
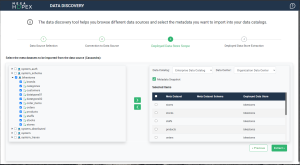
4. Once connected, in the left tree, select the objects to import into Hopex.
5. On the right, select the repository data center that will hold the metadata and the catalog that references it.
6. Using the first arrow, add the desired items to the catalog tree.
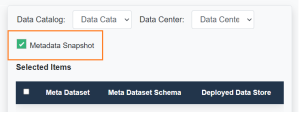
You can create a snapshot of the selected metadata set by checking the MetaData Snapshot box. See Snapshot of a Data Catalog.
7. Click Extract.
To view the objects imported into Hopex:
1. In the navigation menu, click Catalogs.
2. Select the data catalog.
3. Expand the Managed Data Sources folder.
See also: Contents of a Data Catalog.