Simulation Scenario Parameters
Parameters that must be managed in a scenario are:
• simulation and measurement conditions (start date, number of instances sent in the process, warm up and tail phases),
• conditions of arrival of instances sent to the simulated process,
• characteristics of the resources of the simulated process,
• characteristics of the steps of the simulated process,
• routing probabilities of the instances.
Creating a Simulation Scenario
To create a simulation scenario from the Tools navigation menu:
1. Select Simulation scenarios.
The list of simulation scenarios is displayed.
2. Click the New button.
The creation window appears.
3. Specify the Name of the simulation scenario.
4. Select the Process type you want to create.
5. Select the process you want to simulate from the Simulated Process field.
6. (Optional) Check the box Import the exact arrival time of process instances from a CSV file.
The following fields are grayed.
7. Specify the number of Process instances that will activate the process as well as the Simulation start date.
8. Click the cells that interest you among the following:
• Infinite Resources,
• Simulate all processes levels,
• Simulation logfile.
9. Click the Next button.
The simulated process diagram appears in the creation window.

10. Select the event that will mark the Scenario Input Flow.
11. If you don't use a CSV file to describe the input flow, select the Schedule of instances that should activate the process as well as the inter-arrival Distribution Law and associated parameters.
12. Click the Next button.
The task list of the simulated process is displayed.
13. Click the Next button.
The resource list of the simulated process is displayed.
14. Click the Next button.
The sequence flow list of the simulated process is displayed.
15. Click OK.
The new simulation scenario appears in the list of simulation scenarios.
You can refine these settings from the scenario properties pages.
When all parameters are filled in, you can start the simulation: see Running Simulation.
Characteristics of a simulation scenario
To access the characteristics of a simulation scenario from the Tools navigation menu:
1. Select Simulation scenarios.
The list of simulation scenarios is displayed.
2. Select the simulation scenario that interests you and open its Characteristics properties page.
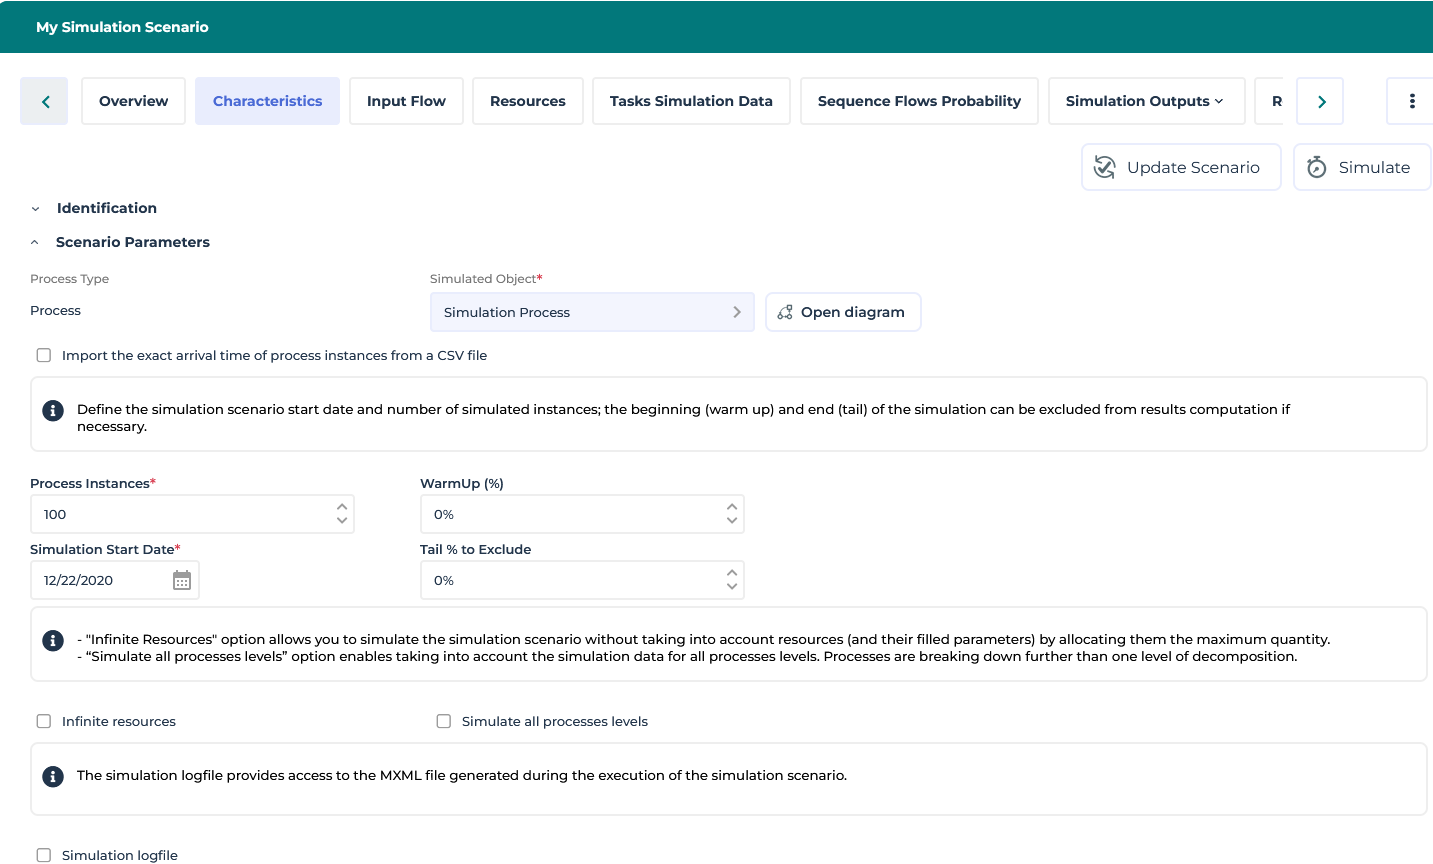
The following characteristics appear:
• The Process Type and the name of the process you want to simulate in the scenario.
• The File location if you have checked the Import the exact arrival time of process instances from a CSV file box.
As a consequence, the following fields are grayed.
• The Process Instances as well as the Simulation start date which define the duration of the simulation. See Simulation duration.
• The Load increase and Tail to exclude periods which define the collection period for the statistical measures. See Measurement period.
• The Infinite Resources box is checked to simulate a situation where resources can't be bottleneck.
• The Simulate all processes levels box enables taking into account the simulation data for all processes levels.
• The Simulation logfile box provides access to the MXML file generated during the execution of the simulation scenario.
Input flow CSV file
It is possible to define an input flow corresponding to the real system behavior. You have to create a CSV file with a “start” column providing the list of dates in an ISO 8601 format type: YYYY-MM-DD'T'HH:MM:SS:SSSZ.
For example :2021-07-28T15:50:03.000
Each date corresponds to a treatment requirement.
Such a file can be automatically generated by a Process Mining tool. For further details, see Using the Process Mining.
Simulation duration
The quality of the statistical results you expect depends on the size of your sample and the stability of the process you are simulating. The more unstable the behavior of your process, the more measurements you will need to compose a representative sample.
If you don't use a CSV file for input flow, the duration of the simulation is therefore defined by two parameters:
• The Number of instances that will be sent in the simulated process to make up the sample,
• the Simulation Start Date which defines, according to the parameters of the input flow, the effective duration of the simulation. See Input flow.
Measurement period
A simulation can be divided into three periods:
• The warm up period during which the instances corresponding to the work requests progressively load the process resources.
• The steady-state period: the average number of instances being processed is stationary.
• The period of load reduction: depending on the processing conditions of the instances and schedules, it is possible that the number of instances being processed in the process will gradually decrease.
Depending on the statistical results you are interested in, you can restrict the collection of results to one of these three periods.
The parameterization of the measurement period makes it possible, for example, to exclude transitional periods that could distort the statistical results. You can therefore exclude:
• The percentage of instances that correspond to the WarmUp phase of the process,
• The percentage of instances that correspond to the phase of progressive decrease of load of the process: Tail to exclude.
Input flow
Since the process response times will be different depending on whether all work requests are sent at once or if they are sent at regular time intervals, it is important to specify the process load conditions.
To access the parameters that define the conditions of arrival of the instances in the simulated process from the Tools navigation menu:
1. Select Simulation scenarios.
The list of simulation scenarios is displayed.
2. Select the simulation scenario that interests you and open its Input Flow properties page.
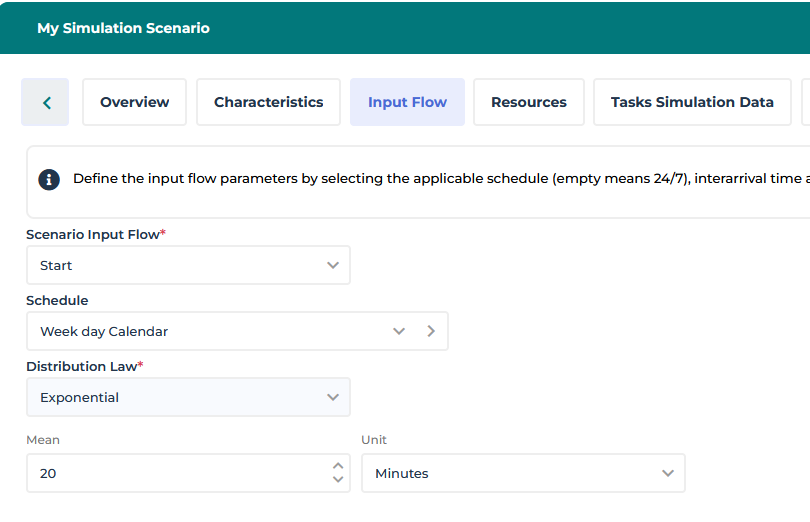
The following characteristics appear:
• The Scenario Input Flow allows you to select the event that will mark the beginning of the treatment associated with the simulated process.
• The Schedule allows you to define the time slots during which the instances will be generated. See Using Simulation Schedules.
• The Distribution Law of the inter-arrivals of the instances in the process as well as the parameters of this distribution. See Distribution Laws and their Parameters.
By default, instances are introduced continuously and at regular intervals. You can enter the distribution law and the corresponding parameters to specify the mean inter-arrival time. For further details, see Distribution Laws and their Parameters.
Tasks of the simulated process
All the tasks of the simulated process are detected during the construction of the simulation scenario.
To access the tasks that will be simulated in the context of the simulation scenario:
1. Open the Tasks Simulation Data properties page of the simulation scenario that interests you.
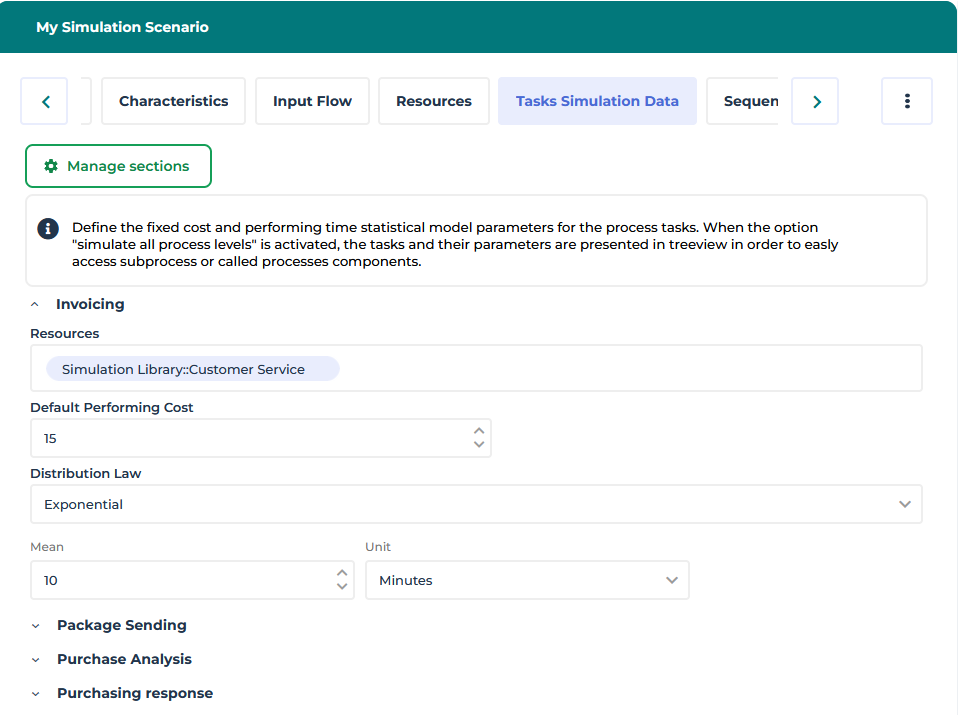
The list of tasks specified in the BPMN diagram of the simulated process is displayed.
2. Expand the section of a task.
The list of parameters for the selected task is displayed.
Presentation of task parameters
For each task you can indicate:
• The Resource in charge of executing the task as defined in the simulated process diagram. See List of Resources.
• The Distribution law and the parameters that characterize the working time of the task. See Distribution Laws and their Parameters.
• The Default Performing Cost.
You can access to these informations in the Simulation Data property page of the task.
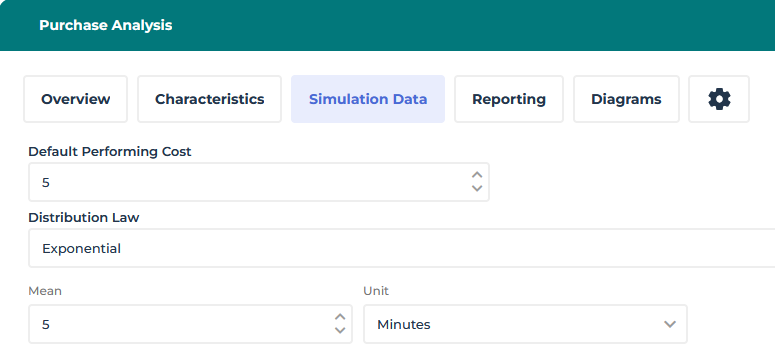
Hierarchical description of the simulated process
If you have ticked the option Simulate all processes levels, in the Scenario Parameters, the simulation takes into account the tasks that describe sub-processes from the simulated process.
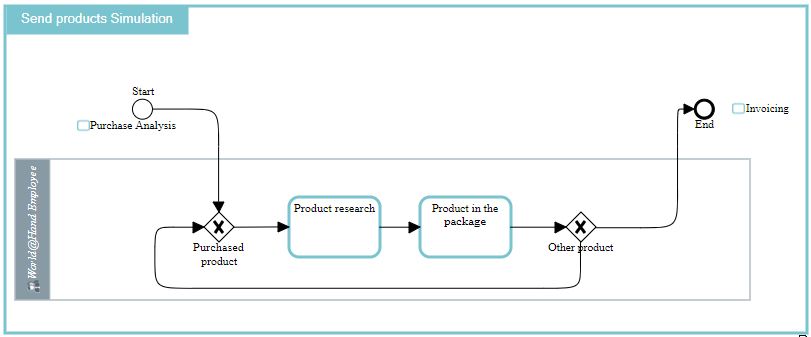
For example, the "Package Sending" operation is linked to the “Send Products Simulation" process modeled by a BPMN diagram.
To specify that the simulation must take into account the tasks of processes linked to operations in the context of the simulation scenario:
1. Open the Characteristics page of the simulation scenario.
2. Tick the Simulate all processes levels box
3. In the property page Tasks Simulation Data and expand the tree of tasks.
4. Fill in the task settings for the process described.
The results of the simulation will present in detail the results of the tasks of the described process and the resources it uses. The results are aggregated at the level of the process described.
List of Resources
For a process to be simulated, all of its tasks must be assigned to resources.
All the resources assigned to the participants of the simulated process are detected during the construction of the simulation scenario.
To access the resources available in a simulation scenario:
1. Open the Resources properties page of the simulation scenario that interests you.
The list of resources specified in the BPMN diagram of the process is displayed.
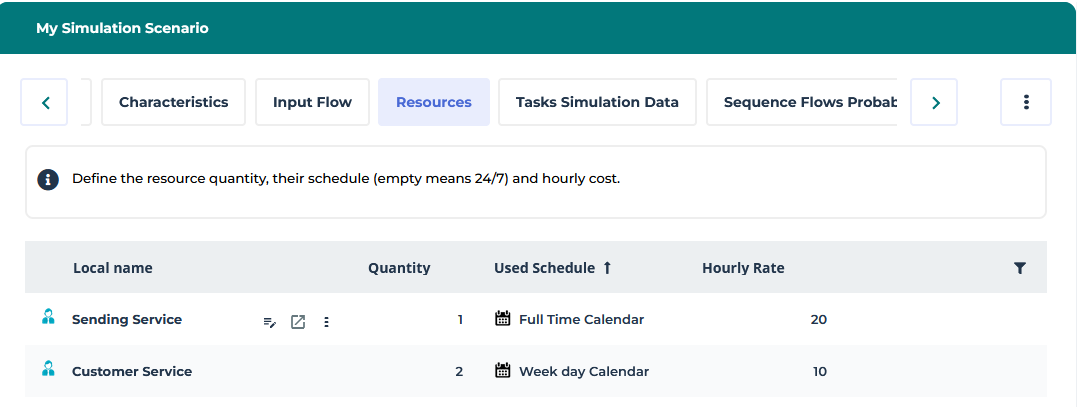
For each resource you can indicate:
• Its available Quantity.
• The Used Schedule that specifies the periods of availability of the resource. See Using Simulation Schedules.
• The Hourly rate of use. By default, this cost is assumed to be zero.
If you have ticked the Infinite Resources option in the scenario parameters, resources no longer have impact on the performances of the simulated process.
Probabilities on the sequences flows
Probabilities on the sequence flows determine the routing of the instances in the simulated process.
To define the routing probabilities on the sequence flows of the simulated process: :
1. Open the Sequence Flows Probability properties page of the simulation scenario that interests you.
The Sequence Flows section lists the process sequences at the output of a gateway.
2. Select the sequence flow you are interested in and, in the Probability column, enter the value between 0 and 100 associated with the routing probability of the sequence flow.
