Describing Concept Views in DIV-1
Creating a concept view
To create a concept view:
1. In the navigation menu click DIV-1 Conceptual Data Model > Concept Views.
The list of concept views appears.
2. Click New.
The concept view creation wizard appears.
3. Specify the Local Name.
In the Term section, the Existing Terms table lists terms with the same name as the view.
4. Under Definition Text space, enter the text of the definition of the view and click Next.
5. In the Owned View Specification section, click New.
The concept view specification creation wizard opens.
6. Select the MetaClass among "Concept", Event Concept" and "State concept".
For example, the same subscription holder can pass from "Child" state to "Adolescent" state, then to "Adult" state and finally "Senior". Passage from one state to another can be connected to an event, a "Birthday".
7. Select the Mapped business concept concerned by the view, then click Add and OK.
The new concept view appears in the list.
Editing a concept view
To edit concept views:
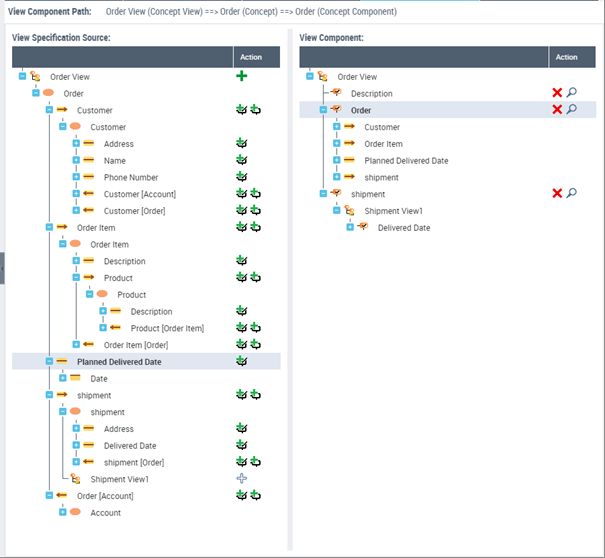
An editor opens on the right. It enables to describe the view in detail.
The view editor is made up of a number of parts:
• the left part that presents all the concept components held by the view, as defined in the business dictionary.
• the right part that presents the concept components that will be kept for the view created,
• the buttons in the Action toolbar that is used to define the components of the view created