Using an export template
Once the export wizard is launched, you need to choose the export mode:
• exporting through a HOPEX standard template enables to use a pre-defined template tailored to your Solution
• exporting through an other template enables to select a custom template in your file explorer
In both cases, the Excel assistant enables you to select the objects you want to export from your repository.
Export using an Excel template
To export data from HOPEX to an Excel file using an Excel template:
1. Access the Excel export wizard.
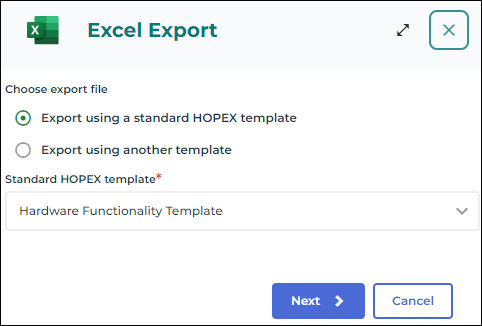
2. In the Choose export file section, select:
• Export using a standard HOPEX template and, in the field Standard HOPEX template, click the drop-down list arrow and select the standard template of your choice in the list.
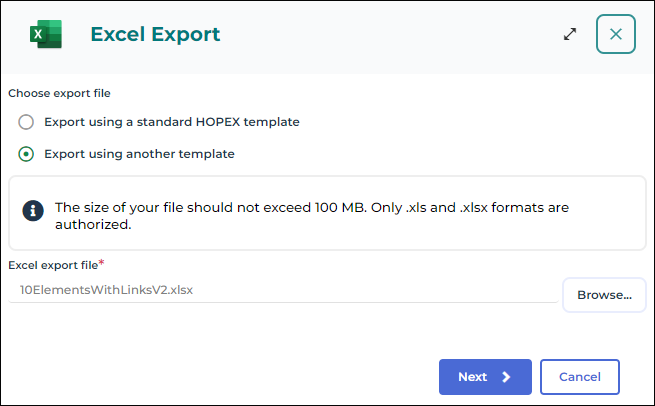
• Export using another template and in the Excel export file field, click Browse to select the template of your choice in your file explorer.
3. Click Next.
Choosing the objects to export
Once you have chose your export file, the wizard guides you to specify which objects were added or not to the export file.
Displayed are:
• on the left, the list of worksheets of the Excel workbook They correspond to an object type.
• on top, a description of the sheet and its content
• in the middle, the list of objects to export contained in the worksheet
If you want to export all the objects of the type corresponding to the worksheet, check Export all objects (the option is selected by default).
To select the objects manually:
1. Select the worksheet corresponding to the type of object that interests you.
2. Uncheck the Export all objects option.
3. Click Add.
4. In the Connecting... search field, enter the object of your choice name(s).
5. Click Connect.
6. Click Next.
Choosing the Export Mode
After customizing your template, you must choose the export mode:
• an instant export starts the export process as soon as you click Export
• an export in background enables to schedule the execution of the export process so that you can keep working in HOPEX regardless of this operation
Instant export
To run the export process instantly:
1. In the Choose export mode field, select Export now (which is the default value).
2. Click Export to launch the export process.
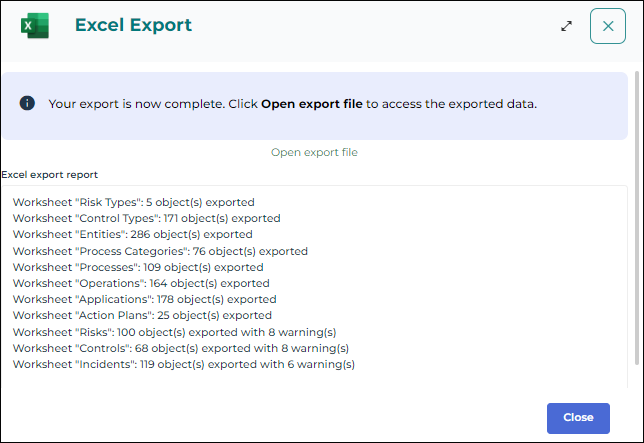
3. Once the export done, a reporting window displays.
4. Click Close to finish the export.
Export in background
The export in background mode enables to schedule and launch the execution of the export process so that you can keep working in HOPEX regardless of this operation.
To export your data in background:
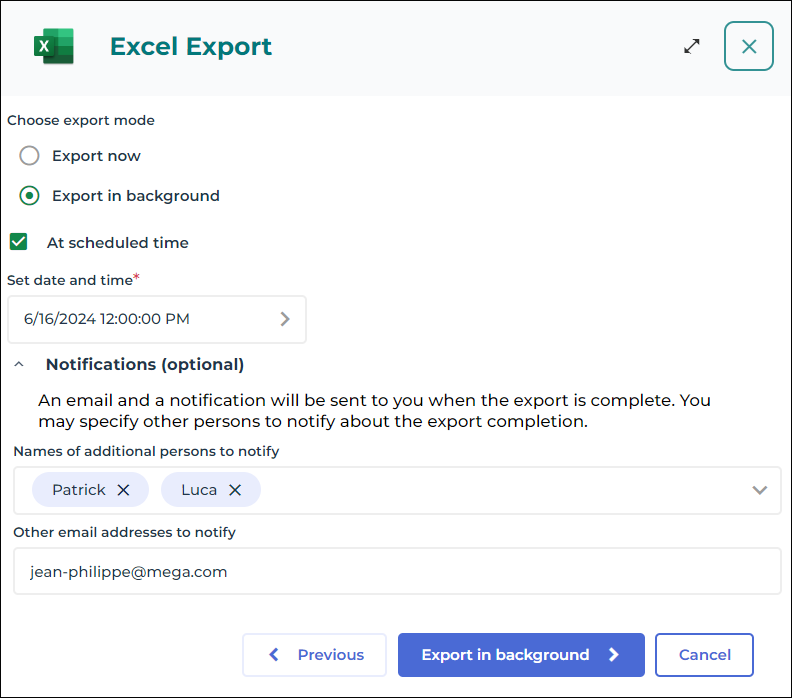
1. In the field Choose export mode, select Export in background.
2. (Optional) Check the At scheduled time option to schedule the export execution. You can then set the date and time you want to start the export process at.
3. (Optional) In the Notifications pane, enter the names and email addresses of the people to notify about the export completion:
• In the Names of additional persons to notify field, in the list, select the HOPEX users you want to notify about the export completion.
• In the Other email addresses to notify field, enter manually the email addresses you want to notify about the export completion.
4. Click Export in background.
5. Once the loading complete, click Confirm export to validate the export execution in background.