Comparing and Aligning Two Repositories
To compare and align two repositories:
1. Connect to HOPEX
2. In the HOPEX menu bar, select Tools > Manage > Compare and Align.
The object comparison wizard opens.
3. Indicate if you want to compare:
• two repositories
• two current repository archived states (RDBMS repository only)
4. Click Next.
5. Select:
• the Source repository
• the Target repository, which is the repository to be updated.

6. (Optional) If required, you can choose to Compare all repository objects.
7. Click Next.
The dialog box for selection of objects to be compared opens.
8. In the Perimeter field, select the perimeter type (by default Standard for Comparison)
9. In the Elements to compare pane, select:
•  to add objects from the source repository, or
to add objects from the source repository, or •  to add objects from the target repository.
to add objects from the target repository.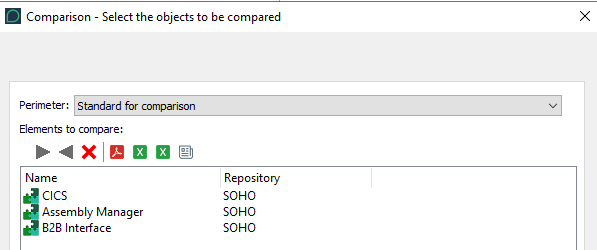
10. Click Next.
The Comparison Progress window opens. It presents the differences between compared objects and their modifications.
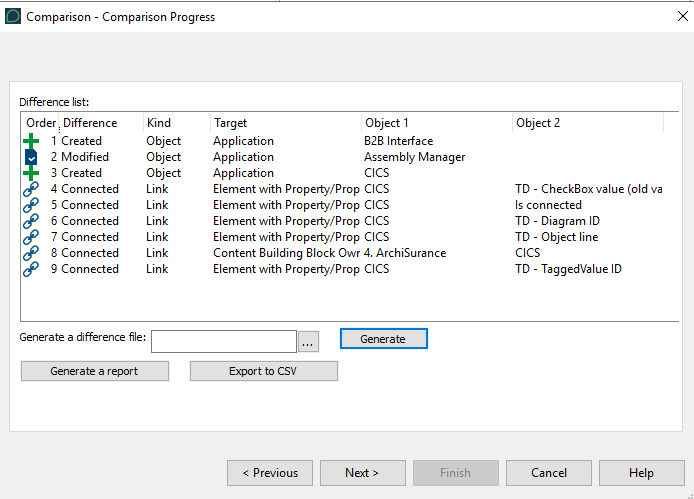
The Difference column presents differences by update category:
• Created: objects not existing in the target repository.
• Deleted: objects existing in the target repository but not in the source repository.
• Modified: objects of which characteristics, including name, have been modified.
• Connected: links, between two objects, that do not exist in the target repository.
• Disconnected: links existing in the target repository but not in the source repository.
• Changed: links for which a characteristic has been modified.
The Kind column presents differences by type.
11. In the Generate a difference file field (.mgr format):
• Click  and enter the name and location of the comparison file, then click Save.
and enter the name and location of the comparison file, then click Save.• Click Generate to generate the .mgr file that contains the list of differences detected.
12. (Optional) Click Generate Report to generate the report (.pdf format) which contains:
• the overview of differences detected
• the detailed list of differences detected
• statistics
13. (Optional) Click Export CSV to generate a CSV file of the differences detected.
14. Click Next.
Differences are imported in the target repository.
The target repository is aligned with the source repository.
If the alignment contains rejects, click Display Rejects to open the alignment rejects file (.mgr,format).
A rejects file is automatically saved in folder <Environment name>\Db\<Repository name>\USER\<User Code> (rejects file-reject-YYYY-MM-DD-hh-mm_555.mgr). This file is empty if alignment does not contain rejects.
15. Click Finish.