Modifying the Shape of an Object
HOPEX objects are represented in a diagram by graphical shapes. Each object is represented by a default shape. Several shapes are available for each object.
You can modify:
• the object shape
• the content displayed on the object shape
• the text characteristics of the object shape
• the position of the object text field
Modifying an object shape
To modify the object shape in a diagram:
1. In the diagram, right-click the object and select Shapes and Details.
Example: Org-Unit.
The Shapes and Details window appears.

2. Select the required shape.
Manual shape is automatically selected.
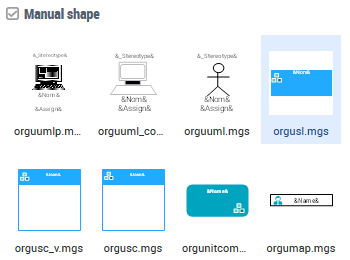
3. Click OK.
The selected object shape is modified.
Modifying the shape set
By default, new diagrams use new shapes. If you want to, you may change new shapes into old shapes.
For compatibility, old diagrams always use old shapes. You can update them with the new shapes.
To modify the shapes version used in a diagram:
1. Open the Characteristics page of the diagram properties.
2. In the Shapes Version field, select a value.
E.g.: “From HOPEX V5” to update an old diagram.
3. Click OK.
Shapes are changed in the diagram.
Modifying the content displayed on an object shape
A shape:
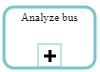
• usually displays the object short name
E.g.: the “Analyze a bus” organization process.
• can display other (text and/or graphic) characteristics.
E.g.: the organizational process “Analyze a bus” displays  representing the “Receive” value of its Task type characteristics.
representing the “Receive” value of its Task type characteristics.
For a same object type, according to the shape selected, characteristics displayed might be different.
To modify the content displayed on a shape:
1. Right-click the shape concerned and select Shapes and Details.
2. In the left pane, expand the tree.
3. Select the content you want to configure.
E.g.: Task Type of an organizational process.
4. In the right pane, in the With section:
• select the characteristics you want to display.
• clear the characteristics you do not want to display.
E.g.: clear Task Type. The Task Type graphical representation is no longer displayed.
Modifying the text characteristics of an object shape
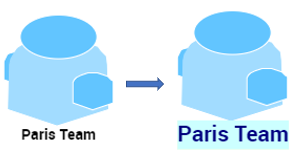
For example, you can choose to display Short Name of an Organizational Process in a diagram.
By default the shape usually displays the object short name.
To access the text characteristics of a shape:
1. Right-click the shape concerned and select Shapes and Details.
2. In the left pane, expand the tree.
3. Select a text characteristics.
E.g.: Short name
4. In the right pane modify the font.
E.g.: Text color, Background color, Size.
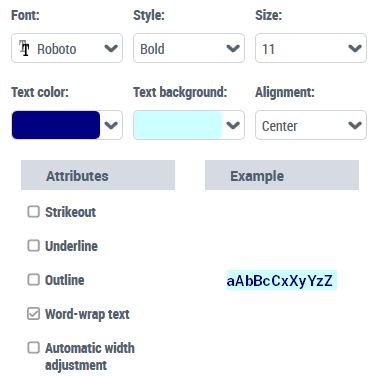
5. Click OK.
the text characteristics of the selected object shape are modified.
Updating the text of shapes
If the shape (.mgs file) of an object type has been modified, when opening the diagram that uses this shape:
• Shapes
All of the shapes of this object type are automatically updated.
• Text of the shapes
Texts of the shapes are not updated.
You can update the texts of the shapes with the new shape (.mgs file). In this case:
• the characteristics (e.g.: font, color) you modified in the diagram are kept.
• the characteristics you did not modified in the diagram are updated.
Example: you have customized the text of a shape (text color modified and background color added).
When the shape is updated (.mgs file): the shape is automatically updated in your diagram and your text customization is kept (text color and background color)
The Reinitialize shapes action updates only the characteristics you have not modified (underlined text).
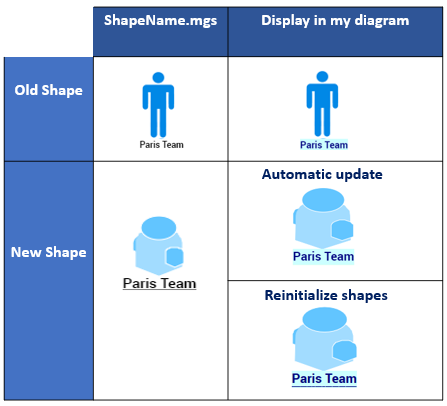
To update the texts of the shapes in a diagram:
All of the texts of all of the shapes are updated (according to the defined rules).
Modifying the position of the text field of an object
You can modify the position of text fields of objects.
E.g.: bottom right instead of bottom centered.
To modify the position of the text field of an object:
1. Right-click the object text field and in the Shape section, select Position then the desired position.
E.g.: Bottom Right