Running Synchronization (Logical > Physical)
Logical to Physical synchronization consists of building the physical model from the logical model, in other words of creating tables and columns corresponding to data diagram entities and attributes:
The synchronization tool is available in the Tools > Data Synchronization navigation pane. You can also open the synchronization tool directly from the database concerned.
To run a Logical to Physical synchronization on a database:
1. Click the icon of the database and select Synchronize.
The synchronization wizard opens.
2. Select the synchronization type "Logical to physical”.
Step 1: Selecting the source objects to be synchronized
To define synchronization scope:
1. In the logical view tree, expand the list of objects contained in the database.
2. By default, all objects are selected and therefore included in synchronization. To exclude an object from thesynchronization, clear it from the Scope column. When an object is excluded, its mapping is also excluded.
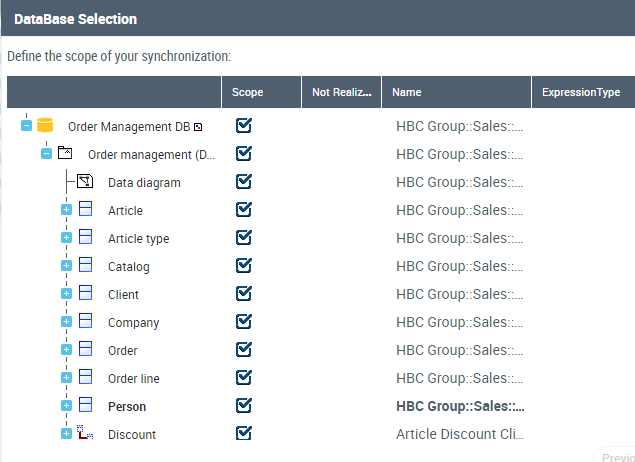
3. By default, all the objects are "realized", in other words, they give way to the creation of an object during synchronization. To specify that an object is "not realized", select it in the Not realized column. For more detailed information, see Realized mode.
4. When the list of objects has been defined, click the Next in the wizard.
Step 2: Synchronization options
From the synchronization options, you can:
• in a case where objects of the logical view have already been synchronized, synchronization will start from zero and will delete existing target objects.
• Recalculate target object names: names of physical objects are recalculated as a function of those of the source objects. This means that any manual modification of physical object names is canceled.
• Take account of optimizations: all optimizations - including those not selected in the validation step (see step 4) are proposed.
• Take account of deletions: entities, associations and diagrams that have been deleted are included in the scope. Consequently, deletion of corresponding target objects and links is proposed.
Other options concern target object properties update. By default, synchronization updates all properties of each object concerned.
Scheduling
You can run synchronization:
• Immediately
• As soon as possible (after publication of updates)
• At a predefined date and time
Step 3: Protecting objects
Synchronization can impact all objects in an existing database.
See Protecting Objects.
Step 4: Validating results
The wizard displays the results that will produce synchronization validation.
Objects that will be automatically modified are indicated by a tick.
Icons preceding object names indicate actions that will be executed on the objects. Actions can be creation  , deletion
  or update
  .
.
, deletion or update .An arrow  preceding an object indicates that synchronization has an impact on sub-objects of the object in question.
preceding an object indicates that synchronization has an impact on sub-objects of the object in question.Validating optimizations
Optimizations are customizations on objects thus removed from automatic synchronization processing.
Optimization examples:
A tick indicates objects that will be modified. If you do not wish to validate modifications relating to certain objects, you must clear the corresponding boxes. This optimization is kept at subsequent synchronizations.
In addition, HOPEX deduces optimizations following actions you may have carried out manually. If you have added a table in the physical view without having created the corresponding object in the logical view, synchronization does not select deletion of this table. 
So that the object will be deleted, you must select the corresponding box.
A report shows actions carried out.
You can close the wizard and view the results in the editor.