Adding Objects to a Master Plan
The Gantt chart of a master plan relates to certain object types. You can check the type of the objects displayed in the master plan in its properties dialog box, Setup tab, Plannable MetaClasses subtab. It is possible to add new object types.
Adding an object to a master plan means integrating planning of the different object life cycle steps in the Gantt chart of the master plan. You can therefore plan all the steps in the life of the object.
Planning object life
Take the example of a master plan relating to applications.
To plan an application in the Gantt chart:
1. Click the Add Object button above the chart.
The query dialog box appears.
2. Select the object type, here "Application", and click Find.
3. Select the application to be planned and click OK.
The selected object appears in the add object dialog box.
4. Click Next.

If it is proposed, select the
Add existing object life check box.
The next dialog box allows you to specify the object life to be taken into account in the master plan.
5. In the Life Cycle to Apply, select an object life.
6. Specify the Begin Date and the End Date.
7. Click Finish.
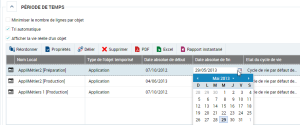
Application life planning appears in the master plan.
You can define absolute start and/or end dates on the time period.
The date can be given at time of creation of the period.
The period is no longer constrained related to a milestone, but to the specified date. The period does not adjust automatically to milestones that you move in the calendar; it remains fixed in the calendar at the date indicated.